
Saturday, October 29, 2011
0 Fab, Fit, & Fiscally Sound Foods: Or, How to Cook Delicious, Healthy Meals on a Budget :)


 In these challenging economic times, several people have mentioned to me that they are looking for ways to cook healthy meals for their families without breaking the bank. And from what I can tell, this seems to be a common refrain at large. People are now looking for ways to conserve funds and make the most of what they already have; and of course, this clearly has a direct impact upon one's cooking and grocery shopping practices as well.
 However, when seen in the proper light, we can look at this a blessing in disguise. As they say, necessity is the mother of invention. :) And nothing hones one's creativity in the kitchen like imposed limitations. Think of it as a fun opportunity to challenge yourself to think in new ways and create something fresh and novel that you probably wouldn't have thought of otherwise had it not been for current circumstances. And you're not alone either; there are pages of culinary history devoted to the long and time honored tradition of scrappy but highly resourceful and innovative chefs making the most of minimal ingredients. When the going gets tough, the tough take inventory of their pantries (and refrigerators), revise their grocery shopping lists accordingly, and then get creative in the kitchen. ;)

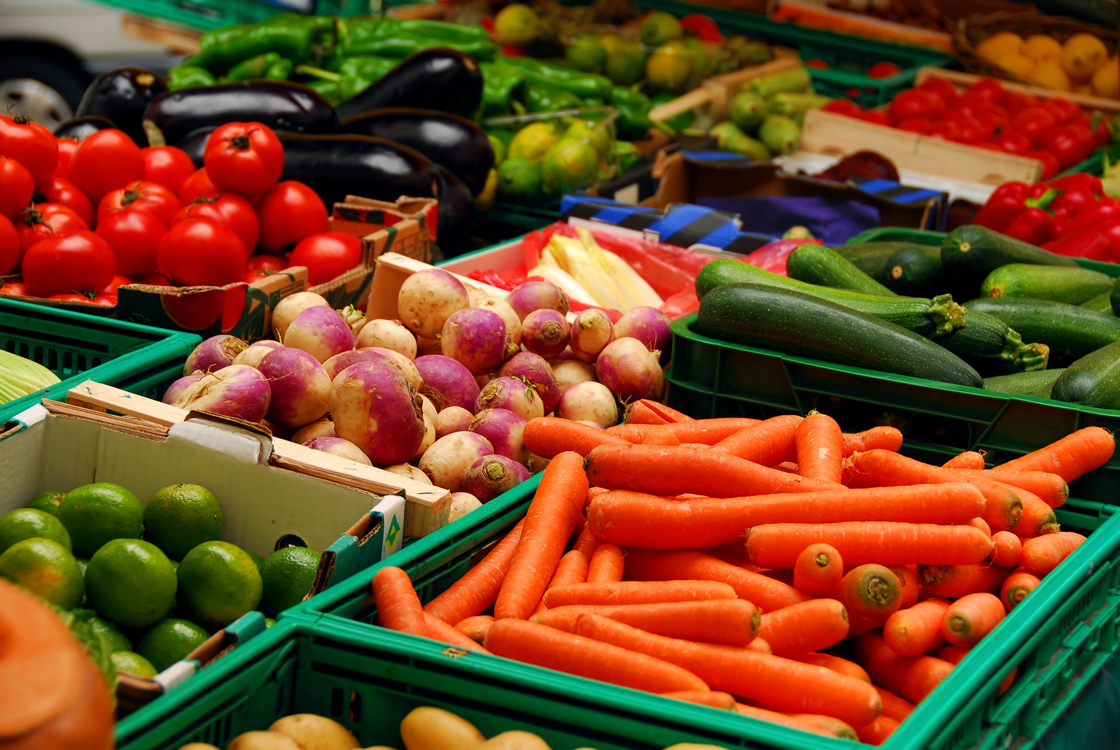
This is why, over the next few weeks or so, I'll be addressing these issues head-on in a new recipe series called "Resourceful Recipes," which will feature economical but healthy ingredients that can be crafted into something delicious with minimal time and effort. All of these recipes will feature fresh and seasonal foods combined with a common staple foods typically found in the ordinary cupboard. Fresh and in-season foods, as well as dry basic staples like rice and legumes, not only taste great and are good for you, but they can also be a good value for your money as well. And if you can snag seasonal produce on special at the supermarket, all the better. Simple and straightforward ingredients like brown rice, bananas, almonds, eggs, sweet potatoes, and broccoli are healthy, delicious, economical, and versatile. So, that's four reasons to feel good about what you'll be cooking and eating. :)
Sunday, October 23, 2011
2 What's In Our Food? Yes, We Really DO Want to Know!


As the below cartoon aptly illustrates, there are a whole host of complex considerations consumers currently face when trying to figure out what's healthy for us and what's not.

And even if we do read the labels, do we really understand them or know how to interpret their health value? Do we really know what's safe for us to eat? How can we truly tell whether food is genetically engineered if there are no labels to indicate this? And even if we do wash off our produce to try to get rid of pesticides, how will we know whether or not these pesticides have been sprayed onto or genetically engineered into our food, the latter of which would clearly render these precautionary efforts useless? (And yes, the latter scenario does happen. A pretty scary thought, eh? And it's enough to make many of us want to take up vegetable gardening. :) And this is not just because of the current economy either, although that's certainly been a factor for a lot of people as well.) And at that, this is really just cracking the tip of the iceberg. This is why the automatic, implicit trust that many grocery shoppers place in the products they buy in the supermarket, particularly in the produce aisle, really does bear some re-examination.


Of course, exercise is crucial as well for health and wellness, but even so, exercisers need quality fuel to 'put into the tank' or else they're not going to reap the full rewards of their athletic efforts. Overall, long-term preventative health requires both pieces of the puzzle.
In support of these initiatives, I highly recommend listening to the following recordings: The first is a talk by Michael Pollan (author of In Defense of Food, and other books, etc.) and the second is a podcast interview with author & food educator, Anne Lappé.

Regardless, the FDA still needs to get its act together in terms of both updating and improving their requirements for food labeling. Additionally, legislation needs to be passed by Congress to ensure that food growers and manufacturers are being honest about what they put in their food. This includes the introduction of laws and enforcement measures to ensure that companies disclose complete and accurate information about our food sources (i.e., where our food is grown and whether or not food is genetic or truly organic in origin) as well as listing how much pesticide is sprayed or genetically engineered into our food. We need to know the true nature of our food. And that means no tricky wording or false advertising. We want the whole truth and nothing but. Big Food, hear us roar! You better be scared, because we are not going to stand for this BS any longer!

 Additionally, there are some companies that are trying to strong-arm or intimidate those educators who seek to expose the truth by hanging legal threats over their heads. (For evidence of this, just listen to the above interview of Anne Lappé.) And of course, we all know why this is happening. It's because deep down inside, these companies know that what they are doing is wrong and they are running scared. Why don't they just change what they are offering us, and make a profit that way (as there's certainly an ever-increasing demand for healthier food!), instead of resisting and undermining the process, and remaining staunchly ingrained in their current practices? (If they were employing honest practices then they'd have nothing to hide!) After all, isn't continual product improvement (i.e., making their products healthier and safer for their consumers) considered to a key selling point? A less fluid and forward-focused approach ultimately doesn't serve their customers, and if you don't properly listen to and meet the demands/needs of your customers, you won't be in business for long. ;) Plus, when people find out what's happening and discover what's really being put in their food, chances are good that they are going to get pissed off at these companies, ditch their products, and look for better, which is what's already been happening. :) And yes, we deserve better. We are worth it, and Big Food needs to get that through their thick skulls, instead of offering us the same old crap that they think we want to eat. The problem with many of them is that they are invested in keeping people fat and comatose, instead of being true advocates for the health and safety of their customers. (Remember the movie WALL-E's cautionary portrayal of the human race 700 years from now? Do we really want to end up like that?!) How can a company consciously do this to the people who buy their products? Don't they care about their consumers? And don't they know that the ones who wise up to the situation are going to vote with their wallets and take their business elsewhere?!
Sure, the goal of businesses is to make money [I also am a business owner as well, so I certainly understand the importance of this imperative :) ], but when greedy, unethical practices override business ethics, there's something seriously harmful and disturbing about that. When business ethics are compromised, not only is it just bad business, but it's just plain wrong on moral and ethical grounds. When companies lie or hide information from consumers, they'll will eventually erode customers' trust and confidence in both their company and their products, which will, in turn, drive away business. Instead of trying to pull the wool over customers' eyes, companies should really shift their line of products to suit customers' ever-increasing demand for healthier, higher quality food. And some are, in fact, genuinely trying to do this. It is getting better, thanks in no small part to the galvanizing efforts of prominent, outspoken figures in the food world like Alice Waters and Jamie Oliver.
So give us what we want in terms of labeling, nutrition, and food safety, even if some of us don't even know that we want it yet. This is why companies should not only fill the demand for healthy food, but also seelk to actively create it. And it's just good business to do that. The campaign for healthier food is gaining momentum, and companies need to realize that if they don't get on the bandwagon, they are going to be left behind in the dust. So, Big Food, how about getting behind the cause instead of actively working against it?
I think the tide is turning and attitudes are changing with increasing public awareness, but we still need to help it along. As one of my friends recently said, "Organic food was once just called food." And let's all help to make it so again.
 |
| To find out what else you can do to help, click on the above picture to expand its view. |
Saturday, October 22, 2011
0 Recipe #295: Pumpkin Risotto

This recipe uses both chunks of fresh pumpkin and puréed pumpkin, as well as both arborio rice and quinoa, which, in each respective pairing, creates a much more diverse texture and flavor than just using one or the other. The walnuts, fresh herbs, and mushrooms add additional interest and complement the texture and flavor of the other ingredients.

Pumpkin Risotto
Ingredients:
6-8 c. water (for boiling the pumpkin)
2 1/2 c. fresh pumpkin, peeled, pulp scooped out, deseeded, and diced into 1" cubes*
1 c. walnuts, crushed
1 1/2 Tbsp. extra virgin olive oil
1/2 c. yellow onion, peeled and diced (about 1/4 large onion)
1/4 c. shallots, peeled and finely minced
1 Tbsp. garlic, peeled and finely minced (about 2 large cloves)
1 large fresh bay leaf
1 c. mushrooms, well-rinsed and thinly sliced (about 3 large or 4-5 medium mushrooms)
1 tsp. salt, or to taste
1/4 tsp. ground black pepper
1/2 c. superfino arborio rice, uncooked
1/2 c. quinoa, uncooked
1/4 c. dry white wine
3-4 c. water (or low-sodium, organic vegetable broth)**
1 Tbsp. fresh rosemary leaves, finely minced and densely packed
1 1/2 Tbsp. fresh sage leaves, julienned and densely packed
2 Tbsp. fresh Italian flat-leaf parsley, finely minced and densely packed
1/2 c. fresh basil leaves, (plus more for garnish), julienned and densely packed
1/2 (heaping) c. Parmigiano-Reggiano cheese, shredded***
1 Tbsp. freshly-squeezed lemon juice
1/3 c. Silk coconut milk (or if unavailable, use plain, lite soy milk)
Directions: Bring water to a rolling boil (on high heat) in a large sauce pot, about 8-10 minutes. Then add diced pumpkin and boil until tender (but not mushy), about 15-20 minutes. Drain into a colander, allow to cool for about 10 minutes, and then take 1 c. of the diced pumpkin and transfer to a food processor. Pulse until smooth, then set aside.
While pumpkin is cooking, spread walnuts onto an aluminium foil-covered baking tray and toast in a 350°F preheated oven for 2-3 minutes, or until light golden brown. Let cool and set aside.
In a large (12-13") sauté pan, sauté onion, shallots, garlic, and bay leaf in extra virgin oil on low heat for 2-3 minutes, or until almost soft and translucent but not browned. Stir frequently. Next add mushrooms, season with salt and pepper, and gently stir to combine. Cook for another minute, then turn up heat to medium and mix in rice and quinoa. Stir continually for about 1-2 minutes, allowing both the quinoa and rice to crisp slightly but not brown. When adequately crispy, a translucent outline will appear around the outside border of both the rice and the quinoa. (This step is particularly important, as it cooks off the rice's starchy coating and prevents the grains from getting sticky and mushy when the liquid ingredients are added.) Watch pan carefully so the rice and quinoa don't brown or burn. Then quickly deglaze with white wine, stirring constantly, until liquid is fully absorbed, about 5 minutes.
Wait until pan only has a thin layer of liquid on the bottom, then use a liquid measuring cup to incorporate water or broth, adding only one cup at a time, stirring constantly. Allow each cup to be absorbed before adding the next. Each addition should be only just enough to cover the risotto. Cook until rice and quinoa are al dente, about 15-20 minutes. With about 5 minutes of cooking time left to go, stir in fresh rosemary and sage. During the final minute of cooking, taste for consistency; if the rice &/or quinoa is still a bit too hard and crunchy, then add more water as needed (i.e., a cup at a time, waiting until each cup has been absorbed before adding the next), and continue to cook until the grains soften a bit more to the desired consistency. Be careful not to overcook; the risotto should be creamy but still firm. Test to see if it's ready by pinching a rice grain; if only 2 or less beads remain, then the rice is done. When ready, remove from heat. Discard bay leaf with a slotted spoon, then add fresh parsley, basil, toasted walnuts, and Parmigiano-Reggiano cheese, and stir until just combined. Let cool for a few minutes, then add lemon juice and lite coconut milk (or plain, lite soy milk, if preferred), mixing thoroughly to evenly distribute ingredients. Gently fluff once, then let stand for 10-15 minutes. Divide into equal portions. Garnish each portion with additional basil, if desired. Serve immediately.
Yield: 6-8 servings as a main course, or 10-12 servings as a side dish.

*Instead of tossing out the pumpkin seeds with the pulp, use them for other recipes. Or, simply spread them out onto an aluminium foil-covered baking tray, season them with salt, and then toast them in an oven preheated to 350°F for about 10-15 minutes, or until golden brown. Watch them carefully so they don't burn, opening the oven and rattling the tray from time to time to loosen the seeds and ensure even cooking.
**You very well might not even need the last cup of water/vegetable broth, as there's already a lot of liquid from the puréed pumpkin, so adjust accordingly.
***To make these recipe vegan, just omit the Parmigiano-Reggiano cheese, or replace with a non-dairy cheese substitute like shredded soy cheese, etc.
 |
| A snapshot of the pumpkin risotto before the walnuts were added. |
Friday, October 21, 2011
0 Recipe #294: Pumpkin Pie

This version of pumpkin pie is made with fresh pumpkin. I used a "pie" pumpkin, also known as a "sugar" or "sugar pie" pumpkin. This is one of the types that you can actually cook with and eat. :) The kind that are used for Jack-O'-Lanterns don't really taste that good for cooking purposes, although you can, of course, toast the seeds and enjoy a delicious snack. :)
The lite coconut milk serves as a clever replacement for much more traditional and far less healthy (!), additions like cream or cream cheese, etc. Not only are the flavors of pumpkin and coconut a great natural complement to each other, but the coconut milk will make the pie just as creamy as those other, and much more fattening, alternatives. :) With a little creativity, it's possible to craft a recipe that cuts the fat and eliminates processed foods, but still delivers on taste. Just think how you'll shock and amaze people when they find out that the pie you just made is actually lowfat and good for them. ;) Of course, you might want to keep them in the dark until after they try it. ;) You can keep a secret for at least an hour or two, right? :) After all, a little awe and some amused expressions of disbelief from your dinner guests can't help but raise your culinary profile. LOL.

Pumpkin Pie
Filling Ingredients:
4 c. fresh pumpkin, peeled, pulp scooped out, deseeded, and diced into 1" cubes (makes about 2 c. pureed pumpkin)
2 tsp. pure vanilla extract
1 egg + 1 egg yolk, at room temperature
1 c. lite coconut milk from a can, including both liquids and solids (about 1/2 of a 13.5 oz. can)
3/8 c. honey
1/2 tsp. salt
2 Tbsp. pumpkin spice mix (see recipe)
1 tsp. ground cardamom
Crust Ingredients:
2 c. oats
1/2 c. walnuts, crushed
1/2 c. pecans, crushed
1/8 tsp. allspice
1 Tbsp. cinnamon
1/8 tsp. clove powder
1/4 tsp. salt (omit if Paleo)
1 Tbsp. honey
1 tsp. pure vanilla extract
1 egg, beaten (at room temperature)
2 tsp. freshly squeezed lemon juice
1-2 Tbsp. ice water
1/4 c. oat flour, for flouring work surface and rolling pin (grind oats into flour in food processor)(if Paleo, substitute almond flour)
Optional/Alternate Toppings:
pecan halves (for decoration, to cover the pie's surface)
(non-dairy) whipped topping
1 scoop lowfat vanilla ice cream per serving of pie
Directions: To prepare filling: Bring water to a rolling boil (on high heat) in a large sauce pot, about 8-10 minutes. Then add diced pumpkin and boil until tender (but not mushy), about 15-20 minutes. Drain into a colander, allow to cool for about 10 minutes, then transfer to a food processor. Pulse until smooth, then transfer contents to an electric mixing bowl, along with the remainder of the filling ingredients. Mix on low speed until frothy and well-combined. Then cover bowl and place into the refrigerator for a minimum of 15 minutes while you prepare the pie shell and other ingredients.
To make the pie shell: Add oats to a food processor and pulse until finely ground into a powdery consistency (or as close to it as possible!). Add 1/2 c. walnuts and 1/2 c. pecans and pulse again until finely ground. Add remaining crust ingredients, minus the 1/4 c. oat flour (for flouring the work surface and rolling pin), and continue to pulse until thoroughly combined. Dough should be thick and stick together; do not over-mix or crust will be too hard when baked. Remove dough, scraping out remaining bits with a spatula. Form a dough ball and then place it upon a clean, even surface, uniformly floured with about 1/8 c. of the reserved oat flour. (You might want to first cover your countertop with wax paper to make clean-up easier and faster.) Flour a rolling pin with the remaining 1/8 c. oat flour, and roll out the dough ball until it's about 1/4" thick, always starting from the center outward, to form a large disc shape, about 12" in diameter.
Bake the pie shell: Carefully transfer dough to a 9" pie plate, using your thumbs to press the dough into the bottom and sides of the pie plate. If necessary, work the dough with your fingers to help it spread out so that it reaches the upper lip of the pie plate. You might need to use a knife to cut away the excess dough. Place pie shell into into an oven preheated to 350°F and bake crust for about 10-12 minutes, or until light golden brown. (Do not bake the crust for much longer, or it will become hard and burnt when the pie is baked. It still needs to be baked first, as the crust needs to solidify a bit in order to keep it from becoming porous and thus, too soggy after the filling is added.) When the crust has finished baking, remove them oven and let cool completely. Then cover pie shell in wax paper, weigh down with a pie beads (or dried beans), and refrigerate for 2 hours minimum, preferably overnight if possible.
Assemble and bake the pie: Remove filling and pie shell from refrigerator, place onto countertop or other clean, level work surface, and slowly and carefully pour filling into the bottom of the pie shell, using a spatula to help guide the liquid mixture into the pie shell a bit at a time. (If you dump it in all all once, the filling will most likely splatter all over the place. ;) ) Place pie into a preheated 350°F oven and bake for 50-60 minutes, or until a knife or fork can easily pierce the filling and come out clean. Pie crust should be a deep golden brown, but not burnt. :) Let cool completely. If desired, decorate surface of the pie with pecan halves. Either serve immediately, or refrigerate or freeze for future consumption. Immediately before serving, top each slice of pie with whipped topping &/or lowfat vanilla ice cream, then serve and enjoy!
Yield: Makes 1 pumpkin pie, about 9" in diameter, or about 8-10 servings.
Chef's Notes: Please note: The pie shell can be made a day or two ahead of time and then refrigerated until you're ready to bake the pie. The dough for the pie shell doesn't need to be refrigerated before it's rolled out, as it's very solid and thick, and binds together exceedingly well.
Please be aware that this recipe's pie shell is crumbly and its texture more closely resembles a graham cracker crust than a traditional pie crust.
Thursday, October 20, 2011
0 Recipe #293: Bulghur Salad with Walnuts, Fresh Vegetables, & Herbs

Need a simple, quick, and nutritious meal or side salad for lunch or dinner? Then try this recipe. :) Every single ingredient in this salad is raw and fresh; so in other words, there's zero cooking and the kitchen prep's a cinch. It's just a matter of soaking the bulghur, emulsifying the salad dressing ingredients (shake, shake and you're done!), and chopping up the vegetables and herbs. Et le voilà, nothing to it.
This dish goes particularly well with chicken, beef, and fish dishes, although it's perfectly capable of standing on its own as an entrée in and of itself. It's the kind of thing I'd probably make for lunch, or something that might taste particularly good on a warm, summer's day. Of course, you can have it for dinner too, or eat it any time of year. :)
Heck, you could even eat if for breakfast if you really wanted to do so. LOL. I don't know about you, but that's not the strangest thing I've ever eaten for breakfast. Probably one of the more atypical breakfasts I've had over the past few months consisted of a can of sardines on top of some wheat crackers, accompanied by a tomato and cucumber salad. Yeah, it's the breakfast of champions, I know. ;) When I'm I'm a roll with the recipe writing, sometimes creating 2-3 recipes a day, it's just a matter of practicality: Right now, I'm super-busy with various writing projects and other business-related initiatives, and this is in addition to regular workouts, the usual household chores and errands, and running three businesses, not to mention my activities as a one-woman recipe factory. LOL. However, that's not the only reason: It can actually be a good idea to make lunch for breakfast, especially when you've only got so many hours of natural daylight to snap pictures of a whole series of dishes. ;) This is why, when I get a chance, my next blog-related project will consist of constructing a light box, so when inspiration hits, it won't matter what time I start cooking and snapping photos. :-D
Bulgar Salad with Walnuts, Fresh Vegetables, & Herbs
Salad Dressing Ingredients:
1/8 c. (2 Tbsp.) olive oil
1/4 c. olive brine (reserved from container of gourmet, brined Kalamata olives)
1/4 c. freshly squeezed lemon juice
1/4 tsp. ground black pepper
1/4 tsp. crushed red chili pepper flakes, or to taste (use 1/8 tsp. for mild heat; 1/4 tsp. is medium heat)
Salad Ingredients:
1/2 c. bulghur, uncooked (medium grade)
1 c. cold water (for soaking bulghur)
1/2 c. scallions, white and green parts, sliced crosswise into 1/4"-thick rounds (about 4 large scallions)
1/2 c. fresh basil, julienned
1/4 c. flat leaf parsley, finely minced
1/2 c. brined Kalamata olives, drained with brine reserved, pitted, and sliced into 1/4"-thick rounds (about 18 large Kalamata olives)
1 c. grape tomatoes, halved
1 1/2 c. diced red bell pepper (about 1 large red bell pepper)
1 1/2 c. diced red green pepper (about 1 large red bell pepper)
1 15.5 oz. can of chickpeas (roughly 1 1/4 c.)
3/4 c. nonfat feta cheese*
1/2 c. walnuts, crushed
1 ripe Haas avocado, peeled, pitted, and diced (makes about 1 c.)
Directions: Mix together all salad ingredients in a cruet, cover tightly with lid, and vigorously (but carefully!) shake until well-blended. Set aside. In a medium-sized bowl, soak bulghur in cold water for 2 hours until soft and all of the water has been completely absorbed, about 2 hours. Set aside. While bulghur is soaking, place all of the remaining ingredients, except for the avocado, into a large bowl and toss. (It's important that the avocado be diced and added last to avoid being mashed into oblivion. LOL.) When bulghur is ready, drain it into a colander, and then squeeze out excess water using hands to press liquid out, or place in a paper towel and squeeze over the sink. Set aside. Transfer to large bowl containing other salad ingredients. Pour dressing over salad, and let marinate in the fridge at least 30 minutes before serving.
Yield: Approximately 2 qts. (i.e., 64 oz.). That about 8 servings of 1 c. per person (or 4 servings of 2 c. each).
Chef's Notes: If it's easiest, you can make the bulghur a day in advance, or the night before. It refrigerates well, and will keep in the fridge for a few days after you make it. In fact, the whole dish tastes better after it's been marinating in the fridge in a tightly sealed, non-reactive container for a day or two. :) The lemon juice and other acidic ingredients will help keep the avocado from oxidizing.
*To make this recipe vegan, just omit the feta cheese, or replace with a non-dairy cheese substitute like shredded soy cheese, etc.
Wednesday, October 19, 2011
0 Recipe #292: Cherry, Apple, & Pear Tart (Made with Asian & Bosc Pears)
 |
| This tart is best eaten while it's still warm. |
This tart's got a balance of both sweet and tart flavors (pun intended!), just as a fruit tart should. As it bakes in the oven, the fruit will caramelize and become deeply infused with all of the spices, thereby intensifying the flavor of all of the ingredients and making your whole house smell good. :) The filling becomes a delectable ooze of soft warm flavors, which is contrasted nicely by the slight crunch of its crust. Enjoy this dish plain or with a scoop of lowfat vanilla ice cream. :)

Cherry, Apple, & Pear Tart (Made with Asian & Bosc Pears)
Filling Ingredients:
3 c. pitted dark sweet cherries (preferably fresh, but if unavailable, frozen will work too)
1/4 c. dried, all natural (i.e., no sugar added) cherries*
1 Asian pear, peeled, cored, and sliced into wedges (makes about 1 1/3 c.)
1 large Bosc pear, peeled, cored, and sliced into wedges (makes about 1 1/3 c.)
1 yellow apple, peeled, cored, and sliced into wedges (makes about 1 1/3 c.)
2 Tbsp. freshly squeezed lemon juice
1 c. all natural, no sugar added natural apple sauce
1/4 c. honey
1 tsp. pure vanilla extract
2 Tbsp. ground cinnamon
1 Tbsp. ground allspice
1/2 tsp. ground clove
1/2 tsp. ground cardamom
1/2 tsp. salt
Crust Ingredients:
2 c. oat flour (or use 2 c. whole oats and grind into finely powdered oat flour in a food processor)
1 c. walnuts, crushed into small pieces
1 Tbsp. honey
1/8 c. (2 Tbsp.) all natural, no sugar added cherry juice
1 tsp. pure vanilla extract
1/8 tsp. ground allspice
1/2 Tbsp. ground cinnamon
1/8 tsp. ground clove
1/8 tsp. ground nutmeg
1/4 tsp. salt, or to taste
1/4 c. oat flour, for flouring work surface and rolling pin
Directions: To prepare filling: Place all of the fruit (fresh and dried cherries, pears, and apple) into a large bowl, then quickly cover with lemon juice and apple sauce to prevent oxidation. Next, add honey, vanilla extract, and all spices for the filling. Set aside, or cover and place in the refrigerator while you prepare the crust.
To make the crust: Either use 2 c. pre-ground oat flour or put 2 c. whole oats in a food processor and pulse until finely ground into a powdery consistency (or as close to it as possible!). Add walnuts and pulse again until finely ground. Add remaining crust ingredients, minus the 1/4 c. oat flour (for flouring the work surface and rolling pin), and continue to pulse until thoroughly combined. Dough should be thick and stick together; do not over-mix or crust will be too hard when baked. Remove dough, scraping out remaining bits with a spatula. Form a dough ball and then place it upon a clean, even surface, uniformly floured with about 1/8 c. of the reserved oat flour. (You might want to first cover your countertop with wax paper to make clean-up easier and faster.) Flour a rolling pin with the remaining 1/8 c. oat flour, and roll out the dough ball until it's about 1/4" thick, always starting from the center outward, to form a large disc shape, about 12" in diameter.
Bake the crust: Carefully transfer dough to a 9" nonstick fluted tart pan (with removable bottom) or 9" pie plate, using your thumbs to press the dough into the bottom and sides of the tart pan/pie plate. You might need to work the dough with your fingers to help it spread out so that it reaches the upper lip of the tart pan/pie plate. Place tart crust/shell into into an oven preheated to 350°F and bake crust for about 10-12 minutes, or until light golden brown. (Do not bake the crust for much longer, or it will become hard and burnt when the tart is baked. It still needs to be baked first, as the crust needs to solidify a bit in order to keep it from becoming porous and thus, too soggy after the filling is added.) When the crust has finished baking, remove them oven and let cool completely. Then cover pie shell in wax paper, weigh down with a pie beads (or dried beans), and refrigerate for 2 hours minimum, preferably overnight if possible.
Assemble and bake the tart: Remove filling and tart shell from refrigerator, place onto countertop or other clean, level work surface, and carefully add filling, using a spatula to scoop it out into the tart shell a small clump at a time. (If you dump it in all all once, it'll splatter and a few pieces of fruit will most likely go flying. Not that I know this from experience or anything. LOL.) Place tart into a preheated 350°F oven and bake for 30 minutes, or until a knife or fork can easily pierce the filling and come out clean. Tart crust should be a deep golden brown, but not burnt. :) Let cool completely. Either serve immediately, or refrigerate or freeze for future consumption. Serve and enjoy!
Yield: Makes 1 fruit tart, about 9" in diameter, or about 8-10 servings.
Chef's Notes: Please note: The tart crust can be made a day or two ahead of time and then refrigerated until you're ready to bake the tart. The dough for the crust doesn't need to be refrigerated before it's rolled out, as it's very solid and thick, and binds together exceedingly well.
*You can find no sugar added dried cherries at Whole Foods Market. Places like Trader Joe's and Wegmans might also carry them as well, but I know for certain they're carried at Whole Foods because I've bought them there recently. :) I've looked in regular chain grocery stores (like Giant and Safeway), but every dried cherry product I've found there thus far contains refined sugar.
Tuesday, October 18, 2011
0 Recipe #291: Mushroom-Olive Quinoa Pilaf with Fresh Herbs

Earlier this afternoon, I created this recipe on the fly for today's lunch. Although it's really supposed to be served as a side dish, I cut the recipe by half so it'd be perfect for a meal-sized portion. Since the dish has enough protein between the quinoa and the cheese, I guess you could also serve it as a main course as well. Of course, this dish is the kind of thing I typically think of serving at dinner time, as an accompaniment to chicken or fish, etc.
Quinoa is SO versatile and very healthy to boot. For starters, it's a complete protein, containing all 9 amino acids. Quinoa contains large amounts of lysine, an amino acid essential to tissue growth and repair. It's also an excellent source of magnesium, iron, copper and phosphorus. Please be aware that it also contains a decent amount of trytophan, so you might not want to eat it with turkey, unless you've cleared your schedule for a 3 hour nap after mealtime. LOL. Quinoa is also supposed to be good for cardiovascular health and may also help those with migraine headaches, asthma, atherosclerosis, breast cancer, &/or diabetes. For more details on quinoa's many health benefits, please see this resource.
Due to popular demand, I plan to create more quinoa recipes in future. In the meantime, you're welcome to browse the current repository. Hope you enjoy this recipe!
Cheers,
-C

Mushroom-Olive Quinoa Pilaf with Fresh Herbs
Ingredients:
1 Tbsp. extra virgin olive oil
1 Tbsp. garlic, peeled and finely minced (about 2 large cloves)
1 c. mushrooms, well-rinsed and thinly sliced (about 3 large mushrooms)
1/4 tsp. salt
1/4 tsp. ground black pepper
1/4 c. dry white wine
1 c. quinoa, uncooked
2 1/2 c. water
1 tsp. fresh rosemary leaves, finely minced and densely packed
1/2 tsp. fresh sage leaves, julienned and densely packed
1/2 c. Kalamata olives, pitted and sliced crosswise into 1/4"-thick rounds (about 16 large olives)
1/4 c. fresh Italian flat-leaf parsley, finely minced and densely packed
1/4 c. fresh basil leaves, julienned and densely packed
1/2 c. Parmigiano-Reggiano cheese, shredded*
Directions: In a medium-sized sauce pot, sauté garlic in olive oil for 2-3 minutes on low heat. Do not let garlic brown. Next add mushrooms, season with salt and pepper, and gently stir to combine. Cook for another minute, then add quinoa. Stir ingredients until just combined, and cook for one minute more, allowing the quinoa to crisp slightly. Immediately add dry white wine to deglaze and cook until liquid has been reduced to a thin layer on the bottom of the pot, about 5 minutes. Pour in 2 1/2 c. water, stir to combine, then cover (with a clear glass lid), and bring to a rolling boil. Then reduce heat to low again and simmer for 10-15 minutes, or until water has been completely absorbed. With about 5 minutes of cooking time left to go, add fresh rosemary and sage, followed by the Kalamata olives. During the final minute of cooking, lift the lid, and taste for consistency; if the quinoa is still a bit too hard and crunchy, then add more water as needed (i.e., a cup at a time, waiting until each cup has been absorbed before adding the next), and continue to cook until the grains soften a bit more to the desired consistency. Be careful not to overcook. You don't want it to be mushy; it should still have a slight crunch to it when it's done cooking, but it shouldn't be so hard that it'll break your teeth. ;) When ready, remove from heat, open lid, add fresh parsley, basil, and cheese, and stir until just combined. Cover once again and let stand for 10-15 minutes, then uncover and gently fluff once. Serve immediately.
Yield: 4 servings as a side dish, or 2 servings as a main course.
Chef's Notes: *To make these recipe vegan, just omit the Parmigiano-Reggiano cheese, or replace with a non-dairy cheese substitute like shredded soy cheese, etc.
Monday, October 17, 2011
2 Recipe #290: Pumpkin-Potato Soup with Fresh Sage, Rosemary, & Basil

It's fall and that means cooking with one of my favorite foods -- pumpkin. :) I always try to use the fresh stuff whenever possible instead of the canned, because it just tastes so much better. Also, it's much healthier that way too. The kinds that they sell in the supermarkets here are usually "pie" pumpkins (also called "sugar" or "sugar pie" pumpkins), and of course they're the kind that are meant for eating. ;) It's not a big deal to peel and cut up a small pumpkin; it just takes some arm power, a good sharp chef's knife, and a sturdy peeler. :)
This is a great soup to serve for special fall &/or winter occasions and holidays like Halloween, Thanksgiving, etc.

Pumpkin Soup with Fresh Sage, Rosemary, & Basil
4 c. fresh edible pumpkin, peeled, pulp scooped out, seeds removed & reserved, and diced into 3/4" cubes (about 1 small "pie" pumpkin)*
3/4 lbs. red-skinned potatoes, peeled and diced into 3/4" cubes (about 1 large potato; makes about 1 1/2 c.)**
1/2 lb. sweet potatoes, peeled and diced into 3/4" cubes (about 1 medium-sized sweet potato; makes about 1 c.)
1/2 lb. yams, peeled and diced into 3/4" cubes (about 1 medium-sized yam; makes about 1 c.)
1 Tbsp. extra virgin olive oil
1/2 c. yellow onion (about 1/4 large onion)
1/4 c. shallots, peeled and finely minced (about 2 large shallots)
1 Tbsp. garlic, peeled and finely minced (about 4 large cloves)
1 large fresh bay leaf
1/4 c. dry white wine
5 c. water or low-sodium organic vegetable broth
3/8 tsp. salt, or to taste, plus more for salting pumpkin seeds
3/8 tsp. ground white pepper, or to taste
1 Tbsp. fresh rosemary leaves, finely minced
1/2 Tbsp. fresh sage leaves, julienned
1/8 c. (2 Tbsp.) fresh Italian flat-leaf parsley, roughly chopped
1/2 c. Silk coconut milk (or lite plain soy milk)***
1/2 Tbsp. freshly squeezed lemon juice
1/4 c. fresh basil, roughly chopped, plus more for garnish
Parmigiano-Reggiano cheese, freshly shredded (for garnish; about 2 Tbsp. per serving for garnish) (optional)
Directions: In a large 6-8 qt. sauce pot, bring 4 qts. (16 c.) water to a rolling boil, about 15-20 minutes. Cover pot to boil faster. Reduce heat to a simmer, then uncover pot and add diced pumpkin, red-skinned potatoes, sweet potato, & yam. Cook, uncovered, until tender, about 20 minutes. (Test with a fork for doneness. If ingredients are easily pierceable, then they're ready.) Then drain into a colander, and set aside to cool for 10 minutes. Then purée pumpkin, red-skinned potatoes, sweet potatoes, and yam in a food processor, in batches, until smooth. Set aside.
While ingredients are boiling, pour pumpkin seeds into a mesh sieve, then thoroughly rinse and drain, removing any remaining pulp and washing off any associated residue. Spread seeds onto an aluminium foil-covered baking tray (for easy cleanup), lightly season with salt, and toast in oven preheated to 350°F for 10-12 minutes, or until light golden brown. Set a timer for the seeds, so you don't forget about them while you're doing the other steps. ;) When ready, pull seeds out of oven. Wearing heat-proof oven mitts, gently rattle tray from side to side to loosen the seeds, and then set them aside to let them cool.
Meanwhile, while pumpkin seeds are toasting, heat olive oil in another large pot until it glistens; be sure to use a non-stick pot for this step. Then add yellow onion, shallots, garlic, and bay leaf, and sauté for 5 minutes on low heat, stirring occasionally. Deglaze with dry white wine, reducing a thin layer on the bottom of the pot. Add 5 c. water (or organic low-sodium vegetable broth), then bring to a rolling boil, covering with a lid to boil faster, about 8-10 minutes. Reduce heat to a simmer, uncover lid, then add puréed ingredients, and thoroughly stir to combine. Season with salt and pepper, and cook uncovered for another 8-10 minutes. In the last 5 minutes of cooking, add rosemary, sage, and parsley. Remove from heat, uncover, & allow to cool for 10 minutes. Discard bay leaf. Pour in coconut (or soy) milk, lemon juice, and 1/4 c. basil, and stir. Then, very carefully, transfer soup to blender in batches, and pulse until smooth. Place each batch into a large 1 gallon pitcher after it's blended. When ready to serve, garnish each bowl with additional basil, 1 Tbsp. Parmigiano-Reggiano cheese, &/or pumpkin seeds, and serve immediately, while still hot (so that cheese melts).
Yield: 3 5/8 qts. (14 1/2 c. or 1 1/2 c. shy of a gallon), or 7 1/4 servings (of 2 c. per person).
* In my opinion, "pie" pumpkins are one of the best kinds of edible pumpkins to use for cooking and baking. They are small and smooth, (i.e., read "not thready" like generic, field pumpkins used for carving Jack O'Lanterns ;) ). Also, here's a helpful tip for preparing the pumpkin: It's easiest to first halve the pumpkin with a large, sharp chef's knife, remove the pulp and seeds, and then slice it into medium-sized wedges before peeling off the outer rind.
**You could also substitute sweet potatoes or yams for the red-skinned potatoes, if you like.
***I used coconut milk to make this soup recipe, which imparts a slightly nutty flavor to the soup and goes quite well with the pumpkin and other ingredients. The nutty flavor is more of an undertone than an obvious note. Since this recipe only calls for a 1/2 c., you won't even really taste the coconut flavor at all. Rather, it gives the soup body and a certain richness, without the use of cream or other, much more fattening additions. The reason I prefer to specifically use Silk brand coconut milk is that it's only 40 calories (and 2.5 grams of fat) per 1/2 cup, (unlike the canned stuff), and the plant-based fats it contains have a multitude of health benefits. Yes, coconut contains saturated fat, but the plant-based saturated fats in coconut are actually much better for you than animal-based saturated fats. For one, the saturated fat in coconut actually works quite differently than animal-based saturated fats, helping you to burn energy instead of sticking to your rear. :) In fact, it's often used as a weight management tool, and, in moderation, is frequently consumed by athletes in its multiple forms (coconut water, coconut oil, etc.) for its performance benefits (i.e., hydration, energy, etc.).

Wednesday, October 12, 2011
2 Recipe #289: Roasted Tomato Risotto With Fresh Basil & Sun-dried Tomatoes
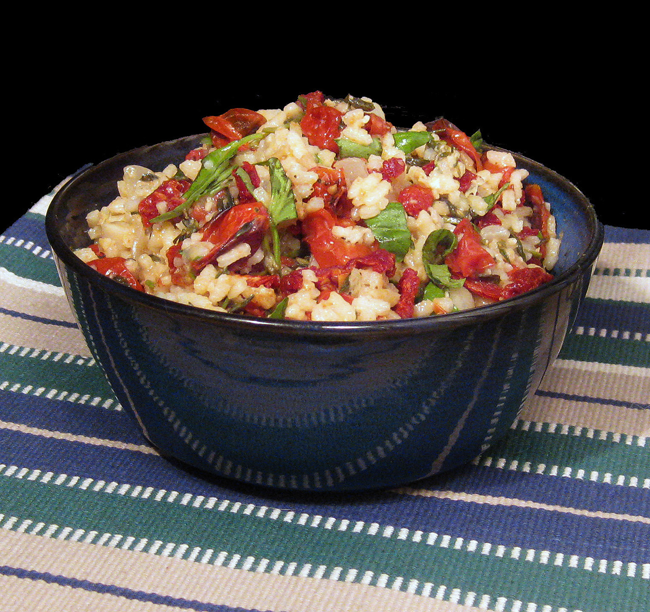
Ah, there's nothing like the rich and tangy taste of tomato risotto, especially when it contains roasted and sun-dried tomatoes and fresh herbs to give it lots of dimension.
This recipe only takes about a half hour to make. There aren't very many ingredients to chop, and the tomatoes are roasted whole, so it's a lot quicker to make than various other kinds of risotto. Also, you'll be multi-tasking by allowing the tomatoes to roast while you make the rice. To speed up the process even further, use pre-cut julienned sun-dried tomatoes. You'll be surprised at how quickly the whole process goes. And before you know it, you'll have a fabulous tasty meal to serve your guests in almost no time at all.

Roasted Tomato Risotto With Fresh Basil & Sun-dried Tomatoes
Ingredients:
3 c. grape tomatoes, whole (1 1/2 dry pints of grape tomatoes)
1 1/2 Tbsp. extra virgin olive oil
1 c. yellow onion, peeled and diced (about 3/4 small yellow onion)
1/4 c. shallots, peeled and minced
1/2 Tbsp. garlic, peeled and finely minced (about 1 large clove)
1 large fresh bay leaf
3/8 tsp. salt
1 c. superfino arborio rice
1/4 c. dry vermouth
1 tsp. unsalted butter
1/4 tsp. ground black pepper
4 c. water or low-sodium organic vegetable broth
1/2 Tbsp. fresh rosemary leaves, finely minced
1 1/2 Tbsp. fresh Italian flat-leaf parsley, finely minced
1/2 c. fresh basil, julienned
1/3 (heaping) c. Asiago cheese shavings
1 Tbsp. freshly-squeezed lemon juice
1/3 c. lite non-dairy creamer (or plain, lite soy milk)*
1/2 c. fresh sundried tomatoes, julienned (buy pre-cut if possible to save some kitchen prep time)
Directions: Roast whole tomatoes on a baking tray covered with aluminum foil (for easy cleanup) in preheated 450°F oven for 20-25 minutes until tomato skin is lightly charred and blistered. Meanwhile, in a large (12-13") sauté pan, sauté onions, shallot, garlic, and bay leaf in extra virgin oil on low heat until soft and translucent but not browned, about 4-5 minutes. Stir frequently. Season with 1/8 tsp. salt to reduce faster. (Tip: When adding salt, sprinkle from high above to ensure a more even distribution.) Turn up heat to medium, mix in rice, stirring continually for about 1-2 minutes. Watch pan carefully so rice doesn't brown or burn. (This step is particularly important, as it cooks off the rice's starchy coating and prevents the grains from getting sticky and mushy when the liquid ingredients are added. Rice should be slightly crispy, but not browned, and a translucent outline will appear around outside border of the rice.) As soon as rice has become crispy, quickly deglaze with vermouth, stirring constantly, until liquid is absorbed, about 1 minute. As the liquid reduces, quickly add butter, black pepper, and remaining salt, and stir until just combined. Wait until pan only has a thin layer of liquid on the bottom, then use a liquid measuring cup to incorporate water/broth, adding only one cup at a time, stirring constantly. Allow each cup to be absorbed before adding the next. Each addition should be only just enough to cover the risotto. Cook until rice is al dente, about 20-25 minutes. During the last addition of water/broth, add the roasted tomatoes, rosemary, parsley, thyme, and 1/4 c. basil, combine well, and then continue to stir. Test to see if it's ready by pinching a rice grain; if only 2 or less beads remain, the rice is done. Rice should be creamy but still firm.When ready, remove from heat and discard bay leaf with a slotted spoon. Stir in Asiago cheese. Then add lemon juice, light nondairy creamer (or plain, lite soy milk, if preferred), and sun-dried tomatoes, mixing thoroughly to evenly distribute ingredients. Garnish each portion with a 1/4 c. fresh basil, and if desired, additional Asiago shavings. Serve immediately.
Yield: 3-4 servings.
*I personally prefer the flavor of lite non-dairy creamer instead of soy milk, but of course, using soy milk adds more protein to the dish, unless you'd like to add more cheese instead. The choice is up to you. :)
Friday, October 7, 2011
2 Recipe #288: Avocado-Edamame Dip
Not too long ago, I created an edamame recipe, Recipe #280: Three-Bean Salad. It probably seems like I've been OD'ing on edamame lately. ;) Guess I'm just in love with the stuff. The mix of colors resulting from the combination of avocado and edamame produces the most vibrant hues, which makes it very attractive to look at and hence, desirable to eat. :) It's also a great source of protein, and is highly nutritious. There's so much you can do with it as well. Although it's most commonly used in its whole, shelled form, it also has a myriad number of other uses in other formats (i.e., mashed, pulverized, etc.) as well. Here is an example of one of those uses. :)

Avocado-Edamame Dip
Ingredients:
4-6 c. lightly salted water (for boiling edamame)
3 (heaping) c. fresh (or frozen) whole edamame, in their pods (makes a little under 1 c. shelled)
1 ripe Haas avocado, peeled, pitted, and mashed (makes 3/4 c. mashed)
1/4 c. freshly squeezed lemon juice
2 Tbsp. extra virgin olive oil
1 Tbsp. garlic, peeled and finely minced (about 2 large cloves)
1/4 c. fresh basil, roughly chopped and densely packed
1 Tbsp. fresh marjoram leaves, densely packed
1 Tbsp. fresh thyme leaves, densely packed
1/8 tsp. ground black pepper
1/8 tsp. salt
1/4 c. scallions, sliced crosswise into 1/4"-thick rounds
Directions: On high heat, bring a large, covered sauce pot of lightly salted water to a rolling boil (about 8 minutes), and then uncover and add edamame. Cook until al dente. If using fresh edamame, boil for about 5-6 minutes. For frozen, boil for 4-5 minutes. When cooked properly, beans should be firm, not mushy. (If they're mushy, they've been overcooked, which will make them taste dry and blechy.) Better to air on the side of caution: To test consistency, remove a sample bean from the pot using a slotted spoon (or tongs) after it's been cooked for the minimum required amount of time, run under cold water to cool, and then taste-test to check for doneness. When beans are ready, immediately remove pot from stove and drain into a colander.* Rinse with cold water and let cool for an additional 5 minutes or so. Shell and place beans into a food processor. Discard (or compost) pods.
Pulse beans until finely ground. Next, add all remaining ingredients, minus the scallions, to the food processor. Pulse again, this time until blended into a fine paste. Using a spatula, scoop out mixture and place it into a medium-sized serving bowl. Stir in scallions and mix until thoroughly combined. Dish tastes best when marinated for at least a 1/2 hour before serving, to allow the flavors to properly meld. Serve chilled (or at room temperature) and enjoy! This dip tastes great with baked tortilla chips or crackers.
Yield: 1 1/2 c.
Chef's Notes: *Edamame can very easily become overcooked and mushy if you're not paying close attention to the precise amount of time it's been sitting in boiling, or even just hot, water. The beans will continue to cook even when you remove the pot from its direct heat source, so this is why they should be immediately drained and rinsed with cold water.

Thursday, October 6, 2011
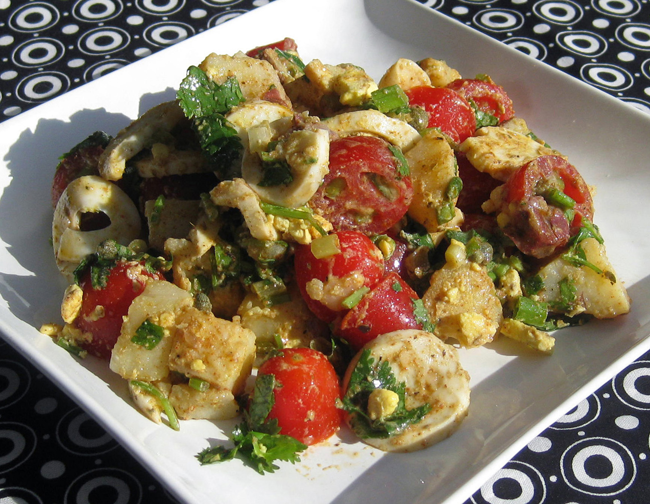
4 Recipe #287: Mexican Egg Salad
Three salad recipes in a single week. What can I say, it's been a week of salads. :) Today, I decided to take on a new challenge: Come up with an original egg salad recipe that I actually want to eat. LOL.
This clearly isn't your grandma's egg salad. :) I use the term "egg salad" rather loosely, as there's no mayo in it, but that doesn't mean I can't call it an egg salad. Heck, there's eggs in it and it's a salad, so there. ;-P Anyhow, it's my blog and I can call it what I want. LOL. [See, this is exactly why I'm known as a GFWA, a Gourmet Foodie with Attitude. :) ]
OK, I'll fess up: The reason I'm creating an egg salad recipe that strays so far away from tradition is that, in truth, I really don't like traditional egg salad at all. :) For one, the typical stuff is usually rather bland and uninspired (Can we say "B-B-B-BORING!"?!), not to mention that it often looks so pale that it looks like a vampire could've drained the color from it. For all the flavor and excitement factor that it has, it might as well be used to fill cracks in the sidewalk. ;) Meh.
Second, traditional egg salad usually that kind of "Would-you-like-some-eggs-with-your-mayo" quality about it. ;) Eggs + mayo, and then more mayo? Yeah, right. It's more like, "Would you like some cholesterol with your cholesterol, sir?" ;) There are already hard-boiled eggs in that thing, so why add insult to injury. :)
Plus, the traditional dish is really stock-and-trade, overly basic cooking that frankly just doesn't get me excited to cook. Hey, I'm the one making these recipes, so if I'm not inspired to make them, then you're in big trouble. LOL. There's a good reason why Erik has learned to just go with the flow: He knows that if I'm just not in the mood to cook something -- he's got an overdeveloped spidey sense for these kind of things -- he'd better not push his luck, or he'll wish he'd never asked. Haha! When I don't want to cook, look out. ;) I'm not exactly saying that I turn into a "kitchen witch" (remember those things?!), but let's just say that sometimes there might be some attitude served along with the meal. ;) Yeah, even this chef has days when she feels like she'd rather phone it in. This is why, when I'm in a mood like this, I don't even have to recommend to Erik that he head in the other direction and not stop until he's far, far away from the kitchen. Hahaha.
So where was I? Ah yes, the myriad but relatively obscure virtues of traditional egg salad. ;) Now, make no mistake about it, THIS egg salad is totally different. There's no mayo, and yet, it's creamy and packed with flavor, and yes, with the addition of vegetables and tomatoes to balance out the "starch and protein fest," it's even good for you too. Imagine that. :)
Frankly, this recipe is pretty much the only version of egg salad that I'll actually want to eat. I submit into evidence Exhibit A: my most recent tweet:
This is the kind of dish that's perfect for picnics, BBQs, and casual parties. Plus, it actually looks pretty on the plate, unlike the usual unsightly congealed egg blobs frequently seen at picnics or family-style buffets. ;) In the former disaster scenario, that egg salad's been cooking in the sun, and in latter, it's usually warm and mushy and very well might require some carbon dating. Haha! (Now doesn't that sound SO appealing?! NOT. Now you know why I never touch the generic version of the stuff, particularly when it's offered in public settings.) Now contrast that to my egg salad, a healthy mix of eggs and vegetables, made fresh from scratch. Yes, my version is an egg salad where you can actually SEE the eggs in the salad, instead of some indistinguishable, massacred mass. ;) With this recipe, you won't ever have to question whether or not the egg salad actually really does contain eggs after all. :-D
Also, as an option to serving this dish as a standalone side, you could also use it as filling for a totally new and different kind of egg salad sandwich.
And finally, you'll be happy to know that this recipe takes under a half hour to make. And, minus the boiling of the eggs and the potato, there's basically zero cooking involved. :) So, have at it and enjoy!

Mexican Egg Salad
Salad Ingredients:
6-8 c. lightly salted water (for boiling the potatoes)
1/2 lb. red-skinned potatoes, unpeeled and well-scrubbed (about 1 medium-sized potato; makes 1 c. cooked and diced potatoes)*
2 large hard-boiled eggs, peeled and sliced crosswise into 1/8" thick rounds with an egg slicer (make in advance)**
1 c. grape tomatoes, halved (about 10 large grape tomatoes)
1/4 c. scallions (white and green parts), sliced crosswise into 1/4" thick rounds (about 4 large scallions)
1/4 c. fresh cilantro, finely minced and densely packed
1/2 Tbsp. capers, drained, soaked in 2 Tbsp. water for 10 minutes, and then drained again
Dressing Ingredients:
1/8 c. (2 Tbsp.) extra virgin olive oil
1 Tbsp. freshly squeezed lime juice
1 tsp. Dijon mustard
1 tsp. ground cumin
1 tsp. paprika
1/4 tsp. dried (or ground) oregano
1/8 tsp. ground black pepper
1/8 tsp. ground cayenne pepper
Directions: Place the grape tomatoes, scallions, cilantro, and capers into a large bowl and set aside. Bring lightly salted water to a rolling boil in a medium-sized pot, about 8 minutes. Then gingerly place the potato into the pot of boiling water. Reduce heat to medium-low, cover tightly with lid, and simmer for 15-20 minutes, or until the potatoes are almost tender when pierced with a knife. Drain into a heat-proof colander, then transfer potatoes back into the pot, and let them cool for at least 15 minutes. Set aside.
Meanwhile, prepare the dressing: Pour all of the dressing ingredients into a blender (or food processor), cover, and pulse until smooth and emulsified. Pour into the large bowl of vegetables and gently combine. Set aside. This will allow the solid ingredients some time to marinate in the dressing while you're waiting for the potatoes to cool.
When the potatoes are cool enough to handle but still warm, dice them into small, rough chunks while they're still in the pot. Then transfer the potatoes into the large bowl of vegetables. Toss well, then add hard-boiled eggs and gently mix together with salad tongs. Cover, and refrigerate for a few hours (or even better, overnight) to allow the flavors to meld. Serve cold or at room temperature.
Yield: 3-4 servings as a side dish, depending upon appetite. :)
Chef's Notes: *I like to leave the potato peels intact when adding the potatoes to the salad -- for added color, flavor, texture, and nutrients -- but whether or not you'd like to do this is, of course, up to you.
**Here's how to make the most tender, creamy, and delicious hard-boiled eggs you'll ever have: My grandmother taught my mother this technique, who in turn, taught me, and so now I'm passing it onto you. :) It's super easy to do: First, bring a pot of boiling water to a rolling boil. Then place the eggs into the pot and quickly cover the pot with a tightly fitting lid. Turn off the heat, and allow the pot to sit on the stove burner for at least 25-30 minutes before draining the water and peeling the eggs. (And just in case you're wondering, yes, the water is, in fact, actually hot enough at this stage to cook the eggs all the way through.) Enjoy!
No additional salt is needed for this recipe. The capers provide sufficient salt. :)