
Wednesday, December 30, 2009
0 Out-of-the-Ordinary Healthy Snack Ideas


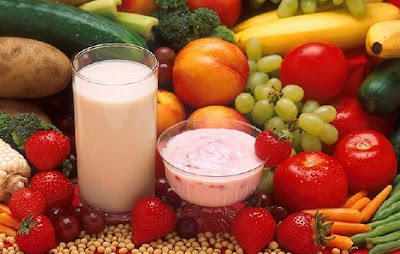
 One of the topics that has been swirling around in my brain is snack ideas. I recently revisited a previous post I wrote, in which I'd requested healthy snack ideas from people. Not even sure if anyone even saw or read that post (LOL!), because it got zero responses. (I guess I could check my Feedburner stats to confirm whether anyone read it, one way or the other, but the truth is that I'm not THAT curious. ;) ) Looking back on it, I might've been just a tad bit too picky in my list of snacking requirements, or it could've been around the same time that microblogging (i.e., Twitter & its ilk) really started to sap the dear life out of blog commenting, but whatever the reason, the silence was deafening. ;-O
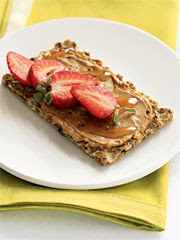
Off the top of my head, here are some of my favorite go-to, healthy snack ideas. (Some are more creative than others.):
--Za'atar spices mixed with a small dollop of olive oil, sprinkled on air-popped popcorn - YUM!
--Sliced, ripened plantains w/plain nonfat Greek yoghurt (or low-fat sour cream)
--Fresh peaches with plain/vanilla yoghurt
--A few handfuls of sugar snap peas
--Raw or steamed string beans with soy sauce, sesame seeds, sliced ginger, & a dab of sesame oil (another plastic-baggie snack)
--Humus & carrot sticks
--Cucumbers (sliced lengthwise) & cheese sticks
--Fresh figs & brie (OK, the brie isn't low-fat, but it's only a small sliver of brie.)
--A mix of dried cherries, almonds, & pumpkin seeds
--Crackers & cheese w/tapenade of vine-ripened tomatoes, sun-dried tomatoes, olives, & capers (easy to make, toss tapenade ingredients into a blender & pulse. Et le voilà.)
OK, I'm sure there are more snacks I could've thought of, but that's a good list for starters.... Feel free to add to this list. :)
Cheers,
-C
0 Bursting with Creativity.....
Hello There Fellow Culinary Adventurers,
Caruru de Camarao com Coentro (Shrimp & Okra with Nuts & Cilantro) (Brazilian dish)
Jugo de Maracuyá Con Leche (Passion Fruit Smoothie) (Colombian/Latin American drink)
Sopa de Plátanos (Plantain Soup) (Latin American appetizer)
Dulce de Tamarindo (Tamarind Candies; made in a healthy way!) (Mexican treat)
Avocado with Sweet Soy Bean Paste (Asian side dish)
Pomegranate Muffins
That should give you something to look forward to reading/making until then. :)
Cheers,
-C

Tuesday, October 27, 2009
2 Recipe #58: Tomato, Red Pepper, & Zucchini Soup
And here's yet another original soup recipe. This one's extremely easy to make; all you have to do is chop up a bunch of veggies, toss 'em in a sauce pot with water & spices, let the whole thing cook for a few hours, & then just forget about it until the timer goes off, et le voilà. Good for those nights when you want to drink something hot, soothing, tasty, & fresh, but don't feel like putting in major effort. :) Make it, drink it, & then crash on the sofa & relax -- You're in for the rest of the night. :)
 |
| The addition of zucchini gives the soup its texture, while the red peppers & carrots add sweetness, & the red tomatoes give it some zing. |
Tomato, Red Pepper, & Zucchini Soup
Ingredients:
3 large garlic cloves, minced
2-3 large shallots, diced
1 Tbsp. extra virgin olive oil
6 red peppers, innards/seeds removed & sliced into 2 inch pieces
3 large zucchinis, unpeeled & diced into rough chunks
5 large carrots, peeled & sliced into small 1 inch thick chunks
4 fresh vine-ripened tomatoes, diced
1 14.5-oz. can of diced tomatoes (NOTE: You will be using the entire can's contents, including the juice.)
3 Tbsp. flour
4 c. water
2 Tbsp. paprika
1-2 dashes Tabasco sauce (optional)
8-10 fresh basil leaves, OR 2 tsp. dried basil leaves
1 tsp. dried thyme leaves
1/2 tsp. dried marjoram leaves
1/2 tsp. parsley
salt, to taste (between 1-2 tsp.)
1/4 tsp. black pepper
15-20 sun-dried tomato halves (i.e., the kind that's not packed in oil) (about 1 8-oz. container of sun-dried tomatoes)
Directions:
1. In a large sauce pot, sauté garlic & shallots in olive oil on medium heat until translucent, stirring frequently.
2. Next, add red peppers & stir, cooking until tender. About 10-15 minutes.
3. Add zucchini & both the fresh & canned tomatoes. Cook for another 10 minutes, continuing to stir frequently.
4. Add flour, stirring until it disappears.
5. Add water, carrots, & all spices.
6. Turn down heat to low & simmer with the lid on for 3 hours. Check on soup occasionally & add water if necessary. Taste for flavor balance & adjust seasonings. Continuing to cook until desired thickness has been reached.
7. In the last 1/2 hour of cooking (i.e., 2 1/2 hrs into cooking), add the sun-dried tomatoes.
8. Remove from heat.
9. Blend mixture in batches, using a hand mixer, potato masher, or food mill. (If you like soup chunky, blend soup only slightly, using the pulse setting.)
10. Serve hot. Reheat if necessary. (Freeze remainder for future lunches & dinners.) Enjoy!
Yield: 8-10 servings.
Serving suggestions: Garnish with thinly sliced/shredded fresh basil. Serve with a dollop of low-fat sour cream or non-fat plain yoghurt, & a slice of sour dough bread.
2 Recipe #57: "Potatoes in Paradise" Potato Soup
Yes, I'm on a cooking spree today; I just made Mexican chili & put it in the fridge for Thursday's lunch with friends, chez penguin. :) Chili tastes even better when refrigerated or frozen overnight.
And now, I'm making potato soup for tonight's dinner. Since it's going to be dining for one tonight, leftovers will be frozen for this weekend, when I anticipate a visit from my squeeze & possibly some friends who're planning on stopping into town then.

"Potatoes in Paradise" Potato Soup
Ingredients:
1 large yellow onion, cut in 1-inch chunks
3 large garlic cloves, minced
2 large shallots, minced
1 Tbsp. butter (Vegan can replace with 1 Tbsp. extra virgin olive oil or omit all together.)
1 Tbsp. extra virgin olive oil
3 Tbsp. flour
1 c. dry sherry
8 large potatoes, peeled & cubed, cut in 1/2" chunks (red or yellow, etc.)
2 large carrots, peeled & sliced into 1/4"-thick pieces
1 stalk celery, diced
4 small sprigs of fresh dill
1 tsp. dried thyme leaves
1 tsp. dried parsley leaves
2 bay leaves
1 tsp. kosher salt, to taste
1/4 tsp. ground black pepper, to taste
4 c. water
2 cup non-fat plain soy milk (buttermilk or skim milk also work well)
Directions:
1. Melt 1 butter in a large skillet; add olive oil & sauté onions, shallots, & garlic until translucent. Sprinkle with flour, & keep stirring until flour is completely absorbed. Deglaze with sherry.
2. Add potatoes, carrots, & celery, & cook for about 30 minutes on medium-high heat. Add spices & water & bring to a boil. Turn down heat, cover, & cook on medium-low heat for 3 hours, or until vegetables are tender.
3. Remove from stove, blend mixture in batches, using a hand mixer, potato masher, or food mill. Return to sauce pot for further cooking. IMPORTANT: Do NOT use a blender, or the potato mixture will very likely turn gummy from overprocessing.
4. Taste and adjust seasoning. A half-hour to one-hour before serving, stir in the (soy) milk & season with salt & pepper to taste. If necessary, add more (soy) milk or water until desired consistency is reached. Heat thoroughly. Ladle potato soup into bowls, garnish with fresh chopped chives, & serve.
Yield: Serves 4-6.
0 Recipe #56: Cyberpenguin's Cincinnati Chili
The subject of chili is a topic that evokes passionate debate in my family. From the start, my mother put forth some pretty strong opinions about what kind of chili, if any, her family would be consuming, and so, we grew up eating very little of it, & when we did, it was always a vegetarian chili. :)
 The irony is that, at university, I won a cooking contest for, you guessed it, my vegetarian chili. :)
And the prize for my efforts? A hardbound copy of Sundays at Moosewood Restaurant: Ethnic and Regional Recipes from the Cooks at the Legendary Restaurant. A great reward indeed! This cookbook is virtual goldmine of recipes that I still use to this very day!
It was not until after university, that I ventured forth & tasted the meat version, which was first made using Wick Fowler's 2-Alarm Chili spice mix, in my own kitchen. I don't normally resort to using commercial pre-packaged spice-mixtures; however, for Wick Fowler's 2-Alarm Chili spice mix, it's worth making an exception. :) I'm happy to report that the results of my first meat chili were decent, and since then, I've made several different versions -- both vegetarian & meat versions -- adding different ingredients like green & red peppers, onions, beans, masa harina de maiz (corn flour), and amazingly, even chocolate (for Cincinnati Chili, which, if you're curious, is similar in concept to a chocolate mole sauce, where the chocolate is more of a subtle accent versus an overriding flavor). (I know the addition of unsweetened chocolate might sound bizarre to some people -- and yes, I was a tad bit skeptical about the concept at first too, but trust me, it adds a really amazing flavor to the dish. Plus, it's fun to be adventurous, try something different every now & then, & expand one's horizons. Especially when that something is really, really good. :) )
I've grown to really enjoy & appreciate homemade chili, in part, due to my continual experimentation with it in the kitchen, & also because of my squeeze, Erik, who often requests it when the weather turns colder. :) I've also served this chili to my parents and also to some family friends, and both times it got a very enthusiastic response. (I was especially surprised by the former, given my mother's previously stated, steadfast opinions with regard to meat-based chili. ;) ) In the latter instance, our friend Gerry was over at the house that day and he couldn't stop raving about it. In fact, I saw him during my last visit home, and he mentioned it again. I think he might've been dropping some hints. ;)
Anyhow, here's my own version of Cincinnati Chili. Frankly, I don't like the idea of chili mixed with pasta, (which, I believe is the traditional way it's served in Cincinnati ;) ), so my version is served with tortilla chips instead, which is more like "Cincinnati Chili by way of Mexico." :)
Also, the nice thing about my version of this recipe is that it calls for 93% fat-free meat (or whatever the highest fat-free version is that you can find) & doesn't require any additional oil; the garlic & onions are cooked in the tomato juice from the canned tomatoes. Just one of the low-fat cooking tactics from my bag o' tricks. :)
This recipe is packed with flavor, so those you serve it to won't even realize that it's lower in fat. Shhhhh! :)
Anyhow, here's the recipe. Enjoy!

Cyberpenguin's Cincinnati Chili
Ingredients:
2 lbs. 93% fat-free ground beef (or whatever the highest percentage low-fat beef you can find!)
1 large yellow onion, diced
2-3 large garlic cloves, minced
1 14.5-oz. can of diced tomatoes (NOTE: Be sure to reserve juice!)
1 6-oz. can tomato paste
4 fresh vine-ripened tomatoes, diced
2 Tbsp. apple cider vinegar
1-2 c. water
2 tsp. paprika
1-2 tsp. ground cayenne pepper (Adjust for heat to suit individual preferences: Adding 1 tsp. will add a small kick to your chili; adding 2 tsp. or more will add a bit more; and, adding 2+ tsp. plus some Tabasco sauce will a "Ka-pow!" :) )
1/3 c. Mexican chili powder
2 tsp. ground cumin
2 tsp. dried oregano leaves
1 tsp. dried cilantro leaves
2 bay leaves
1/4 tsp. ground allspice powder
1/4 tsp. ground clove powder
1 tsp. ground cinnamon powder
2 Tbsp. (Hershey's) unsweetened cocoa powder
salt, to taste (between 1-2 tsp.)
1 (15.5 or) 16-oz. can kidney or pinto beans
2 Tbsp. masa harina de maiz (corn flour)
fresh cilantro leaves, for garnish
Directions:
1. Brown meat in large sauce pot. Drain, transfer meat to bowl, & set aside.
2. Sauté onions & garlic in the tomato juice (from the diced tomatoes can) on medium-high heat using the same sauce pot you used to cook the meat. (Using the same sauce pot will add flavor to the onions & garlic & also save on dishwasher loads; this is a good way to be economical & green. And also, it's great for those of us who hate washing dishes & despise cleaning anything in general. :) )
2. Cook garlic & onion mixture until translucent, stirring frequently.
3. Next, add meat & all other ingredients except for kidney beans, masa, & fresh cilantro leaves. Turn down heat to low & simmer with the lid on for 30 min.
4. Check on chili & add water if necessary. Taste for flavor balance, & adjust to suit your personal preferences.
5. Add kidney beans & masa. Slow cook with lid on for 60 more minutes. Taste, and continue to cook until desired thickness has been reached, approximately 30-60 additional minutes. Garnish with fresh cilantro leaves & serve.
Yield: 8 servings.
Serving Suggestions: Garnish with fresh cilantro leaves and serve with low-fat/baked tortilla chips.  I personally recommend R.W. Garcia Flaxseed Tortilla Chips, which are a tasty, crunchy, & yes, healthy alternative to plain ole' tortilla chips. :) To accompany the chili, I recommend either the Blue Corn w/Flaxseed or Flaxseed w/Soy varieties. The other flavors are probably too busy for this dish; there's enough flavor sensations already going on with the chili itself. Best not to overdo it & keep the focus on the main event, i.e., the chili. :)

Alternate Ingredients: Add California black olives. Or try fresh green & red pepper (cut into small strips), &/or cooked corn kernels.
Chef's Notes: Chili freezes well, and can keep for several months.
Wednesday, October 14, 2009
0 Ch-Ch-Ch-Changes......
If you've visited this blog lately (via the live page versus the feed :) ), you probably will have noticed that there have been a few changes, some more obvious than others.
Firstly & most obviously, there's the new blog header, which was designed & created by yours truly. :) And then there's the addition of various buttons, some of which I nabbed from various places & then customized, and others of which are unique creations.
As the saying goes, "form follows function," so while I enjoy the design process, the ultimate purpose is to streamline content and make it easier for readers to navigate this blog.
I'm honestly nowhere close to being finished with the design & layout of this blog. There's a lot of work still to be done, & I frankly haven't had a whole lot of time to devote to this leisure activity -- So, as a matter of practicality & priorities, the work has been done slowly over time, & will probably continue to be done in such a manner until further notice. :)
At some point, I plan to add tabs and move a lot of the links to these areas to further de-clutter the page while still continuing to provide lots of detailed content. Although you wouldn't know it from looking at this blog's layout (especially in its earliest incarnations), I'm actually quite the design minimalist. I think the new logo reflects that intent/impulse.
Anyhow, thanks for your patience during the on-going face-lift!
Cheers,
Cyberpenguin
Saturday, October 3, 2009
0 Introducing the NEW "Cook. Eat. Drink. Blog." Facebook Fan Page!
Introducing the NEW Facebook Fan Page for Cook. Eat. Drink. Blog. Drum roll, please. :)
If you click on the above widget, it'll take you directly to the landing page for this blog's Facebook fan page. (Of course, you need to belong to Facebook first, before you can join this fan page. :) )
Alternatively, you can show your support for this blog by adding your own Cook. Eat. Drink. Blog. widget to your website or blog, either on a sidebar or within a blog post. :)
Thank you so much for publicly showing your support for this blog!
0 Recipe #55: Vegetarian French Onion Soup

This recipe makes for a great post-exercise fluid/sodium replacement option. I often drink it after long runs on a chilly Fall or Winter’s day. It’s very refreshing & tasty, and so easy to make. Enjoy!

Vegetarian French Onion Soup
Ingredients:
2-3 large cloves garlic, minced
1 Tbsp. olive oil (Or, for more flavor, use ½ Tbsp. olive oil + ½ Tbsp. butter)
2 shallots, minced
2 yellow onions, sliced into ¼ inch thick slivers
2 large bay leaves
salt, to taste
freshly ground black pepper, to taste
1-2 tsp. dried thyme leaves
1 Tbsp. whole wheat or all-purpose unbleached white flour
½ c. sherry
½ c. dry white wine
¼ c. low-sodium soy sauce, or to taste
6-8 c. water (or for more flavor, can use vegetable stock)
4 slices bread (can use whole wheat or sourdough slices, etc.)
4 Tbsp. shredded Asiago cheese (or vegan Parmesan cheese substitute)
a few sprinkles of a soft, mild-tasting cheese like mozarella* (or vegan shredded cheese substitute)
Directions:
1. In a large nonstick pot, sauté the garlic in olive oil (&/or butter) over medium heat, until soft, about 3-5 minutes. Stir occasionally, watching pot carefully, to make sure garlic doesn’t burn. Add shallots, onions, and bay leaves. Lightly season with salt, pepper, and thyme. Cook, stirring occasionally, until slightly caramelized, about 20 minutes. (If you cook the onions too quickly, they’ll taste bitter.) Add flour, stir well, and cook for 2 more minutes. Deglaze pot with sherry and white wine. Add water/stock, taste and bring to a slow boil over high heat, then reduce heat to low and simmer uncovered for 15 minutes. Taste soup for flavor & sodium content/level. If necessary, add soy sauce (to taste), and adjust other seasonings as needed. Place 1 slice of bread at the bottom of each bowl/soup cup and ladle in soup. Sprinkle each full bowl with 2 tsp. Asiago cheese, mixed with a few sprinkles of low-fat mozarella, etc.
Yield: Makes 4 servings.
Chef's Notes: *While it's more traditional to use Gruyère, I frankly think that low-fat mozarella tastes better & has a more even consistency when mixed with the Asiago. IMHO, melted Gruyère tastes like a rubber band. :) Of course, do what you like best.
Friday, September 18, 2009
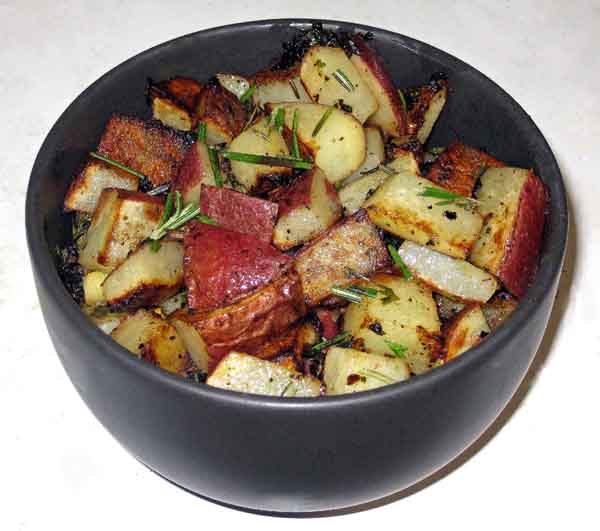
0 Recipe #54: Rockin' Rosemary Potatoes
This is one of my favorite ways to prepare potatoes..... Hope you like it as much as I do. Enjoy!
Ingredients:
1 Tbsp. extra virgin olive oil
2 large garlic cloves, peeled & minced
3 c. red-skinned potatoes, diced with skins intact (about 2 medium-sized potatoes)
1 1/2 Tbsp. fresh rosemary leaves, finely minced (about 2 small sprigs)
1/2 Tbsp. fresh oregano leaves, finely minced (about 1 small sprig)
1/2 Tbsp. fresh thyme leaves (about 2 large sprigs)
3 scallions, sliced crosswise into small (1/4") rounds
2 Tbsp. fresh parsley, finely minced
2 Tbsp. freshly squeezed lemon juice
1 tsp. unsalted butter
1/2 tsp. kosher salt (or to taste)
1/4 tsp. ground black pepper (or to taste)
Directions: Sauté garlic in olive oil in a large pan on low heat until it just begins to soften (about 30 seconds). Then add diced potatoes, season with salt & pepper, and continue to cook for a few more minutes until soft. Stir ingredients frequently, so that garlic doesn't burn. Next add minced rosemary and cook for a minute or two more. Add minced oregano & thyme, and continue to cook, thoroughly mixing together all of the ingredients. Next, add chopped scallions and continue to cook until they just start to soften. (Be careful not to overcook; scallions should retain their firmness & bright green color.) Lastly, add lemon juice & sliver of butter, stirring continually. Potatoes should be cooked until golden brown. Remove from heat and serve.
Yield: 2-4 servings.
Alternate Preparations: To make this recipe vegan, simply omit the butter.
Wednesday, September 16, 2009
0 Recipe #53: Pollo A La Brasa (Peruvian Rotisserie Chicken)
Yessssss, the chicken recipe I promised to post here -- y'know, the one you've all been eagerly awaiting since 9/15/09 :-D -- has finally arrived.
So feel free to jump up & down in excitement. :)
Also, there's actually another reason I didn't post the recipe right away: To be honest, my first test kitchen experience was mildly disastrous, as I hadn't yet perfected the recipe, was feeling rushed due to time pressure (never a good sign!), & so, very hastily proceeded to add a bit more liquid than was actually necessary. One leaking Ziploc bag & a very thorough refrigerator cleaning later, I decided that I would take a second shot at it at a later time. Of course, after that rather unpleasant experience, I really wasn't in any hurry to make that next attempt. :)
(On that note, here's a good kitchen tip: It's not a bad idea to put items marinating in a Ziploc bag in a bowl as a preventative measure, just in case it starts leaking. Word to the wise: The slow seeping of liquid from a leaking Ziploc bag isn't always apparent at first glance. :) )
The truth of the matter is that, if I had only checked on the chicken, instead of leaving it marinate for an extra day or so, that little spillage mishap probably could've been avoided. On the plus side, a chicken marinating for a few more hours can actually be a good thing: It typically can only enhance the flavor even more. So, in other words, "Good things come to those who suddenly become very busy & must thereby prolong the marination process." :) Except, that is, when the marinade seeps out of the Ziploc bag & into every crevice of the refrigerator. Not pretty. Not at all. :)
Anyhow, back to the story: Months passed, & I just didn't seem to have the time or the inclination to finish the recipe or test it out. I know I promised to post the recipe soon after I'd mentioned that the chicken was marinating, provided it met with the "Cooking with Corey" seal of approval, but since it didn't turn out as planned, I wasn't about to rush the next go-round just to meet a self-imposed deadline. I was determined that the next attempt would be carefully planned to ensure a successful outcome.
On the plus side, any mistake made in the kitchen usually means a course-correction for the next time around. Sometimes it can take an attempt or two to work out the kinks in a recipe, depending on its complexity, but in my own case, most times I can thankfully get it right on the second try.

Ingredients:
2 Cornish hens, 1.5 lbs each
4 Tbsp. distilled white vinegar
3 Tbsp. white wine
2 Tbsp. ground dried oregano
2 Tbsp. cumin powder
2 1/2 Tbsp. garlic powder
2 1/2 Tbsp. paprika
2 1/2 Tbsp. Mexican-style chili powder
2 tsp. black pepper
1 tsp. kosher salt
juice of 1 lemon (or lime)
1/3 c. soy sauce
2 Tbsp. olive oil
Ingredients For Prepping The Chicken:
(Important Note: These ingredients are totally separate from marinade ingredients!)
freshly squeezed lemon juice + water mixture, (1 part lemon juice to 10 parts water) for washing chickens
1 Tbsp. water, for diluting marinade
Directions:
1. In medium-size bowl, combine all ingredients for the marinade, minus, of course, the Cornish hens.
2. Remove giblets (which are typically packaged in plastic & then stuffed inside the inner cavity of the chicken) & set aside. (You can use these for other dishes or if not, just discard them.)
3. Wash chickens thoroughly under running water, & then wash a second time with lemon water, making sure to remove excess fat from the chickens. Be sure to clean both the outside & inner cavities of the Cornish hens.
4. With a large carving fork, poke deep holes all over chicken, including under wings. Pour marinade into a large, sturdy (i.e., freezer-quality) plastic bag. (Check bag to make sure it's well-reinforced around the bottom & side edges. That way, you will avoid the above-described leakage mishap.) Place chickens inside plastic bag & thoroughly rub the marinade all over the chicken, making sure to cover both the inner cavities and the outside skin/flesh of the chicken. Seal the bag & marinate for at least 2 hours -- preferably up to 6 hours, but no longer than 24 hours -- in the refrigerator.
5. After marination process has been completed, remove chicken from bag and dilute marinade left behind in bag with 1 Tbsp. of water. (Place marinade in a small saucepan, bring to a boil and simmer 2-3 minutes. Set aside.).
6. Place chicken on a rotisserie spit on the grill, and roast at medium heat for 45 to 55 minutes. If broiling, cut chicken in half lengthwise and broil for 30 to 40 minutes, basting with marinade every 10 minutes.
Yield: 2 dinner-sized portions.
Tuesday, September 15, 2009
0 Of Buffets and Big Eyes :)
 Today Erik & I went to an Indian vegetarian buffet for lunch. Neither of us are vegetarian per se, but we both like Indian vegetarian food. :)
It's been a while since we've gone out to eat, & it was nice to go out to lunch to spend some time with him. Plus, the food at this restaurant is DELICIOUS. :)
I had a very rushed morning -- a long story that I won't bother explaining -- & normally make a point of eating breakfast. This morning was just one of those rare days when the only thing I had to eat was a mid-morning snack of a nectarine & a piece of cheese, and then by 12:30 pm was of course more than ready for lunch.
Today -- as a direct result of the uneven spacing of meals/snacks -- my eyes were a bit bigger than my stomach, & I ate two medium-sized plates of food at the buffet. Normally, I'm pretty good about not overeating at buffets and one will do the trick. OK, I don't know what the heck I was thinking. Apparently, my eyes & my stomach were doing the thinking for me. :)
The other thing is that I haven't been running lately due to some recurring soreness in my knees. The reason I mention this is that when I'm "not exercising," I seem to do more things that I regret. ;) Namely, eating with the same kind of wild abandon normally reserved for a tank of Great Whites during a feeding frenzy. LOL! :)
All kidding aside, it's 9:15 pm and I am STILL digesting lunch. Hard to believe, I know. I'm actually scared to find out how many calories I consumed in this one meal, & honestly there's a part of me that'd rather not know (!). However, what's done is done, so now I'm heading off to the gym to do some course-correction & work off some of those extra calories. I would probably need to run 15 miles to make a significant dent (LOL!) in consumed calories from today's lunch. However, since it's late & realistically-speaking, my knees probably can't handle that amount of mileage after several days off from running, I think I'll be running closer to 5-6. :) After all, 500-600 extra calories burned is better than nothing!
Anyhoooooo, as a result of the aforementioned situation & the current time of night, I've decided to hold off on making the chicken until tomorrow night. So you'll just have to wait one more day for the modified recipe. That's just the way things went today. You're welcome to check back after tomorrow night's dinner, & there might be an update with the recipe. (I'm not going to promise an exact time table; however, the recipe will most likely show up here at some point in the near future.) Until then, have a great night!
-C
0 Bock Bock Bock! The Chicken is Marinating......

Earlier tonight, I marinated a chicken. Basically, I took the Peruvian Roasted Chicken recipe (that I'd blogged about earlier) and modified it to make it even better. :) Of course, my own version of this recipe will most likely be posted here after it's been taste-tested for dinner (i.e., most likely tomorrow!), provided it passes muster with the "eating brigade" & gets the Cook. Eat. Drink. Blog. seal of approval. :)
Until then, hang in there. The suspense will soon be broken. ;)
Sunday, September 13, 2009
0 Guerilla Kitchen Tactics: Surviving the Recession By Going Grocery Shopping in Your Own Pantry
 What I'd like to know is this: How many other people, besides myself and a few of my friends, have gone into "survival cooking mode"?
Translation: I'm cooking on a budget at the moment. :)
So there you have it. I know it's probably not fashionable or even wise to publicly admit that on a blog (especially one that isn't anonymous!), but it's the bald, honest-to-goodness truth. Of course, I know I'm not exactly unique in this predicament. Due to the tight economy, many people are dealing with similar issues.
However, no worries, I won't be turning into "Frugal Frannie Fussbudget" anytime in the near future. :) To be frank about it, I absolutely despise that sort of downward-spiraling, penny-pinching mentality, where every action is dictated -- or rather, pre-determined -- by money stresses, and motivated by a "dearth" mentality, which usually results in poor choices in both the short- & long-term. Forget it. I refuse to participate in that attitude. I'd rather be thankful for what I have and focus on that, considering the long-term cost benefit analysis in terms of both one's health AND pocketbook.
So instead of stressing out about it, I decided that it was best to view the current situation as an opportunity. You know the old expression about "making lemonade out of lemons," etc., etc.? Yeah, I'm going to make the most of it, and have a d*mned good time doing it. :)
And while I'm currently very cost-conscious at the moment, I still believe that one's long-term health is never worth sacrificing for short-sighted, short-term gains. In other words, I won't be subjecting anyone in my household (including the cats!) to so-called "cheap food," which actually ends up being quite expensive after factoring in the heavy cost of medical bills caused by a lifetime of artery-clogging food choices. Yes, expediency and cost still do matter to some extent, but not at the cost of my family's health: I would rather make quick and simple meals using whole foods before giving up on all counts & just grabbing a Big Mac. :)
I think it's possible to make meals which are both healthy and cost-conscious. And right here, through this blog, I'd like to show you how you can accomplish all that on a budget.
A while back, some of you might recall that I blogged about how you can save money by buying your spices in bulk, either online or at your local ethnic grocery store. And just yesterday, I blogged about how you can find healthy & tasty, creative meal ideas by centering your cooking inspiration around coupons. And today, I bring you yet another idea for how to cook a healthy meal on a budget: Take inventory of your kitchen pantry and fridge.
Now this isn't as daunting as it sounds. You don't need to lift or examine anything, or reorganize your entire pantry in the process. All you have to do is get a piece of paper and write down a list of items that perhaps haven't gotten a lot of use (or exposure to natural light!) lately but could perhaps be incorporated into a meal of some kind. In other words, try to find food items that you'd like to "use up" but that could still be made into a tasty meal of some sort.
Simply put, this activity is the food equivalent of going clothes-shopping in your own closet to find new outfit combinations you never even knew you had. :)
Before proceeding with this exercise, I have one word of caution: Make sure you're in a solid state of mind when you conduct this little inventorying exercise. What I mean is this: While I'm not about to send my sister, who happens to be a psychiatrist, to visit all of your homes to administer a mental fitness test :), it's of the essence that you do your inventorying when you're in a calm (read, "non-panic-button-pushing-but-still-conscious") state of mind. I cannot stress this enough. Make sure that you are not having one of those "moments," in which whatever ingredients you choose to combine in the kitchen won't be thoroughly regretted later at the dinner table by both you and your family. :)
Please note, this is NOT an exercise in "getting rid of foodstuffs" by way of inflicting them upon unwitting dinner guests. :) Using up items is not necessarily the same thing as getting rid of them!
As my mother & sister like to joke, many a calamitous cooking disaster has begun with five little innocent-sounding words: "What can I use up?" :) There have been many unfortunate tales of woe revolving around such dire kitchen miscalculations, several of which have been comically recounted by the female members of my family. Of course, I'm not at liberty to release any of the details, having been sworn to secrecy on pain of torture by spatula-beating (LOL!). All I will say is that the results weren't pretty.
Every cook, no matter how excellent or experienced, has had their fair share of culinary bombs and bloopers. Such is the sacrificial offering which must be made to the Kitchen Muse in the name of creative experimentation. :) But it is better for one to at least try to stack the cards in one's favor by starting out with a relaxed and natural state of mind, which acts as a primer, nay the foundation, for inspired cooking. Not surprisingly, a steady mind gives way to a steady hand and heart. :)
This reminds me of a certain hilarious incident from my past, one which has no doubt been comically retold by my mother on numerous occasions, in which I decided that I would take all of the leftover lipsticks in my bathroom drawer & combine them into a new shade. Yes, I created my very own shade of lipstick, and it should've been named "Vampira," because it was a not-so-lovely brownish purple color that, when applied, gave the impression that all of the color had been drained from my face. :) See, there was a reason those shades had been left over in the drawer. It would have been so much smarter if I'd have just chucked them in the bin instead of temporarily morphing myself into a cosmetical "Dr. Frankenstein." ;) Attempting to use up all the ingredients in your pantry without paying mind to their expiration date or actual originally-intended purpose is the culinary equivalent of this activity. :-D
Such impulsiveness is generally ill-advised. :) Rather, write down about 20 ingredients on a piece of paper, and then go online & search for a recipe based on a few of these ingredients -- feel free to search this blog if you like :) -- or use a recipe generator like RecipePuppy or CookThing.
That way, the exercise becomes a practical, problem-solving tool, instead of a "Rorschach" experiment. :)
Good luck!
-C
Saturday, September 12, 2009
0 If It Clucks Like A Delicious Peruvian Rotisserie Chicken..... It Must Be El Pollo Rico :)

Apparently, I'm on a roll & just can't stop writing this week. This time the subject is chicken.
If you are a Facebook friend of mine, & saw my most recent status updates, no doubt you probably saw this post:
"OMG, OMG, OMG. I think I've hit the jackpot of recipes. Is it true?! Does this recipe actually replicate the taste of El Pollo Rico's nationally-famous Peruvian chicken? Now I've just GOT to try it. I know a few people who've since moved away from DC, who will be VERY interested in this recipe. Hopefully it'll help quell a little bit of their homesickness & cravings for this unbelievably delicious chicken. :)"
I took a friend of mine to this restaurant several months ago. As a former DC area resident, she'd somehow missed eating at this place while living here & had been wanting to try it ever since. Of course, I had no problem complying with that request. In fact, I seem to recall that I was fairly insistent about taking her there. :)
She had a similarly ecstatic reaction to this place. It's the same with almost all of my friends I take there. It just can't be helped. All they do at this place is pollo a la brasa -- it's the main event, baby! -- but man, oh man, do they know how to "do it right"!
I even wrote a lengthy Yelp entry on the topic, writing, not one but two, entries on the subject of this place's legendary chicken, which inspires cravings in local area residents like you wouldn't believe.
Bock, bock, bock!!!!!
0 Some Creative Ways to Generate Easy,Thrifty, & (Shock, Shock! Yes, It's True!) Healthy Meal Ideas
 I wanted to share a very simple but creative way to save money & generate meal ideas in these budget-conscious times: Base your meals around coupons.
Now, that doesn't mean I'm suggesting that you create a dinner based around "Little Debbies." :) Or whatever happens to be on sale at the moment. You don't have to be at the mercy of grocery store flyers, coupon mailers, or the advertising & coupon inserts in your Sunday paper to create healthy meals on a budget. :)
There's been a lot of media coverage about the "high cost of cheap food." But I'm not talking about funnel cakes and fast-food here. I'm talking about fresh fruits and vegetables, grains, and other basic food staples which can be used very inexpensively to make healthy, fresh meals.
What I'm suggesting is this: Find some coupons for a food item with high nutritional value, and use them to jumpstart your brainstorming process. Perhaps the meal will center around this ingredient as the "main event" or perhaps it will be used as a background element. The point is that this method is a tool to help you generate ideas and focus in on a solution.
A lot of times I find that it's easier to come with meal ideas if one has something in mind or at least some kind of tool or resource to help narrow down the vast array of selections, as opposed to asking the open-ended question, "What the heck should I make for dinner?!" :) Such questions have been known to strike fear into the hearts of even the most experienced cooks, especially when one is short on time & overwhelmed with the many things one must do in a day. Most creative souls know that if they wait for inspiration to strike, that there are those days when they might be waiting for quite a while. :) A more proactive approach is to look at the situation like a jigsaw puzzle where one can best solve it by working the outer edges and corners first. :) Either that, or one can start by assembling the pieces with the instantly recognizable images! This is a much better way to go about finding a "solution" versus dumping the entire 1000 piece jigsaw puzzle out onto the table, crossing one's fingers, & hoping for the best. :)
 Either way, you get the metaphor. Formulate a strategy. Narrow down the number of variables you have to simultaneously contend with and then take the step-by-step approach, as a means of solving the "problem." [OK, this isn't the same thing as a calculus exam; no one will be grading you on your ability to come up with "creative dinner solutions." :) ]
The reason for why this method is so effective is really quite simple: You don't just pull creative ideas out of a hat.  Really, creativity doesn't work like that. Yeah, yeah, I know there are some people who say that they don't have any idea where such-and-such idea came from, but if we really analyze the creative process, there is a lot of evidence to support that creative ideas are actually formed over a long period of time; they come from a long, slow mulling-over of thoughts, both consciously and subconsciously. It is a "percolation" of the mind, if you will. And a lot of that occurs in the unconscious mind -- in both waking & sleep states. There is also a certain "ebb and flow" of the creative process itself, in which the ebb isn't actually an inactive period in the mind; the mind is still processing information, but to the naked eye of the conscious observer, it might just simply look that way. Anyhow, this isn't a discourse in psychology or the biological sciences.
My larger point is this: When it comes to generating ideas, limitations can actually be a good thing. As the expression goes, "Necessity is the mother of invention." And nowhere is that more true than in the kitchen. I find that my most creative ideas come from having to work within a limitation of some sort. This is not stifling; it's actually liberating, because it forces a person to "find solutions," often in an unorthodox way that one would not have thought of otherwise (i.e., under "normal" circumstances).
Anyhow, here's an example of how you can put "coupon-based, meal-idea brainstorming" to work for you: The other day I had a coupon for 2 half-gallon cartons of grapefruit juice. Now how the heck can I get a meal idea out of something like this, you might ask?! Well, grapefruit juice can be used in some surprising ways, let me tell you. :)
One of the more obvious ideas would be to use the juice for breakfast or freeze the juice & turn them into juice popsicles & eat them as snacks. But that's not really a meal, now is it? A much more interesting idea would be to use the juice for a smoothie for either breakfast or lunch. This is especially useful for a meal-on-the-go. I even happen to have an original recipe for that. Grapefruit apricot smoothie, anyone? ;)
And then we can get even more creative with ways to incorporate grapefruit juice into recipes. Some ideas: Grapefruit juice can be used as an ingredient in glazed chicken, fish, beets, and various other dishes. It can also be incorporated into a vinaigrette for a salad. And so on & so forth.
This exercise can be rather fun. Just recently, I looked through my coupons and challenged myself to create meal ideas from multiple coupons. Now, THAT can be a real flexing of one's creative muscles. LOL!
Often, I'll look through my fridge and cupboards, and see what I can make from what's lying around the house. Even if my supplies are dwindling, I can usually come up with something. Or, if not, I consult online resources for additional help.
One site that I highly recommend for generating meal ideas is RecipePuppy. This site will search for recipe ideas based on the ingredients you plug into its search engine. I tell you, this site rocks! Not only that, but they are on both Twitter (@RecipePuppy) and Facebook, & even happen to have their very own Twitter search bot, where you can tweet some ingredients to RecipePuppy's @recipebot, and you'll get some recipe ideas tweeted back to you using the ingredients you specified. Pretty cool, eh?!
RecipePuppy also has a site called CookThing, which has a similar function.
So next time you're struggling for meal ideas, try following some of the above suggestions. Hope these ideas help you!
Cheers,
-C
Friday, September 11, 2009
2 Phew, This Is Hard Work!
 I just added five -- count 'em, five (!) -- posts (including this one & the one I just finished that was backdated from July!), & am just about ready to keel over from all the writing. :)
To boot, I fell asleep on the couch again around 6 pm, and it royally screwed up my sleep schedule. So here I am at 5:54 am, still awake, not having gone to bed since, er, 6 pm. :)
Of course, I enjoy writing, but frankly sometimes the actual documentation process itself, especially for a new recipe creation, can be a bit tedious. Sometimes I'd love to just be able to come up with an original recipe and have all the ingredients and instructions automagically recorded for me. :)
For me, the real fun's in the recipe creation process & the story-telling that goes along with it. :)
Perhaps the other reason the process is so "painful" is that, as you probably have already figured out by this point, I like to put a lot of details into each post. There are a lot of crucial details, and due to my perfectionist and den-mother-like tendencies, I'm going to do everything in my power to ensure that when it's time for you to go through the cooking process, that your experience turns out well. :)
[And if that means describing something in carefully detailed, precise language, then so be it, regardless of how much effort or time it takes for me to do so. A recipe blog is one place in which skimping on information could be potentially dangerous. ;) ]
Anyhow, I hope you like these last few posts. Hopefully the enormous amount of time and effort put into the documentation process proves to be worth it in the end -- for both creator and reader alike! :)
Good Night -- er, I mean "Good morning!" ;),
-C
Thursday, September 10, 2009
0 Guess Who's Going to Be the "Featured-Chef-of-the-Month" on CookEatShare.com?! :)
 Just a quick update. I've got some exciting news: The website, CookEatShare.com would like me to be a featured chef there for an entire month. This is so cool!!!! I feel so honored. Wow. Just wow!
Here's how it happened: A company representative by the name of Susan left a comment on my blog roughly a month ago, indicating their interest. Here's an excerpt from that letter. (Certain identifying information has been removed/concealed as a courtesy to the author):
"My name is Susan and I work with a high traffic cooking site called www.cookeatshare.com. I have tried a few recipes of yours and was very impressed. We would like to make you a featured chef on our site in August or September. Our 'featured chef' section, which is at the very top of our home page, gets tremendous exposure to our over 300,000 monthly visitors. You can see it here...www.cookeatshare.com. The featured chef also gets exposure in our monthly newsletter, which goes out to a very broad audience.
We are a cooking social network for professional chefs and foodies. We've grown rapidly over the past year and now reach over 300,000 unique visitors on a monthly basis. We've had great write ups in the Daily Candy, Eater, San Jose Mercury News, Orange County Register, and many other reputable sites.
We really like the recipes and other content you post on Cook. Eat. Drink. Blog., which is why we'd like to make you a featured chef. You can link back to your blog from your profile and from your recipes, so this is truly a win-win. Creating a profile and uploading recipes can be done in just a few minutes, and I can help as much as you need me to.
You can reach me at (email address). Or just sign up on CookEatShare and send me a message through the site. I look forward to working with you!"
0 Recipe #52: Tilapia Veracruzana
No that's not a misprint. It only looks like I skipped "Recipe #51," but that's because I haven't actually posted it yet. :) (It's sitting in my "drafts" box, while I try to locate my chicken-scratch notes for the recipe. ;) ) -->Update (as of approximately 5 am on 9/10/09): That recipe has now been posted, here.
Anyhow, after last night's 6-mile run, I fell asleep early -- I accidentally dozed off on the couch sometime around 9 pm (?!) & slept there the entire night! Oops! -- & am now up at 5:30 am. So, in other words I now have a bit of time to type up the recipe I made for last night's dinner. :)
The below dish is an original recipe, but it's not mine. It's my mother's preparation, & it's fabulous. In fact, this is a dish that people who don't even normally like fish will actually like. Trust me on this. I have proof. (More on that later!)
Part of the reason for this is that the fish is breaded. So, in other words, it'll even appeal to the 99% of the American population, who, as little kids, have fond memories of growing up on fish sticks and ketchup or "fish 'n' chips" for lunch/dinner as their first "fish-eating" experience. :-D
While I do love fish, I must admit that I'm not a huge fan of tilapia. Having said that, here is the story of how I came around to the idea of eating tilapia, and how I convinced Erik, my squeeze, to eat it as well. Hint: It has something to do with this recipe. :)
I consider the fact that I was able to get Erik, who's not exactly a big fish-lover in the first place, to eat fish of any sort -- let alone tilapia! -- to be a major triumph. Corey - 1, Erik - 1. Yes, everyone came out a winner here. :)
 From a nutritional standpoint, there are several reasons to eat tilapia. First of all, this fish is high in protein and low in saturated fat, but still contains a decent amount of Omega-3s, the heart-healthy fatty acids whose benefits, by now, have very likely been trumpeted to the entire planet and beyond. I've also written a few articles about their benefits, and have probably mentioned them ad naseum on this blog and elsewhere. ;-) In fact, a 3 oz. serving of tilapia provides over 100 mg of Omega-3s, more than hamburger, steak, chicken, turkey, or "oinkety-oink." :)
Anyhow, back to the story: I'd previously told my mother that I wasn't a huge fan of tilapia, having eaten my fair share of it (in it's unbreaded and unadorned form) growing up. However, she'd apparently either forgotten or ignored this small fact, and made it anyhow for dinner one night during my stay there a few weeks ago. ;)
On top of that, there was yet another reason for my dislike of tilapia -- an unpleasant "food memory association." You see, I'd gotten rather sick of eating it while living & working in East Africa many moons ago, (another story for another time), where restaurants there almost always serve it fried and breaded. It's not that it wasn't tasty, but there's only so much fried food & tilapia-eating that one person can take on a weekly basis. :) While I don't normally make a practice of eating fried foods, I didn't have much choice, since there was a limited range of things that I was able to eat (due to a some dietary restrictions, etc.). Long-story short, the reason I'd stuck with the tilapia is that when I tried the chicken, it tasted like fish; upon further inquiry, I discovered that the reason this was so was because their chickens had been fed "fish meal." YUCK! Well, that certainly explained THAT. Thus ended the extent of my chicken-eating while I was staying at this particular hotel. :) (To be fair, I'd also had some amazing culinary experiences while in this very same locale, including my very first Ethiopian meal, but again, these are all stories for another time.)
Anyhow, back to the more recent dining experience I'd had at my mother's house: I have to say that I was pleasantly surprised with the meal my mother had prepared that night, and -- dare, I say it -- even shocked at how good it was. Well, that certainly changed my mind on the spot about tilapia. It was incredibly delicious. In fact, it was so good that I'd gobbled up every mouthful, probably in record time (!), and then kept raving for about 5 straight minutes to my mother (the cook!) about how amazing it was.
Apparently, my mother had made a lot of notable improvements to the dish since my last tasting experience at their house: Whereas before she'd floured the fish, she now substituted breadcrumbs for the flour, which made it taste markedly better!
This could also possibly explain why the first time I made tilapia back at our household in the city -- using the original, unmodified recipe (i.e., with the flour!) -- was also the last. ;) Frankly, both Erik and I hated the way it had turned out when I used the flour preparation. In fact, the experience had been so unpleasant that both of us had vowed never to eat tilapia again!
So imagine my surprise when the very same recipe with a slightly different preparation turned out to be delicious! Yes, the breadcrumbs do matter THAT much. :)
 Truth be told, tilapia is a rather bland, unexciting fish. It really does NEED flavoring, desperately! Having said that, it IS perfect for breading and also for picking up other flavors. When making a breaded fish, you don't want to use a fish that's terribly pungent or overpowering in terms of taste.
Anyhow, when I got back home, I was determined to try the new version of the recipe, even though I knew it would take a fair deal of convincing to get the idea past Erik, especially since we'd both been previously disinclined to try it again due to past experience, and on top of that, he wasn't exactly a big fish lover in the first place. ;)
In fact, when I told him I wanted to try making tilapia again, Erik wasted no time in reiterating his thoughts on the matter. :) So, his initial resistance at my request to pick up some tilapia fillets at the supermarket didn't exactly come as a surprise. :)
 As a person who'd grown up with a number of unpleasant seafood & fish-eating experiences (i.e., eating the devil's food of a crab, strongly fishy-tasting fish, etc.), Erik had already been predisposed to avoid the stuff. So taking all of the above combined factors into account, I knew it was going to be an uphill battle, and even if I succeeded in getting him to buy the fish, that I'd be still cooking dinner for a fairly skeptical audience.
In order to convince him, I told him that my mother had made the same dish when I went home a few weeks ago, and that my initial reaction, like his, was hesitancy and uneasiness, and also might've included a bit of eye-rolling. ;) And then I proceeded to describe my shock and amazement at how good it was. At first, he wasn't convinced. So I kept working on him. It was a gradual process of wearing down his resistance. :)
As you now know, I managed to convince him to try it again. I kept raving to him about how good it was, etc., etc., until he couldn't take it any more. It might very well be that the only reason he bought the fish in the first place was to stop hearing me talk about how good it was. :)
Well, it looks like Erik and I have both eaten our words about "vowing to never eat tilapia again." Thankfully, Erik was a good sport about last night's dinner: He acknowledged that "yes, it was good" and even voluntarily admitted that his "previous opinion of the fish had been amended." :)
Anyhow, enough blathering about our "tilapia conversion" story. :) Here's the recipe.

Tilapia Veracruzana
(I forgot to take a picture of the dish when it was done, so you'll have to settle for a stock photo for now. :) )

Ingredients:
2 4-6 oz. tilapia fillets
Jason brand flavored bread crumbs (Jason's simply has the best flavor, no contest.)
1 Tbsp. olive oil
about 2 tsp. capers
 about 1 oz. julienne-cut sun-dried tomatoes (i.e., the kind that's not packed in oil)*
 1 14.5 oz. can of diced tomatoes, with juices*
1 medium-sized fresh vine riped tomato, diced
10 Greek olives, pitted & sliced into quarters**
Directions:
1. Gently wash fish fillets and put on a plate. Do not dry; the moisture is needed in order for the breadcrumbs to stick to the fish. :) Lightly bread fillets and put aside.
2. In a large (nonstick) skillet, pour olive oil & tilt pan around to evenly distribute. Heat olive oil on medium-high heat & then add breaded fish fillets. Sauté fish for 1 minute on each side & then put fish back on plate. Please NOTE that you should NOT cook the fish all the way through at this point. (That comes later. :) )
3. Add canned diced tomatoes (& their juice) and fresh diced tomatoes to skillet. Cook for about 3-5 minutes, or until liquid is reduced by about half. Then add all other ingredients to skillet, making sure that sun-dried tomatoes have been submerged in the tomato juice. Cook for about another minute or so. Be careful that the ingredients at the bottom of the pan don't burn. If necessary, add a small amount of water to pan to keep ingredients from burning.
4. Add breaded fillets back into pan. The easiest thing to do is to first clear a path for them by adding the fillets one at a time to each side of the pan, each time covering the fish fillets with the tomato mixture. Cook for about 2 more minutes. Tilapia cooks very quickly, so be sure to watch the fish very carefully, so you don't overcook it. (You want the fish to still be tender & flaky!)
5. Remove from heat & serve. Enjoy!
Yield: Serves 2.
Serving Suggestions: This fish is a lot to eat, but if you'd like to add a side, I'd recommend rice or couscous &/or a vegetable like steamed broccoli or spinach.
Chef's Notes: *Tomatoes: I use about half of a 3.5 oz. package of Bella Sun Luci julienne-cut sun-dried tomatoes. They are extra soft & moist, & perfect for enhancing the flavor of this dish. As for the canned tomatoes, do NOT drain juice from can. I like to use Hunt's 100% Natural Diced Tomatoes. A bonus: This kind has a pop-top lid, so no can-opener required. :)
**Olives: I like to buy olives with pits because they stay fresher longer; in other words, it's best to make the effort to pit the olives yourself. :) Also, I like to use Greek olives instead of the more traditional Kalamata, because they are better suited for this particular dish: They deliver more flavor without overpowering the other flavors of the recipe. Also, Greek olives are less salty than Kalamata; the capers & canned tomatoes already provide plenty of salt! Culinary balance is key.
Wednesday, September 9, 2009
0 Cooking For the Time-Challenged :)
 I know that this isn't a very chef-like thing to admit, but lately I haven't felt much like cooking or creating new recipes. GASP!
Part of the reason for this is that I've been really, really busy, particularly with various work-related projects & marathon-training, & so, haven't had much time to cook. In these situations, I usually revert back to making simple & healthy meals which take "2 seconds" to make. That also usually means falling back on "old standbys," many of which happen to be found in this very blog. Yes, it's probably no surprise that I use this blog as my very own online cookbook. :)
Anyhow, I just wanted to say that there's NOTHING wrong with cooking simple meals. The kind that have 3 or 4 ingredients made from fresh whole foods. In fact, sometimes these meals can be the best, most enjoyable kind.
Normally, I like complexity -- in flavors, etc. -- and absolutely love making elaborate, gourmet dishes when & if time allows -- but right now, I just don't have the bandwidth. So simple & fresh is what's for breakfast, lunch, & dinner.
At some point (READ: when I can find the time), I'd like to post a few of these meal suggestions, which hopefully will help make your lives easier, healthier, & happier.
Some of you might recall that a while back I'd posted a series on my running blog called "Simple, Healthy Meals." I'm thinking about reviving that series, transferring over some of the recipes here, & adding a few new ones to the mix.
In the meantime, check out this post.
Monday, July 27, 2009
1 Recipe #51: Get Your Omega 3's -- Fresh Basil Pesto, Made with Walnuts & Almonds
 (As promised in a subsequent post, below is "Recipe #51," a backdated recipe post that I finally finished!)
Today I came up with a delicious original recipe as a way of incorporating more Omega-3's & other nutrients into one's diet. By substituting the usual standard "pesto" ingredient of pine nuts with walnuts & almonds, it's possible to create a much healthier pesto, which is lower in fat by almost 4 grams!
As usual, this recipe has been thoroughly taste-tested by some very picky eaters before receiving the "Cook. Eat. Drink. Blog." seal of approval. :) However, before I get into the recipe, I just would like to say a few words about the benefits of walnuts & almonds:
Two excellent sources of Omega 3s are almonds and walnuts. Omega-3 fatty acids play a very important role in our health, as they are able to reduce inflammation in our bodies. They are the "good kind" of fat, which helps to lower the bad kind. The kicker is that since the body can't produce Omega 3s, we have to consume them instead.
Additionally, almonds & walnuts also contain monounsaturated fats, the same kind of heart-healthy fat found in extra virgin olive oil, which also makes an appearance in this recipe. :-D
Both Omega-3's & monounsaturated fats have been shown to have a beneficial effect on cardiovascular health, & are associated with a reduced risk for heart disease. For example, the Omega-3s found in walnuts prevent irregular heart rhythms and also benefit those suffering from asthma, rheumatoid arthritis, eczema, and psoriasis.
 While both almonds & walnuts have a high caloric content (i.e., 575.0 calories per 100 g & 618 calories per 100 g, respectively), they are also high-energy, nutrient-rich foods as well. Case in point: Did you know that one small serving of walnuts has more protein than an egg?! [Of course, as common sense would dictate, it's a good idea to consume moderate, balanced portion sizes of these foods during your meal or snack. :) ]
Almonds and walnuts have excellent nutritional value: Both are incredibly rich in manganese, magnesium, iron, copper, phosphorus, zinc, selenium, thiamin (B1), riboflavin (B2), niacin (B3), pantothenic acid (B5), vitamin B6, folic acid (B9), and vitamin E. In their pure and unadulterated form, both are low-sodium, high-fiber foods.
Including these nuts in your diet keeps your heart and blood healthy. Both are rich in powerful cholesterol-lowering antioxidants as well as phytochemicals which may help to prevent cardiovascular disease and even cancer. Their high magnesium content positively affects the arteries and veins, and improves the overall flow of nutrients through the body. Almonds are loaded with potassium, a mineral which helps the body maintain a normal blood pressure and protects against hardening of the arteries. Walnuts are high in calcium, which also helps to protect your heart, not to mention its many other benefits.
 Studies have shown that both of these nuts may be helpful in preventing gallstones. Regular consumption of these nuts also helps to lower cholesterol levels, control high blood sugar and weight, and improve cardiovascular functions.
Walnuts also contain trace amounts of iodine, which plays a significant role in maintaining efficient metabolism processes and levels, destroying toxins in the body, and ensuring strong and healthy skin, teeth, nails and hair.
Almonds lower the risk of high blood pressure, cardiovascular disease, and diabetes. Their high vitamin E contact might explain the reason why they are associated with a decreased risk for heart disease. Whatever it the reason, there appears to be a correlation between eating almonds and improving one's cholesterol. :)
Some ideas for incorporating more almonds and walnuts into your diet:
--Add a handful of chopped walnuts or almonds to your morning cereal. Use on cold or hot cereal (like oatmeal, Cream of Wheat, etc.).
--Sprinkle nuts on a salad.
--Try substituting almond butter for peanut butter on toast or in a sandwich. Its yummy!
--Take small bags of almonds &/or walnuts with you to keep with you, so you can reach for them as a snack.
--Incorporate these nuts into your meals in alternate forms: Use walnut oil for salads and almond meal in baked goods.
--Substitute almonds and walnuts for other less nutritious nuts. Find walnut & almond-based recipes or modify existing recipes, etc. Or even easier, make the below recipe. :)

Fresh Basil Pesto, Made with Walnuts & Roasted Almonds
Ingredients:
3 Tbsp. whole plain raw almonds
3 Tbsp crushed walnut pieces
1/2 c. extra virgin olive oil
3 medium-sized garlic cloves, roughly chopped
6 c. fresh basil, destemmed and loosely packed
2 Tbsp lemon juice (fresh) (NOTE: Lemon juice is used for flavoring & also as a preservative; the citric acid in the lemon juice helps to prevent discoloration upon exposure to the air.)
1 c. Asiago cheese, freshly shredded (NOTE: For best results, use block of Asiago and shred using microplane grater/zester.)
salt, to taste
cracked black pepper, to taste
Directions:
1. Lightly toast almonds in oven or toaster; watch them carefully so that they don't burn. Then place toasted almonds, walnuts, olive oil, and garlic in food processor, and pulse until the mixture is finely ground.
2. Next, place basil into food processor, adding a small batch at a time (via the feed tube) while pulsing the mixture until it becomes thick and smooth.
3. Stir in the shredded cheese and lemon juice, and blend until desired consistency is obtained. Add salt & pepper to taste.
Yield: 4-6 servings.
Serving Suggestion: Serve atop pasta. Other ideas: Use pesto as topping for chicken, fish, etc.
Variations: Instead of basil, try using parsley, cilantro, mint, spinach, or kale.
Chef's Notes: Pesto will keep in the refrigerator for about 1-2 weeks. IMPORTANT: If you plan to freeze the pesto, it's best to leave out the cheese and add it after you thaw out the pesto. Cheese doesn't freeze very well.