
Thursday, March 31, 2011
0 Recipe #256: Classic Caesar Salad, Made Fresh!


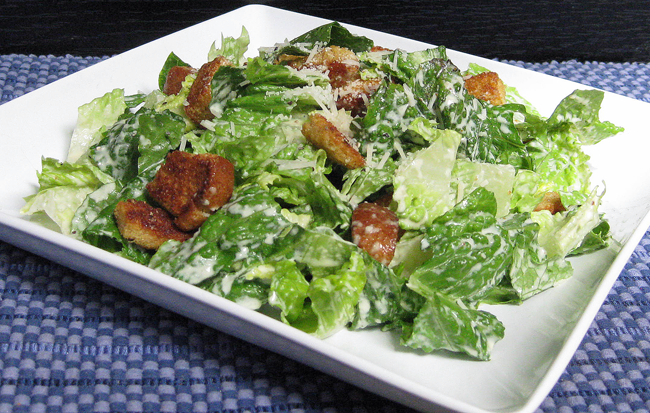 |
This is Caesar salad the way it was meant to be enjoyed: Fresh & made from scratch! Cool and crisp hearts
of romaine, light and lemony Caesar dressing, a generous amount of shredded Parmesan, and freshly made,
crunchy, seasoned croutons. Mmmmm, delicious!
|
I have a very fond childhood memory of going to a beautiful vacation resort with my family as a young girl, and having the most spectacular, freshly made Caesar salad ever, made tableside, i.e., the way it really was meant be made and served. :)
The funny thing is that after the very first night of our trip, in which we'd discovered this unbelievably amazing salad, I think we probably had it almost every night for dinner, for the rest of the trip. ;)
The resort was in an out-of-the-way location on several acres of land -- complete with hiking trails, horse stables, beautiful mountains, and waterfalls -- and so, the hotel restaurant was the only real game in town for dinner. That is, unless you'd already packed your own freeze-dried food & planned to eat it on the trails. LOL. It was a gorgeous place to vacation. Of course, this was a long time ago and that resort is no longer in existence, but the memory of those salads still stick in my mind. Yes, those of you who know me well can now make jokes about my photographic memory for food. ;)
It seems that these days, most restaurants serve pre-made or commercial, bottled Caesar salad dressing, which is undoubtedly a sign of the times. I sometimes wonder if there are still human beings left on the planet who've had the (recent!) pleasure of sitting down and enjoying a fresh Caesar salad made from scratch, and at that, one made tableside. If such rare persons still exist, please feel free to let me know. :)
Yeah, I know the tableside Caesar salad experience is kind of an old school thing that's fallen out of fashion, and probably hasn't been cool since the 70's (which, I realize, probably seems like prehistoric times to some of you ;) ), but the experience is something unique and fun to witness. Whether you decide to prepare your Caesar salad by doing all of the prep work by hand, tableside, or by combining together all of the dressing ingredients in a blender and then mixing them with the salad, the point I'm trying to make here is that, in terms of taste, there's nothing quite like the experience of enjoying a freshly-made Caesar salad.
These days, most people don't have the time or the patience to make Caesar salad from scratch, and honestly, the same effect -- in terms of taste and texture -- can be achieved by taking some shortcuts without sacrificing either. For one, a blender can be used to make the dressing for expediency's sake. So, unless you're a complete masochist or have nothing else better to do, I'd suggest making the dressing this way. :) That's how I've written the recipe instructions, although if you'd like to make the salad by hand, I've also included those instructions in the "Chef's Notes" section of this post. Of course, if you want to put on a show to amuse your guests, by all means, go for it. :)
As many of you surely already know, there's a whole production that goes along with the making of a fresh Caesar salad in a tableside, restaurant setting. It's sort of like a mini cooking show, except without a camera crew and a much smaller viewing audience. ;) I remember that, at the aforementioned resort, my family & I used to love watching the waiter go through all of the steps. We'd watch him mash the garlic and the anchovies into oblivion with a fork, crack the egg into the bowl, and whisk everything together by hand, etc. It was a long process, but the end result was worth it, because it was really was such a tasty treat. Of course, it wasn't so amusing on the nights we'd arrived at the restaurant a bit on the late side. By that point, we were absolutely starving, and so, it didn't take long before the whole affair had turned into what seemed like a neverending trial of our patience. ;) On those nights, the final product couldn't arrive fast enough. It seemed painstakingly slow, like we been given front row seats to watch a work of avant-garde performance art, in which the main attraction was watching paint peel from the museum ceiling. ;) Yeah, hurry up and skip all the fanfare. We want to eat. NOW. :)
The whole rigamarole of the tableside Caesar salad experience is a bit like going to a Japanese steak house. It's certainly not the place to go to if you're in a rush, particularly if you expect to be in & out of there in under an hour for your mid-day office lunch break, which, let's not forget, includes travel time. ;) But of course, you can't expect lightning fast service at a restaurant like this. After all, it's not a drive-thru. ;) And anyhow, that's not the primary reason for your visit. In part, you eat there precisely because of the show they put on there. That, and because the food is (hopefully!) delicious. Of course, the tableside Caesar takes far less time to prepare than an entire Japanese meal made on the hibachi, but nevertheless, you get my point.
Of course, if you make a Caesar salad at home, the only person holding up the show is you. ;) If you're fast enough with the kitchen prep (or become so after a bit of practice ;) ), you could even try making the salad for a dinner party as part of the evening's entertainment. :) If you've got guests at the party who don't know each other very well and need an ice-breaker, it could even turn into an conversation piece. ;) Or, make it for dinner one night for your family, and get your family members involved. Everyone can pitch in. This way, you can bring the experience home, except without all of the awkward small talk with the waiter, and the even longer awkward pauses. ;) Who knows, you might turn out to be singlehandedly responsible for bringing the tableside Caesar salad-making experience back into vogue. :)

Classic Caesar Salad
Salad Ingredients:
22 oz. package (of 3) hearts of romaine (lettuce), sliced/torn into bite-sized (1 1/2") pieces, washed, spun dry with a salad spinner, & chilled in the refrigerator until ready to use (approximately 14 c.)
2-3 Tbsp. Parmigiano-Reggiano cheese, (freshly) shredded or shaved
freshly ground pepper (from a pepper mill), to taste
Caesar Dressing Ingredients:
1 extra large, very fresh egg* (or 3-4 Tbsp. mayonnaise, if you prefer not to use partially cooked eggs)
2 small anchovy fillets (from a tin), mashed (about 1 tsp.) (or, if unavailable, use 1 tsp. of anchovy paste)
1 Tbsp. garlic, peeled & chopped/halved lengthwise/mashed (about 2 large garlic cloves)
1/4 tsp. kosher salt, or to taste
1/8 tsp. coarsely ground black pepper
1/4 tsp. dry yellow mustard
2 Tbsp. freshly squeezed lemon juice
1/16 tsp. (4-5 drops) Worcestershire sauce
1/3 c. extra virgin olive oil (If you like your dressing a bit thicker than the classic preparation, use 1/2 c. instead)
1/4 c. Parmigiano-Reggiano, (freshly) shredded
Croutons:
3 c. 1" cubes of day-old rustic French or Italian bread, crusts intact (This preparation enhances the flavor & texture of the croutons, although you can trim them if you'd prefer)
1/4 c. extra virgin olive oil
Directions: Coddle the egg: Bring a very fresh egg (in its shell) to room temperature by immersing it in warm water; otherwise, it might crack when coddled. Once the egg has reached room temperature, place it in a mug and pour boiling water around the egg until it is covered. Let stand for exactly 1 minute. (Precision in cooking time is very important in this instance, for should you immerse the egg in boiling water for any longer than a minute, the hot water will overcook the egg.) Drain the hot water, and then immediately run cold water into the mug until the egg can be easily handled. Crack into a small bowl or custard dish and set aside.
Make the dressing: Place the garlic, anchovies, and salt in a blender, and pulse on the lowest setting (i.e., this is the "stir" setting on my particular blender) into a fine, smooth paste. Next, add the pepper, dry mustard, lemon juice, and Worcestershire sauce, followed by the coddled egg (or mayonnaise, if preferred) until the mixture is thick, approximately 1 minute. (This enables the lemon juice to "cold cook" the eggs.) Incorporate the olive oil in a slow steady stream with one hand while whisking with the other until emulsified. (If the dressing stops gets too thick, add a tablespoonful of water or two and then continue until all the oil is added.) When the dressing is well combined, whisk in 1/4 c. of the Parmesan cheese, & continue to blend.
Make the croutons: Preheat oven to 400°F. In a large bowl, add bread cubes, enough olive oil to coat but not drench, salt, pepper, and garlic powder and toss together until evenly coated. Spread bread cubes across a 12" x 17" rimmed baking sheet, in a single layer, and bake 10-15 minutes or until golden brown. Halfway through the baking time, remove from oven and shake the pan to make sure the croutons toast evenly, return to oven, and cook another 3 minutes, until golden brown and crunchy. Remove from oven and allow to completely cool. Set aside. (Croutons can be made ahead & then store in an airtight container until ready to use.)
Assemble the salad: In a large bowl, toss the romaine with the dressing, 2-3 Tbsp. cheese, and croutons until well-combined. Divide salad into equal portions and serve immediately on chilled plates.** Using a pepper mill, crack fresh pepper over each salad, to taste, and sprinkle additional Parmigiano-Reggiano cheese on top, if desired. Serve immediately & enjoy!
Yield: Serves 3-4 as a dinner or lunch salad, or 6-8 servings as a first course/appetizer, that is, if served without any additional ingredients. If you'll be adding another protein source like chicken, shrimp, or salmon, etc., then adjust your salad portions accordingly. (It'll probably make around 4-6 main course servings if you add 4 oz. of protein per salad serving.)
Chef's Notes: Traditional tableside prep directions: To make the salad by hand the traditional/old-fashioned way, you'll need to first add the garlic, anchovies, and 1/4 tsp. kosher salt to a large salad bowl, mash them into a fine, smooth paste, and then, with one hand, add the rest of the ingredients into the bowl in the same order as mentioned in the above instructions, while whisking them together with the other hand. Make sure you pour the olive oil with one hand into the bowl in a slow, steady stream, while whisking continuously with the other hand, so that the dressing emulsifies.
Important Health Advisory: *Please use caution in consuming raw and lightly cooked eggs due to the slight risk of salmonella or other food-borne illness. To reduce this risk, make sure you use only extremely fresh (i.e., a few days old maximum but not over a week), properly refrigerated, clean, grade A or AA eggs with intact shells, and avoid contact between the yolks or whites and the shell. Contamination typically occurs on the surface of the egg shell, but there have been cases in which the egg itself has been infected, generally the yolk, but occasionally the white. However, incidence of poisoning is rare. Please note: Raw or lightly cooked eggs should not be used in food prepared for pregnant women, babies, young children, the elderly, those with weak immune systems, or anyone else whose health could be compromised.
**Due to the inclusion of a coddled (partially or lightly cooked) egg in this recipe, the salad dressing must be refrigerated and used the same day it’s made. Coddling causes the yolk to become slightly thickened and warm. This is safer than eating a raw egg, as it will kill some of the bacteria; however as is the case with eating any undercooked food there are risks involved. [According to the USDA, eggs should be cooked until both the white and the yolk are firm, and the water temperature has reached 165-180°F. Coddled eggs will not reach this temperature.]
If you're skittish about using a partially cooked egg, substitute 3-4 Tbsp. mayonnaise. If you'll be using the mayo, be sure to reduce the amount of oil used, using your own best judgment as you add a little bit of oil at a time, testing the consistency after each addition. (I haven't made the dressing using mayo, so that's why I haven't listed a more precise amount.)
Wednesday, March 30, 2011
0 Recipe #255: Spinach & Potato Gnocchi
I'm back from my travels now, as of a few days ago. I'd gone home (i.e., to my hometown) to spend some time with my family. It was a good trip. While I was there, I took over the cooking to making things easier on my parents. My mother was ecstatic at the prospect of being able to take several nights off from cooking. It was also a great opportunity to share some of my latest recipe creations with them. :)
One evening, I made them an elaborate dinner of various tapas: Anchovies marinated in green sauce, served on crostini, (as well as a separate version made with sardines for my father, since he doesn't care for anchovies), followed by grilled shoestring rosemary-covered sweet potato fries with a sour cream and chive dipping sauce. (The later recipe I created on the fly, so it hasn't been posted yet. I might save that recipe just for the cookbook. Not really sure at this point....) For dessert, I made coconut sticky rice pudding (using white glutinous rice, since they didn't have the black variety), which was topped with poached mangoes infused with Curaçao, and then finally sprinkled with crunchy, caramelized coconut, and served in parfait glasses. Plus, in the same day, I also managed to make an original puréed kale and potato soup (also created on the fly) for the following night's dinner, as well as marinate the tequila-lime chicken, which would later be made on the grill (sans fajitas & other accompaniments) and served with leftover sweet potato fries, for the next night's dinner after that. The whole production took several hours to prepare, but it was worth it. We made sure not to eat as much earlier in the day in preparation for the feast. ;)
The funny thing is that while I was there, some family members (who shall remain nameless ;) ) lost a pound or two while I was there cooking. :) I'm pretty adamant about making and eating meals and snacks at regular intervals, so that probably had something to do with it too. Skipping meals &/or eating large meals with no snacks can really mess with a person's metabolism. And so, the practice of doing the exact opposite, provided one is eating healthy meals in the appropriate portion sizes, will actually help a person regulate their blood sugar and also lose weight over a period of time.
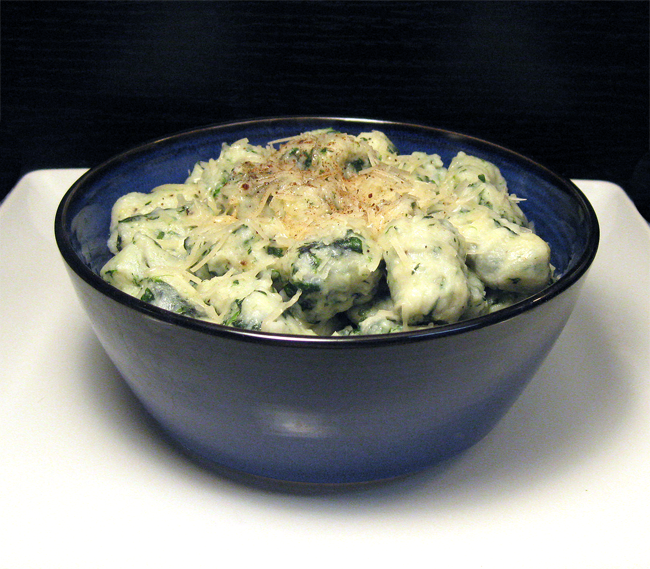
Anyhow, it was great to be back home for a bit. Now that I'm back in DC (i.e., my current home -- I really consider both locales to be home!), I decided to make something simple (and relatively quick!) for dinner tonight, spinach and potato gnocchi. Gnocchi are Italian "dumplings," typically made with potato and flour. They are actually considered to be pasta, and are usually topped with some kind of sauce. Their trademark ridges help hold the sauce and also ensure that the gnocchi cook quickly and evenly. Gnocchi are most commonly served as a first course (i.e., primi piatti), although if you wish, you can certainly serve them as a main course, just like I did. ;) Please be aware that gnocchi are extremely filling, so a little goes a long way.
Gnocchi are fairly easy to make once you get the hang of it, although it might take a bit of practice (and dexterity) to master some of the techniques, particularly when it comes to shaping the gnocchi. When made correctly, the taste and texture of gnocchi is delicate: They should taste like little pillow-like puffs of air that melt on your tongue. If instead, they taste like dense "dough balls," then you need to practice making them a bit more. ;) Although they are usually boiled, they can also be oven-baked (or sautéed) as well.
So, try your hand at gnocchi making. It's a lot of fun!

Spinach & Potato Gnocchi
Ingredients:
1 lb. (or about 3 large) Russet potatoes*, well-scrubbed, unpeeled, and perforated all over with a fork (makes about 3 c. riced/mashed potatoes)
1/4 c. kosher salt (for baking the potatoes)
1 c. unbleached, all-purpose flour, plus more for flouring working surface & dough
1/8 tsp. ground nutmeg
4 Tbsp. Parmigiano-Reggiano cheese, shredded (or about 1/2 - 1 Tbsp. per person)
Directions: Prepare the vegetable ingredients: In a preheated oven set to 425°F, bake potatoes, uncovered, in a glass baking tray lined with kosher salt until slightly overbaked and easily pierceable with a knife or fork, about an hour.
While potatoes are baking, steam spinach in 1/2 c. water in a large (12-13") sauté pan, covered with a lid, on high heat for 2-3 minutes, so that greens are lightly steamed but still retain their color. Drain spinach into a colander, rinse with cold water, and then gather spinach into the palm of your hand and squeeze several times to release remaining excess water. (Try to squeeze out as much moisture as possible, as this will help produce light and flavorful gnocchi.) Finely mince, then place into a large bowl and set aside. In another bowl, thoroughly combine flour, salt, & pepper together and set aside.
When the potatoes are almost done baking, bring a large (6 qt.) pot of lightly salted water, seasoned with olive oil, to a rolling boil over high heat. (This pot of water will be used to boil the gnocchi. Cover with a lid to help boil the water a little faster.) When ready, cool potatoes for a few minutes, just until you are able to skin them. (Potatoes need to be warm but not piping hot when you make the dough, otherwise the ingredients won't bind together properly.) Using tongs, transfer potatoes to a plate. Discard the kosher salt (or reserve for later use), and then quickly skin the potatoes, reserving the skins for another dish if you like. (They still had a dab of kosher salt stuck to them after baking, so I ended up eating the skins as I was peeling them off. ;) So yummy!). Then scoop out the flesh into small manageable chunks and pass through a potato ricer, which will help keep the gnocchi light and fluffy. Rice potatoes directly into the same bowl containing the minced spinach.
Make the dough: Combine spinach and potatoes & then set aside. Next, using a spatula (or the back of a large serving spoon), spread spinach and potato mixture to a 1/2" thickness onto a clean, floured surface, followed by about half of the flour mixture (roughly 1/2 c. or only just enough flour to bind the ingredients together), and form into a mound. Make a small depression in the center. Crack the egg and place it right into the hole. Lightly flour the palms of your hands, and then, using a bench scraper, reach underneath the outside of mound and fold the ingredients into the center, lightly tossing them together. Using the bench scraper and your free hand, continue to fold the ingredients, without kneading them, until the mixture turns into a pile of course crumbs. Next, begin to knead the dough very gently, using a lot less force than you'd typically employ for bread dough. Add the remaining 1/2 c. of flour as you knead, so that only a minimal amount of flour will be used. Use a light touch and work quickly (i.e., you should be able to finish kneading the dough in under a minute), but don't overwork the dough, or gnocchi will be too heavy. If the dough feels too sticky, sprinkle a little more flour onto the dough, but only use just enough flour to keep the gnocchi from sticking to your hands and the working surface. Dough should be moist and firm, but not sticky.
Roll out the dough: Break dough into four equally-sized pieces. Flour the palms of your hands again. Starting with the floured side of the dough facing upwards, roll out each piece into long, 3'4" thick "logs," using the palms of your hands. Line up all of the logs so that they're parallel to one another, and then use a bench scraper to cut them crosswise into 1" inch long pieces.
Shape the gnocchi: Lightly dust the gnocchi with flour before shaping them. To shape the gnocchi, you can use a common table fork or a traditional, ridged wooden gnocchi board (also called a gnocchi paddle). Here are the instructions for the two different methods:
To shape the gnocchi using a fork: Hold the fork in one hand with the tines facing upward, and with the other hand, pick up a single gnocco with your thumb and index finger, grasping it by its cut ends, and place it against the tines of the fork as far from the end of the fork (i.e., the points) as possible, with the cut ends facing outward (i.e., perpendicular to the fork tines). Then, using your thumb, gently press and roll the gnocco against the fork with a gentle but assertive forward motion, down the length of the fork towards the points. The gnocco should curl up a bit over your thumb and make a slight "C" shape. A properly shaped gnocco will have ridges/indentations on its curled exterior, from the impressions made by the fork tines, with a smooth concave depression on its underside from where your thumb was. When finished shaping, place it back onto the floured surface (or onto a floured baking tray). Repeat until all of the gnocco have been shaped.
To shape the gnocchi using a gnocchi board: Rest the bottom edge of the board on a firm surface, tilting it at about a 45° angle. Then, pick up a single gnocco, holding it by its cut edges with your thumb and index finger, and squish it lightly with your thumb along the board while simultaneously pushing it away from you. The gnocco will roll away and curl up around your thumb, forming a cupped "C" shape. Ridges will appear on its curled exterior, from where the gnocco was pressed onto the board, and there'll be a smooth inner curve from where your thumb was. When finished shaping, place it back onto the floured surface (or onto a floured baking tray). Repeat until all of the gnocco have been shaped.
Boil and assemble gnocchi: Transfer gnocchi, approximately 44-45 at a time, into the 6 qt. pot of boiling water. Boil gnocchi in batches until they rise to the surface and float, about 2-3 minutes. Using a slotted spoon, gingerly transfer gnocchi to a large serving bowl, shaking spoon gently over the pot to drain excess water each time before placing gnocchi into the serving bowl. (Gnocchi should be handled very carefully, or else they'll break.) Immediately, transfer to bowls or plates, using the same slotted spoon. If desired, season with additional salt and (black ground) pepper to taste (you can just use a pinch of the leftover kosher salt if you wish). Sprinkle with nutmeg and Parmigiano-Reggiano while the gnocchi is still warm, so that the cheese melts. If desired, top with a light layer of tomato sauce, butter & sage sauce, seven-herb sauce, mint & Kalamata olive pesto, or regular pesto. (Or you can simply drizzle them with a bit of olive oil instead.) Serve immediately, accompanied by a Caesar salad or vegetable side.
Chef's Notes: Selecting and processing the potatoes: *For the best results, select Russet potatoes. Russets are ideal because they are dry and starchy, which, in turn, will help to create light-as-air gnocchi. Too much moisture will make for heavy, gummy dough, so the less moisture the better. If you can't find Russet potatoes for some reason, the Yukon Gold variety will do. Please note that, comparatively speaking, Yukon Gold are a bit waxier and do contain a bit more water than Russets, although some might prefer Yukon Gold for their cold and flavor. Whatever potato you choose, be sure to use a dry, high-starch potato. Also, the older, non-waxy potatoes work a lot better, as they tend to be a bit drier as well.
IMPORTANT: Whatever you do, do NOT use a food processor to mash the potatoes. This will make the potatoes extremely gluelike, and will lead to unpalatable and very heavy gnocchi.
How to make light & fluffy gnocchi: The trick to creating perfect gnocchi is to use as little flour as possible, extract as much moisture from the ingredients as possible, and handle the dough as little as possible.
The bottom line is this: The drier the ingredients, the lighter the gnocchi. This is why it's important to squeeze the heck out of the spinach before combining it with the potatoes and other ingredients. :) Similarly, this also explains why it's better to bake the potatoes on a bed of salt versus boiling or sautéing them. Boiling potatoes, even with their skins intact, encourages water absorption/retention, whereas baking potatoes on a bed of salt in an oven, uncovered, will dry them out. This is also why the potatoes are perforated all over with a fork before they're placed into the oven. The holes made all over the potatoes allow the steam to escape and thus, remove any remaining moisture.
Also, be careful not to overflour the gnocchi as you're working with the dough and shaping the gnocchi. Too much flour, as well as too much kneading, will make your gnocchi heavy, so use a light hand and as little flour as possible when forming the gnocchi.
And lastly, use a potato ricer, which will help to aerate the potatoes, and thus, the gnocchi as well. Although it's not a required step nor is it listed in the above directions, you could also sift the flour and other dry ingredients together if you like, before working the dough. All of these steps will help to yield much lighter gnocchi.
Storage: If you won't be cooking the gnocchi right away, you can also refrigerate cooked gnocchi in a sealed container (or covered bowl) until a few minutes before serving time. Just be sure to let them cool first and then lightly coat them with olive oil before placing them into the fridge, to keep the gnocchi from drying out or sticking to one another. They'll keep for several hours or overnight.
Another alternative is to freeze them: Gnocchi will keep in the freezer for several months. To freeze them, first place the uncooked gnocchi onto baking sheets lined with wax paper, then dust with flour, and freeze until hard, about 1-2 hours. Then remove from freezer and place into a large freezer bag, in a single layer. When ready to cook, simply boil the frozen gnocchi in lightly salted water, seasoned with a drop of olive oil. Cook for about 2 minutes, or until they rise to the surface.
Tuesday, March 22, 2011
0 Recipe #254: Tomato-Basil Soup with Swiss Chard, Kale, & Baby Spinach

I'll be leaving very soon for a trip to visit my parents very shortly, but somehow still managed to finish typing up a final recipe before my departure. :) I created & prepared this soup recipe yesterday, then ate a bowl for dinner that night, and froze the rest. (Soups like these, i.e., ones that are primarily all vegetables, freeze really well.)
It's a fairly last minute trip, so, for the past few days, I've been making a concerted effort to use up all of the perishables in my fridge. This soup is one of the recipes I created in order to accomplish this feat. ;) Enjoy!
Tomato-Basil Soup with Swiss Chard, Kale, & Baby Spinach
Ingredients:
1 Tbsp. extra virgin olive oil
3/4 c. leeks (white parts only), finely minced
1/2 c. shallots (3 large shallots)
1 large fresh bay leaf
1/4 c. dry vermouth
12 c. water
3 c. vine-ripened tomatoes, diced (about 4 large tomatoes)
½ c. tomato paste (almost a whole 6 oz. can)
4 c. fresh, uncooked Swiss chard, cut into bite-sized pieces
2 c. fresh, uncooked kale, cut up into bite-sized pieces
1 c. fresh, uncooked baby spinach leaves
1 c. fresh basil, roughly chopped
1/4 c. fresh marjoram leaves, roughly chopped
1/4 c. fresh Italian flat-leaf parsley, finely minced
1 Tbsp. fresh oregano, finely minced
1 tsp. salt, or to taste
1/2 tsp. ground black pepper, or to taste
3/8-1/2 c. (6-8 Tbsp.) Parmigiano-Reggiano cheese, shredded (or 1 Tbsp. per person)
Directions: In a large 6-8 qt. pot, heat olive oil until shimmering. Then sauté leeks, shallots, & bay leaf for 5 minutes on low heat, stirring occasionally. Deglaze with vermouth, reducing a thin layer on the bottom of the pot. Add 12 c. water, and bring to a rolling boil, covering with a lid to boil faster. Open, add tomatoes and tomato paste. Season with salt and pepper. Stir to combine & distribute the tomato paste, cover, and cook for 10 minutes on medium heat. Then reduce heat to low, remove lid, add greens & all herbs, then cover again, and simmer for 5-6 more minutes. Remove from heat, uncover, & allow to cool for 10 minutes. Discard bay leaf, garnish each bowl with about 1 Tbsp. Parmigiano-Reggiano cheese, and serve immediately.
Yield: About 4 qts., or 6-8 servings (of 2 c. per person).
Variations: Can also add pasta, potatoes, &/or cannellini beans, if desired. To make this recipe vegan, simply omit the cheese, or use a non-dairy cheese substitute like soy cheese, etc.
Monday, March 21, 2011
0 Recipe #253: Coconut Sticky Black Rice Pudding with Poached Asian Pears

For those of you who don't think that fruit-based recipes can't be sweet as sweet as pie, cake, or cookies, I dare you to try this recipe and then tell me that it isn't sweet. ;) If you like super-sweet desserts, this one's for you.
The Thai name for sticky rice pudding is khao neeo, and in Chinese, it's put chai ko. It's one of my favorite desserts, and can be served either warm, cold, or at room temperature. However, this particular recipe isn't your average sticky rice pudding. First of all, it's got whole, fresh vanilla beans, coconut, ginger, and Chinese star anise -- a wonderful, heady combination that'll make your kitchen smell divine. Second, the recipe calls for Chinese black sticky rice, which is naturally sweet. And lastly, the Asian pear slices have been infused with triple sec. Top that with a bit of crunchy, caramelized coconut, and you have a nice contrast to the rice pudding and the pears. Get ready for a rich, complex, and intensely flavorful experience for your taste buds. Yum, yum, yum!
Coconut Sticky Black Rice Pudding with Poached Asian Pears
Ingredients:
3 c. water (for boiling rice)
2/3 c. milled, Chinese black glutinous (i.e., sticky) rice (a.k.a. "Forbidden rice")
1 1/3 c. unsweetened lite coconut milk
1/4 tsp. salt
1 c. water (for making syrup)
1/2 c. honey
1 whole vanilla bean, scored lengthwise
1 Tbsp. ginger, peeled & grated (about 1" piece)
4 whole, small Chinese star anise (about 2 tsp.)
1/3 c. triple sec
Directions: Cook the rice: In a large sauce pot, bring 3 c. water to a rolling boil. Add rice, reduce heat to low and simmer, covered, until tender, about 30-35 minutes, or until almost all of the water has been absorbed. Add more water if liquid cooks down too quickly or the rice isn't quite ready. (When ready, rice should crack open slightly and develop 2 or more beads.) Add coconut milk & salt, cover again, and cook for 7-10 more minutes. Remove from heat and allow to cool for 5-10 minutes, fluff with a fork, and then set aside.
Make the syrup: While the rice is cooling, bring 1/2 c. water to a rolling boil in a separate medium-sized sauce pot. Add honey, then ginger and Chinese star anise. Scrape seeds and essence from vanilla bean into the pot, followed by the vanilla pod. Boil, uncovered, for about 10 minutes, or until honey has completely dissolved and the spices' essences have been released. (Add just a bit more water if liquid should cook down too quickly.) Allow to cool slightly, about 2-3 minutes, before straining and pouring over rice. Set aside until rice has finished cooking. Then strain over rice, pressing the whole spices into the strainer to extract any remaining liquid and essences. Add lime juice if desired. Mix thoroughly and set aside, or refrigerate until serving time.
Sauté and caramelize the pears: Meanwhile, in a large (12-13") nonstick sauté pan, add pears and pineapple juice, cover, and simmer on low heat until they begin to soften and liquid has been reduced to half its volume, about 6-8 minutes. Remove lid, flip pears over onto the other side with a spatula, and deglaze with triple sec until only a thin layer of liquid remains, about 5 more minutes. Place the pears in a medium-sized bowl & set aside to cool to room temperature while you prepare the remaining ingredients. Or, if serving cold, cover and chill in the refrigerator until serving time.
Caramelize the coconut: For best results, do this step just before serving time. Place 2 Tbsp. honey and 2 Tbsp. water into a small sauce pot, boiling until dissolved, about 30-60 seconds. Watch carefully so it doesn't burn. Then add 1/4 c. shredded coconut and stir continuously until golden brown. Remove from heat and set aside.
Serve the pudding: When ready to serve, spoon the rice pudding into small bowls. Top each portion with the pears and then sprinkle with caramelized coconut flakes. Garnish with mint leaves, if desired. Add a bit of low-fat whipped dairy topping if you like. Serve warm, hot, or at room temperature, with herbal or green tea, or other mild, subtle-tasting beverage.
Yield: 4 servings.
Chef's Notes: Be sure to use Chinese sticky black rice and not wild rice. (Wild rice is a dark color, but trust me, it's not what you want to use for this pudding. ;) The taste of wild rice is woody and savory, and totally wrong for a dish like this. Furthermore, wild rice isn't even technically considered to be rice.) Also, since this pudding is very sweet, it's a good idea to buffer/balance out the sweetness with something plain or mild tasting, like a cup of (herbal) tea or a glass of milk.
Variation: If you can't find Asian pears at your local grocery store, simply substitute Bosc or Barlett pears. Also, feel free to substitute other fruit, like mangoes or strawberries. These fruits are good selections because they'll provide a good flavor contrast to the sweetness of the pudding. If you don't happen to have triple sec, Curaçao and Cointreau are two good alternatives.
0 Has Chef Penguin Gone Off the Reservation?

Plus, it's not just with the cookbook writing itself -- -- but there are other work-related and personal projects on the horizon as well. Life is a bit crazy here, but I decided to take a little breather in between the goings-on to let you know what's actually been going on. ;)
Also, in other non-recipe-related news, I'll be literally going "off the reservation" for a while. No, that doesn't mean I'll be moonlighting as a spy or an assassin-for-hire. LOL. Hey, I'm a chef. I create stuff, not destroy stuff. ;) Well, er, that is, most of the time. ;) We won't count the kitchen tools that got bent out of shape in the dishwasher or the minor incident in which I set the kitchen ablaze once during a dinner party. (My guests found that latter occurrence highly amusing. Another story for another time. Perhaps. ;) )
And when I say I'm "going off the reservation," that doesn't mean that I've lost my marbles either, although some people might've been questioning that as they scratched their head at the shepherd's pie recipe, especially the ones who know me. ;) Yeah, that recipe was really for Erik and the other carnivores (er, cough, I mean, mostly male diners ;) ) out there. Plus, it was my own dang fault, because once I'd mentioned the idea, after wondering aloud about whether or not I should make it, the cat was already out of the bag. Basically, by that point, I'd already planted the idea in his mind and then it was too late, especially after he'd gotten really excited about it. And since I've mostly been "cooking for the cookbook" these days, and my latest cooking agenda has consisted almost entirely of vegetable-centric dishes, I thought I'd cut him some slack and honor his request. And plus, it was a highly fitting recipe selection for St. Patty's Day. So there. :)
And let's face it, while I'll be honest and say that shepherd's pie isn't really my thing (it's not something I'd personally seek out and try), it was actually pretty tasty, all things considered. As I said before, I'll try almost anything once, and will only post the recipe if it tastes good and also passes the family taste-test. :) Needless to say, Erik was very enthusiastic about the final product. So, I'm glad the meal made him happy, because I told him he'd eating it for dinner for the next 3 days. Hahaha.
 Plus, I associate meat pies with Sweeney Todd and British nursery rhymes -- you know, four & twenty blackbirds being baked into a pie and such - BLECH! Hahaha. And then, of course, after I started thinking about that, I couldn't get the nursery rhyme, Sing a Song of Sixpence, and the theme song from Sweeney Todd out of my head while I was making the shepherd's pie. Isn't that lovely, eh?! ;) Probably not the most encouraging of signs. Hahaha!
Anyhow, back to the story....
Then, he said, "OK, you don't have to make it." And then when I relented, he said something like, "No, please don't make it, because then it won't turn out like it should. And when you don't want to make something, we all know what happens." ;) Of course, that really pushed my buttons, because I then took it as a challenge, because nobody tells me what I can or cannot do. ;) Hahaha. Of course, I already knew that he'd been employing a bit of reverse psychology, and this was exactly the outcome he'd been hoping for. ;) My suspicions were confirmed when I called him out on it, and his only reply was a very wide grin. :-D He knows I hate when people tell me I can't do something, because then I'll just have to prove them wrong. ;)
I'm sure that my usual subscribers probably didn't know what to make of that shepherd's pie recipe. I know it just didn't seem to fit in with the rest of the recipes here. By now, most of this blog's readers have probably come to expect veggies galore with a few chicken dishes scattered here and there, and an occasional red meat selection or two. So OK, you can count the shepherd's pie as the once-in-a-blue moon red meat selection, even though it's atypical of the recipes I'd typically choose. ;)
So, what did I mean, exactly, when I said that I'm literally going off the reservation? Well, maybe this isn't the typical or proper usage of the word, but I'm getting out of dodge for a few days. Erik'll be holding down the fort here in DC, with the cats et al, while I'll be going home. (And, I mean "home" as in my "original home," a.k.a. "hometown.") As usual, I'll most likely be cooking for my family while I'm there. I can't guarantee that I'll have time to post recipes, as it's most likely only going to be a short trip, but if you do see some recipes pop up here and there, they might actually be postdated autoposts. So, online and IRL friends, please don't think that this means that I'm online or available for IM chats and such. ;) If I do have time, I might pop onto Facebook and Twitter, and of course, I'll be checking my email. If you've got any urgent correspondence, please email or DM me. Thanks!
So, enjoy the rest of the week, and if you don't see a post or two from me here over the next two weeks, expect to hear from me again in about a week. Have a good one!
Toodles,
-C
Sunday, March 20, 2011
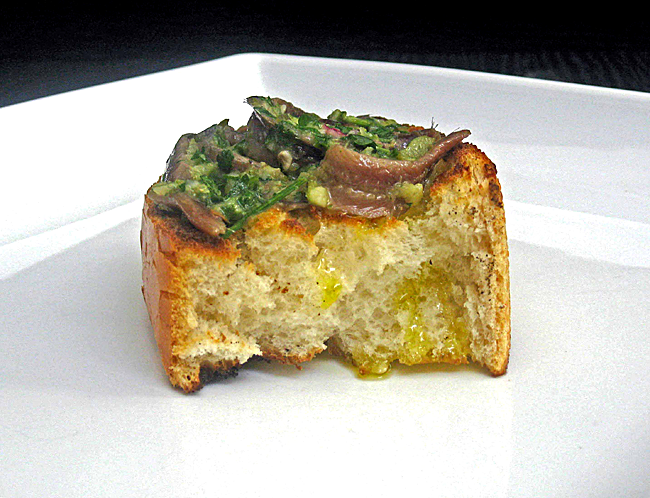
0 Recipe #252: Acciughe Marinate in Salsa Verde (Marinated Anchovies in Green Sauce)
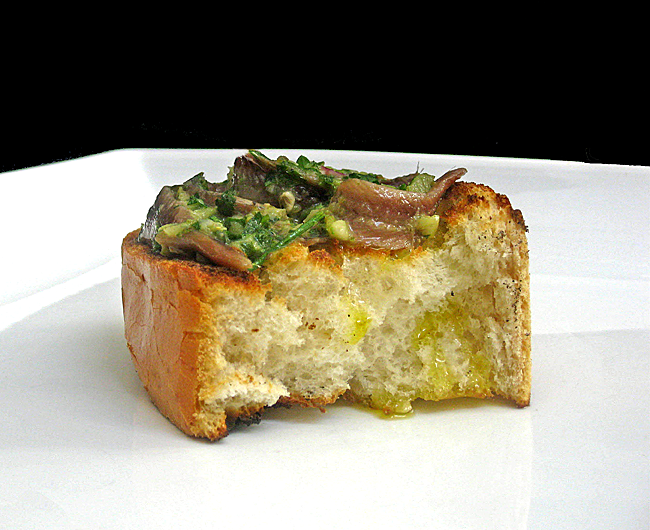
Acciughe con salsa verde, or anchovies in green sauce, is an old Italian classic, originally hailing from the Piedmont region of Italy. In Italy, this zesty, brightly colored appetizer (or antipasto) is typically accompanied by slices of fresh bread (or crostini) and an assortment of other antipasti, and of course, is washed down with some fantastic, locally produced wine. :) From what I can discern, generally speaking, it seems that this dish is much better known in Italy (and other regions of Europe) than it is here in America.
Given people's tendency to have strong (and often rather polarizing!) opinions about anchovies, I realize that some of you will probably love this recipe while others of you will probably think to yourselves, "Blech." ;) Oh well, can't please everybody. ;) Just like any recipe blog, there are going to be some recipes that are going to thrill you & make you jump for joy while there might be others that send you running into the hills. Of course, it's my hope that the majority of the recipes here will make you want to do the former. :)
If you don't care for anchovies, you can always skip them. The green sauce still makes a great antipasto when served with fresh bread or crostini. For additional flavor, you can sprinkle some Parmesan cheese onto the bread, so that it melts onto the crostini, and then add the green sauce on top. Or, use the sauce as a marinade or topping for fish (or other seafood), chicken, veal, rack of lamb, or pasta; this sauce will really add some zing to whatever it's accompanying. Its bright green color will also really add a lot of visual appeal as well.
The nice thing about this dish is that there's no cooking required. So, that means that the nutrients of all the ingredients are retained. Also, that means there's one less step to do. :) Basically, to make the sauce, you just toss everything into a food processor -- minus the anchovies and the bread, of course -- and you're done. You can have it ready in a matter of minutes.
If you're looking for an easy, yet elegant appetizer to serve as an hors d'œuvres platter -- whether for cocktail hour, a dinner party, or other festive occasion -- this recipe will definitely fit the bill.
This recipe goes out to my pal, Meg, who loves anchovies (and all manner of seafood for that matter!) just as much as I do. :)

Acciughe in Salsa Verde (Marinated Anchovies in Green Sauce)
Ingredients:
2 oz. can (Sicilian) filleted anchovies, packed in salt (and olive oil), drained & rinsed (about 12 anchovy fillets, i.e., 12 halves)
1/2 c. milk (for soaking the anchovies)
1/4 c. fresh Italian flat-leaf parsley, roughly chopped & densely packed
1/8 c. fresh basil, minced, roughly chopped & densely packed
1 tsp. fresh marjoram leaves, densely packed
1/16 tsp. (a pinch) crushed red chili pepper flakes
3/4 tsp. garlic, peeled & finely minced (about 2 large cloves)
1 Tbsp. red onion, finely chopped
1/2 hard boiled egg yolk, finely chopped (optional)
1/4 c. extra-virgin olive oil
1/8 c. freshly squeezed lemon juice
4 (or more) slices rustic/artisanal, Italian bread, toasted (i.e, crostini) (I used Italian sourdough bread)
Directions: In a small bowl, soak anchovies in milk for 15 minutes, & set aside. In a food processor, add all of the ingredients -- except for the anchovies and bread -- and pulse until just combined, but be sure to leave mixture a little chunky. Drain and rinse off anchovies, and then pat them dry with a paper towel. Place a third of the sauce into a deep medium-sized bowl (or a jar, if you won't be serving them right away), following by a third of the anchovies, and repeat process (twice) until you've complete all 6 layers. Cover and chill in the refrigerator until serving time. (Don't be too concerned about the olive oil congealing in the fridge, as it'll melt again once the dish is taken out and allowed to reach room temperature.) An hour before serving time, remove from refrigerator to let it reach room temperature. Serve with crostini, and refrigerate any leftovers in a sealed container. (Mixture will keep for about a week.)
Yield: Makes about 1/2 c., or 4-6 appetizer-size servings. That works out to be about 2-3 anchovies per person.
Chef's Notes: Preparing the green sauce: When making the sauce, the traditional preparation is to chop all of the ingredients by hand, in order to yield a chunky consistency. Of course, you're welcome to prepare the sauce in this manner, but of course, it'll save you a lot of time if you use a food processor instead. :)
Fresh vs. canned anchovies: In Italian, acciughe means anchovies, but alici refers specifically to fresh anchovies, which are milder than the canned variety. Many of you already know that I will list/use fresh, whole/natural ingredients (over dried, canned, & frozen, etc.) for my recipes whenever possible. (I also make a point of avoiding man-made chemicals and heavily processed foods too, i.e., Cheese Whiz and the like. The less additives the better. My body is not a lab experiment, thank you very much. ;) ) However, since I was unable to find fresh anchovies, I had to resort to using the canned stuff, which, of course, is much easier to find. :)
Selecting & preparing canned anchovies: If you only can find canned anchovies, choose high-quality, salt-cured ones that have been packed in olive oil, preferably the Sicilian kind, if available. Please note that, in this particular recipe, a few measures have been taken to reduce the "fishiness" of the anchovies: They are first soaked in milk, then drained, rinsed, and marinated in the green sauce. The sauce contains lemon juice, a known seafood "cleanser." [The acids in the lemon juice react with, and essentially neutralize, the bases found in the seafood's volatile amines, i.e., organic chemical compounds such as di- and trimethylamine, which are responsible for producing the "fishy" smell of seafood. These amines start forming as soon as the fish is plucked out of the sea, and exposure to air (oxidation) hastens their production. This is why fish should always be refrigerated, frozen, salt-cured, or otherwise preserved before it's consumed. And this is of course why fresh fish should of course be consumed right away, and also explains why fresh fish should never smell overly "fishy." :) However, preserved fish (i.e., canned anchovies, etc.) can sometimes still be a bit fishy-tasting due to the fact that the preservation process itself takes a bit of time to complete, and so a certain, albeit probably very small, amount of volatile amines form during processing, i.e., before they are preserved.]
Availability of fresh anchovies: Depending on where you live, fresh anchovies might either be easy to find or hard by come by. Of course, I'd personally rather use fresh anchovies over the canned stuff, but even here in a large metropolitan area like DC, it can take a lot of legwork to find them.
Local DC resources: I cast a wide net, searching far and wide for fresh anchovies, but couldn't seem to find them anywhere, and I live in a large metropolitan area! I really did want to use fresh anchovies for this recipe, and so, believe me, I looked really long and hard for them too. I first checked online to find some good local resources (Chowhound is typically a great resource for locating specialty foods), and then called several supermarkets and specialty markets -- including Whole Foods, Trader Joe's, Grand Mart, and Cameron's Seafood Market, etc. A good number of them put the phone down to go and check, but in the end, they all gave me the same answer: "Sorry, but we don't carry fresh anchovies." I also called small specialty markets and delis like Angelo's in Silver Spring and the Italian Store in Arlington. Vace's in Bethesda said they had them, but they only carried ones that were already marinated in oil. The last place I called, A & H (also in Bethesda, as well as Cleveland Park), wasn't picking up their phone & there's no way I was going to trek all the out way there and subject myself to those crazy, eternal Bethesda traffic jams (!) without a phone call first to confirm. ;) I haven't checked the fish market in SW DC or Dean & DeLuca in Georgetown, but these might also be some other good resources as well.
Addenum (added 3/21/11): I just found out that A & H, actually does carry fresh, salted anchovies, but of course, by now, I've already created the recipe, prepared the dish, and taken all of the photos. ;) Oh well, there's always a next time. :) (A & H was the last place I checked, and in my haste to call the last resource on my list, I'd only been focused on getting one piece of information, their telephone number. So, I didn't even think to check their website for specialty product information, like I'd done for some of the other places, etc. Oops.)
 Making this dish with fresh anchovies: If you are lucky enough to be able to find fresh anchovies, by all means use them for this recipe. Please see below for instructions on how to select, prepare, and cook fresh anchovies.
Selecting fresh anchovies: For this particular recipe, salted fresh anchovies would be ideal. You'll still need to soak them a bit to release some of the salt before they are added to the green sauce. (Don't worry; they'll still retain their salty flavor.) For detailed information on how to select/buy fresh anchovies, please see here and here. Since the canned anchovies are already filleted and butterflied, you will need about 6 fresh anchovies for this particular recipe.
Preparing fresh anchovies: The easiest thing to do is have the fish market clean, gut, and fillet them for you. If, for some reason, you don't have this option or would like to try your hand at it yourself, a how-to guide for cleaning (removing the scales & gutting) can be found here. See here (i.e., the one chosen as "Best Answer") for filleting intructions. And lastly, for video instructions on how to clean and fillet anchovies, check out these instructions.
Cooking fresh anchovies: Before handling fresh anchovies (or any fish for that matter), make sure your hands are clean. Always rinse off fresh anchovies, and then wash your hands with antibacterial soap and water before cooking with them. Just as you'd handle meat, never reuse any surface that's touched the fish for the preparation of other ingredients. For health and safety reasons, it's very important to practice the proper handling of meat to avoid cross-contamination.
The traditional Italian way to prepare this recipe is to "cold cook" the anchovies. The acid in the lemon juice will "cold cook" the fish and kill off the volatile amines as mentioned above. However, if you don't feel comfortable consuming "cold cooked" fish, you can cook them in a nonstick pan with some extra virgin olive oil and a large bay leaf. If you're going for some real old-school authenticity, you can also deglaze the pan with some chicken broth. Since premium-quality alici are very small, they only need to be cooked for a few minutes per side over medium heat. Fresh anchovies can also be boiled, which takes approximately two minutes or so. (I personally prefer sautéing them.)
Variations: Another traditional way to serve this dish is to serve it with little bits of bread that've first been soaked in vinegar. To do this, soak 1 (additional) slice of bread in 1 Tbsp. white wine vinegar for about 15 minutes or so, then squeeze out the excess liquid, finely chop the bread into bite-sized pieces, and then finally, add these little bits to the sauce.
Another, albeit less traditional, option would be to add 1/2 c. fresh, uncooked, loosely-packed, chopped baby spinach to the above recipe. This addition will also make the sauce a bit milder as well.
Thursday, March 17, 2011
0 Recipe #251: Celebrate St. Paddy's Day with Colcannon
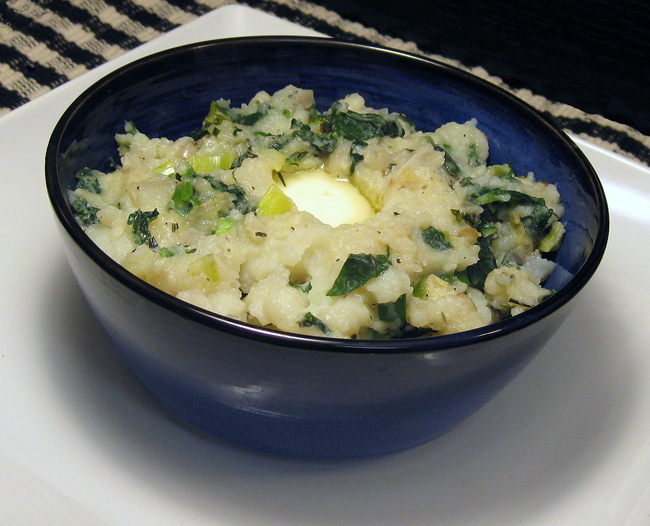 |
| Wanna get your kids to eat their greens? Then try this recipe. :) It's so tasty, they won't even notice you're serving them something healthy. :-D |
In honor of St. Paddy's Day, I'd like to post another Irish recipe, colcannon. Yesterday, I took on sherpherd's pie for all of you meat-lovers out there, and so today I've added a vegetable-centric dish, which'll hopefully make the vegetarians happy. :) Both of these recipes feature simple, modest, and readily available ingredients, including -- you guessed it -- the potato. :)
 |
| An Irish clover. |
too. They seem to have found every possible creative culinary use for it known to man. :) In Irish cuisine, there are an incredibly diverse and clever array of dishes featuring this humble vegetable. For starters, consider many of the following colorfully named, potato-based dishes: champ, bruisy, boxty, pandy, etc., and of course, last but certainly not least, colcannon. :) If your ancestors had gone through a few potato famines (like the Irish Famine of 1740-1741 and the Great Famine of 1845-1852), you and your ancestors would most likely come to appreciate them too. :) Consider that during the 1840s, one-third of the population was entirely dependent on the potato for food. Wow. So, understandably, the potato is a pretty big deal to the Irish, both historically and culturally speaking. It's been a food of sustenance and survival, but also one of comfort and creativity too.
And speaking of which, potato-based dishes -- like colcannon and sherpherd's pie -- are considered by many to be one of the ultimate comfort foods. Not coincidentally, both are highly popular, traditional choices for St. Paddy's Day. :)
Happy St. Patrick's Day, everybody!
-C
Colcannon
Ingredients:
6 c. lightly salted water (for boiling potatoes)
2 c. large russet or red-skinned potatoes (approximately 1 lb. or about 2 large potatoes), peeled and cut into large wedges
1/2 c. fresh kale, chopped into bite-sized pieces
1/2 c. fresh Swiss chard, chopped into bite-sized pieces
1/2 c. fresh baby spinach leaves
1/2 c. water (for steaming greens)
1/2 Tbsp. extra virgin olive oil
2 Tbsp. leeks (white parts only), minced
2 Tbsp. shallots, peeled & finely minced
1/2 Tbsp. garlic, peeled & finely minced (about 1 large clove)
1 tsp. fresh thyme leaves, densely packed
1 tsp. fresh rosemary leaves, densely packed & finely minced
1/2 tsp. fresh marjoram leaves, densely packed & finely minced
1 Tbsp. fresh Italian flat-leaf parsley, densely packed & finely minced
1/2 cup skim milk
Directions: Bring a pot of (6 c.) lightly salted water to a rolling boil in a large sauce/stock pot, about 8 minutes. Meanwhile, in a large (12-13") nonstick sauté pan, steam kale, Swiss chard, and baby spinach in a 1/2 c. of water with the lid on until gently wilted (but still bright green), about 3 minutes. Uncover, drain into a colander, & set aside. In the same sauté pan, heat olive oil on medium heat until glistening. Then reduce heat to low and add leeks, shallots, garlic, and all fresh herbs, minus the chives. Stir frequently and cook until tender and lightly golden brown around the edges, about 5 minutes. Set aside.
By now, water should be at a rolling boil. Add potatoes to a medium-sized stock pot, & then set your kitchen timer for 20-25 minutes. Cook until tender and easily pierceable with a fork. Remove from heat. Drain water, & let them cool for 5-10 minutes. When ready, return mashed potatoes to the stock pot and mash potatoes with a potato masher until just combined but still a bit chunky. (Be careful not to overmix mashed potatoes, or else they'll become glue-like and unappetizing in terms of both taste and texture.) Return pot to the stove, stir in the milk, followed by the greens, scallions, and ingredients from the sauté pan. Season with salt and pepper, and cook on low heat for another 3-4 minutes. Remove from heat and stir in lite nondairy creamer. Transfer mashed potato mixture to a medium-sized serving bowl. Make a small well in the center of the mashed potatoes, and place the butter into the hole, so it can melt a bit. (I accomplished this using a wooden spoon, which I then rotated around around in a full circle.) Sprinkle with chives, if desired, and serve hot.
 |
| A savoy cabbage. |
Variations: If you'd rather not use butter, there are other, albeit nontraditional, options. You could also try Parmesan or low-fat, sharp cheddar cheese, or even low-fat sour cream.
Many colcannon recipes contain cabbage, although I opted not to use it in my version of this dish. However, if you'd like, you could substitute 1/2 c. savoy cabbage for a 1/2 c. of one of the leafy greens in the above recipe.
Wednesday, March 16, 2011
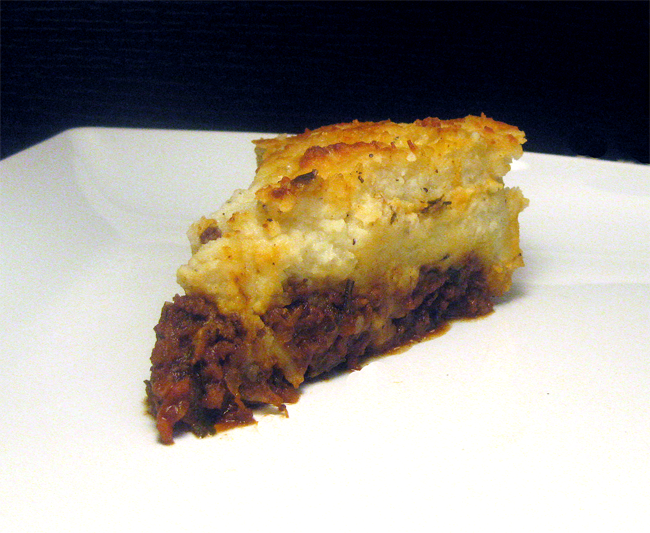
1 Recipe #250: Shepherd's Pie, A St. Paddy's Day Treat!

Since it's almost St. Paddy's Day, I have a short, relevant, personal story to share with you. Most of my family probably doesn't realize this, but I went through a good bit of my life -- up until about my mid-twenties --thinking that we were part Irish. When St. Patty's Day would roll around, I'd smile (yes, Irish eyes are always smiling ;) ) and don green, feeling proud to have an "excuse" to celebrate "being Irish." As the saying goes, "Everybody's Irish on St. Patrick's Day," but back then, I really did think that I was. :)
So what led me to believe this? Well, long ago, my mother had told me a story about her Uncle Jack, who'd lived in Ireland. So of course, as a little kid, I'd assumed that this meant that he was Irish, and therefore, so were we. :) However, one day many years later, during a discussion about our family's heritage, I asked my mother point blank, "We're part-Irish, right?" She looked at me quite incredulously, and replied, "No, we're not Irish. What ever gave you that idea?" And then, of course, I mentioned the story she'd told me about Uncle Jack. She then explained to me that, although he and his wife had lived in Ireland, Uncle Jack was actually of English extraction. So, unless there was some as-yet undiscovered, long-lost Irish relative, there was no way we were Irish, not even a smidge. Upon hearing this, I'd felt a bit deflated, as I'd always thought that I had some kind of kinship, quite literally, with the Irish. Oh well, I guess you don't have to be Irish to appreciate their warmth and wry sense of humor, participate in various aspects of their culture (music, dance, folklore, etc.), or enjoy a delicious and hearty slice of shepherd's pie. :)
I'd like to thank my pal Patrick (who's so very aptly named indeed! ;) ) for suggesting this dish as a meal idea for St. Patrick's Day. Hope you enjoy the recipe!

Shepherd's Pie
Filling Ingredients:
1 1/8 lbs. (1.125 lbs.) lean ground (or minced), grass-fed beef (or lamb)
1 Tbsp. extra virgin olive oil
1 c. yellow onion, peeled & shredded (1 small onion)
1/4 c. shallots, peeled & shredded
1 Tbsp. garlic, peeled & finely minced (about 2 large cloves)
1/2 c. red wine
1/4 c. Worcestershire sauce
1/4 c. tomato paste
2 Tbsp. fresh Italian flat-leaf parsley, densely packed & finely minced
1 Tbsp. fresh Tuscan rosemary leaves, densely packed & finely minced
1 Tbsp. fresh thyme leaves, densely packed
Directions: Bring a pot of lightly salted water to a rolling boil in a large sauce/stock pot, about 8 minutes. Meanwhile, in a large (12-13") nonstick sauté pan, sear meat on high heat (without oil) until browned, about 5-7 minutes, stirring frequently. While meat is cooking, stir to break up meat into small bite-sized bits. Remove from heat & discard any residual fat. Using a slotted spoon, transfer into a metal colander to allow the excess liquid and any remaining fat to drain. Set aside. By now, water should be at a rolling boil. Add potatoes to the sauce/stock pot, & then set your kitchen timer for 20-25 minutes.
Make the filling: In the same sauté pan you used to sear the meat, heat olive oil on low heat until it glistens. Then add onion, shallots, and garlic, and cook until tender and translucent, about 5 minutes. Just as ingredients start to brown, deglaze pan with red wine and Worcestershire sauce. Stir continuously with a spatula to break up any of the fond (the brown bits) that've stuck to the bottom & sides of the pan. Next, immediately return (drained) meat back to the pan and stir in tomato paste until thoroughly combined. (Do this step quickly before all of the liquid disappears.) Quickly season with salt & pepper, ground nutmeg, and paprika, and then add a 3/4 c. chicken (or beef) broth to the pan, stirring continuously. Turn up heat to high and cook for about 10 minutes, or until liquid is almost completely absorbed. Stir in carrots and another 1/2 c. broth, and continue to cook for another 5 minutes. Add remaining 1/4 c. broth and all of the fresh herbs (parsley, rosemary, and thyme), and cook until liquid has been reduced to a thin layer on the bottom of the pan, about 3-5 more minutes. Remove from heat & allow to cool.
Make the mashed potato topping: By now, the potatoes should be done. Drain water & let them cool for 5-10 minutes. When ready, mash potatoes until creamy & smooth, or pass through a potato ricer or Mouli grater, using the same pot you used to boil the potatoes as the receptacle for whichever option you choose. Place butter into the bottom of the stock pot containing the potatoes, turn on the heat to high, and cook for about 30-60 seconds, until butter starts to melt. Quickly remove from heat, season with salt & pepper, stir in milk & nondairy lite creamer, and whisk in egg. Mix until just combined & set aside. (Be careful not to overmix mashed potatoes, or else they'll become glue-like and unappetizing in terms of both taste and texture.)
Assemble pie: Put the meat filling into a 1 1/2 qt., circular, over-proof/Pyrex baking bowl (or deep pie plate), and then top with the mashed potato topping, using the back of a large spoon. (I used a Pyrex bowl that was 7" in diameter and 3 1/2" high.) The mashed potato mixture should form a slight mound on top of the bowl versus being completely flat, as the pie will deflate slightly after baking. Sprinkle with Parmigiano-Reggiano cheese, making sure to evenly spread out the cheese so that it covers the entire top surface of the bowl. Use a fork to prick the top so that the potato mixture forms little peaks on its surface. Place in a preheated oven set to 400°F, and bake for 30-40 minutes, or until bubbling and golden brown. Divide into equal portions, transfer to plates, and serve immediately, preferably with a green vegetable side dish. :)
Yield: 4-6 servings.
Variation: Substitute Guinness Extra Stout for the wine and chicken/beef broth. Use a 1/2 c. of it to deglaze the pan with the onions, shallots, & garlic, and then add the remaining 1 c., a 1/2 c. at a time, for cooking the meat, carrots, and herbs.
Wednesday, March 9, 2011
0 Recipe #249: Chinese-Style Black Rice Noodle Salad
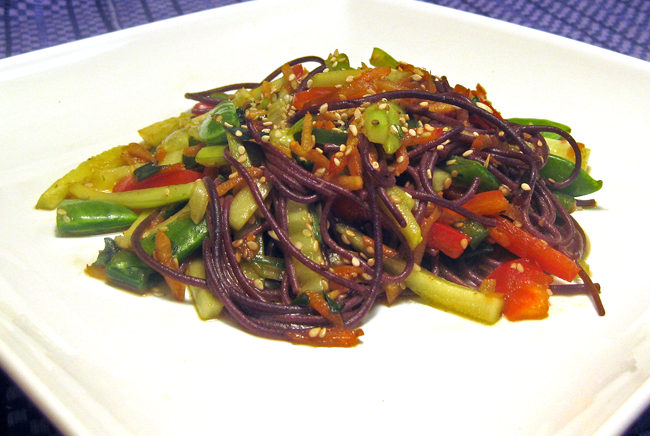
I just made up this recipe on the fly and had it for lunch. It turned out really well! It's a very colorful salad that has a lot of visual appeal. There are lots of brightly colored vegetables, which contrast quite nicely with the black rice noodles. It's really quick & easy to make. Probably takes about 15 minutes total to prepare, and then about 30 minutes to marinate in the refrigerator. You can make it the night before, and let it marinate overnight in the fridge for the next day's lunch or dinner. (In fact, it tastes even better after a day or two of marination.) It can be served either as a side salad or as a meal. If you're planning to eat it as a meal, just add a protein source like tofu or grilled/canned salmon, and you're good to go. Enjoy!
Chinese-Style Black Rice Noodle Salad
Noodles:
2 c. water, seasoned with a drop of sesame seed oil
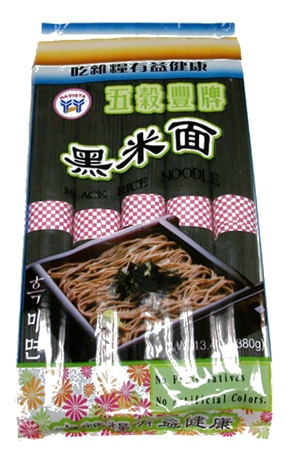
1 serving thin (1/16" thick) black rice noodles* (use pasta measure)
Salad Ingredients:
2 c. cucumber, peeled and julienned into 2"-long pieces (about 1 large cucumber)
1 c. red bell peppers, julienned into 2"-long pieces
1 c. green bell peppers, julienned into 2"-long pieces
1/2 c. shredded carrots
1/2 c. shredded daikon radish
2/3 c. sugar snap pea pods, chopped into 1" pieces
1/4 c. scallions, sliced crosswise into 1/4"-long tubes (about 4 medium-sized scallions)
1/8 c. fresh cilantro, roughly chopped
1/8 c. sesame seeds
Salad Dressing Ingredients:
1 Tbsp. ginger, peeled & finely minced (about 1" piece)
1 Tbsp. garlic, peeled & finely minced (about 2 large garlic cloves)
1/4 tsp. salt
1/4 c. tamari sauce (Japanese soy sauce)
1 Tbsp. white rice wine vinegar
1 Tbsp. freshly squeezed lime juice
1/4 tsp. ground Chinese star anise** (or use ground aniseed, if unavailable)
1/4 tsp. Chinese-style chili sauce (from a jar)
2 Tbsp. sesame seed oil
3 Tbsp. honey
Directions: Bring 2 c. water (seasoned with a drop of sesame oil) to a rolling boil in a medium-sized sauce pot, about 8 minutes. When water has come to a boil, drop in black rice noodles and cook until al dente, according to package instructions. (The kind I used took about 4-5 minutes to cook.)
While you're waiting for the water to boil & the rice noodles to cook, make the salad. Combine all of the salad ingredients together and set aside. Next make the dressing: In a mortar & pestle, pulverize garlic, ginger, & salt into a smooth paste, then add all remaining dressing ingredients into the mortar and stir thoroughly (with a small spatula) to combine. (The honey will probably be the most challenging to combine with the other ingredients. If you stir enough, it'll eventually meld with the other ingredients & then dissolve a bit, due to the acidic content of the lime juice & vinegar.) Set aside.
When noodles are ready, transfer them to a colander, drain, rinse with cold water, & then drain once more. Add to the bowl of salad, pour dressing on top, and toss well to combine. Refrigerate for at least 30 minutes to marinate salad and meld flavors. When ready, divide salad into equal portions, transfer to plates or bowls, and serve immediately.
Yield: 4-6 servings.
**Regarding Chinese star anise, please read this advisory before buying or consuming any type of star anise. Yes, it's a link to another recipe, but the preliminary exposition contains some essential tidbits that I strongly advise you read before consuming &/or cooking with any type of star anise. As I've mentioned above, you can always substitute aniseed for the Chinese star anise, if you prefer. Aniseed doesn't have quite the same flavor -- Chinese star anise has a lot stronger "licorice" flavor to it -- but it'll certainly suffice.