
Tuesday, November 30, 2010
2 Recipe #204: Som Tam (Green Papaya Salad)


Green papaya salad, or som tam (ส้มตำ) in Thai, is a very popular spicy-sweet salad eaten throughout Thailand, which originated in north-eastern Thailand (in Laotian-speaking Issan). Som tam literally means "sour pounded" in Thai, which is appropriate considering how the dish is made. :) Also known as tam bak hung (ตำบักหุ่ง), som tam (sometimes also written som tum or som dum) is traditionally made with a large clay mortar & a wooden pestle.
I know it probably sounds tremendously old-fashioned to make this recipe with a mortar & pestle when one has their pick of modern kitchen equipment, but it's really the best way to make this dish, as you want its many different flavors to be literally pounded into the papaya. For the preparation of this particular salad, nothing else but a mortar & pestle will do. The object isn't to completely pulverize (or rather, obliterate!) the food, as one would in a blender or food processor, but rather to mash the heck out of the initially-added ingredients while being gentle with all others that follow, all in the same bowl. ;) So, it's obviously essential to follow the recipe steps exactly as they are written so that the ingredients are mashed together in the correct order. Believe me, the extra effort, (which isn't really even that much effort, to be honest), is worth it!
The flavors are incredibly vibrant, & it's easy to see why this sensational salad is a favorite dish amongst the Thai people as well as others living around the world. Those who taste som tam for the first time often go back for seconds & thirds. Better watch out: One bite & you'll be hooked! :)
No worries about getting addicted to the stuff; It's also tremendously healthy for you -- lowfat, low-calorie, high-fiber, & very nutritious! :)
This dish is truly delicious & full of flavor. It embodies the five main tastes of Thai cuisine: salty (the salt & fish sauce), umami (the dried shrimp & again, the fish sauce!), sour (lime juice, tamarind, & tomatoes), sweet (palm sugar) & hot (Thai chilies). Green papaya has a very mild, almost bland, flavor to it, so it's perfect for picking up the other flavors in this dish.
It's a great dish to serve to round out a meal, and goes well with seafood, chicken, beef, or tofu. Try serving it the traditional Thai way -- on a bed of cabbage (or just a single, bowl-shaped cabbage leaf), accompanied by kai yang (barbecued chicken marinated in Thai seasonings) & either rice noodles or a side of sticky rice steamed in a banana leaf. Som tam also goes well with Thai-style marinated beef, coconut chicken curry, or grilled fish.

Som Tam (Green Papaya Salad)
Ingredients:
1 Tbsp. whole garlic, peeled (about 2 large cloves)
1/2 tsp. salt
1/2 tsp. dried baby shrimp (or shrimp paste)*
1/2 Tbsp. red Thai (Bird's Eye) chilies, stemmed, sliced lengthwise, then seeded & sliced crosswise into small pieces (about 2 medium-sized red chilies)
1/2 Tbsp. green Thai (Bird's Eye) chilies, stemmed, sliced lengthwise, then seeded & sliced crosswise into small pieces (about 2 medium-sized green chilies)*
1 Tbsp. (coconut) palm sugar*
1 Tbsp. tamarind paste*
6 c. fresh & very firm green (unripened) papaya, skin peeled & then peeled into long, thin, ribbon-like strips (using a special Thai peeler with a zig-zag blade) (about 1 medium-sized whole papaya, 2 - 2 1/2 lbs.)*
1/2 c. carrots, peeled & shredded
1/3 c. unsalted, dry-roasted peanuts
2-3 Tbsp. freshly squeezed lime juice (juice of about 1 large lime)
1 1/2 c. cherry tomatoes, halved (or 2 medium-sized vine-ripened tomatoes, drained)
1/4 c. scallions, sliced crosswise into 1/4" rounds
1/2 c. fresh cilantro, roughly chopped & tightly packed
1/2 c. Thai basil, roughly chopped (optional)*
Directions: In an extra large clay or ceramic mortar, add the garlic, salt, dried shrimp, & chilies, & pound vigorously with the pestle until pulverized. Next, add the palm sugar & tamarind paste, & pound a few times more until the mixture forms a thick paste. Add a few cups of papaya & the carrots to the mortar (i.e., as much as you can fit without crowding the bowl, while still leaving room for additional ingredients!) & gently bruise the papaya just a little bit with the pestle, but not so hard that it disintegrates or becomes soggy; the papaya should still be crunchy. Toss the papaya in the mortar with a spoon in one hand as you pound the ingredients with the other to ensure that the papaya is thoroughly coated with the other ingredients & thus, picks up all of their flavors. Next, gently crush the peanuts, pounding only long enough to break them up a bit; or add them in whole at the end (as a garnish) if you prefer. Pour the lime juice & fish sauce (called nam pla in Thai) all over the papaya, & toss again so that everything's well mixed. Follow with the green beans, pound a bit, & then stir in the cherry tomatoes & the remainder of the papaya, continuing to gently pound a few times to infuse the flavors into the papaya. Add scallions, cilantro, & basil, & toss. Mix well. Taste the salad & adjust ingredients accordingly to the desired ratio of hot, sour, sweet, salty, & umami flavors. Ideally, the overriding notes of the salad should be hot & sour flavors with just a hint of sweetness.Transfer to plates & serve immediately. Enjoy with Thai barbecued chicken & sticky rice.
Yield: 8-10 servings.
Chef's Notes: Special kitchen tools: It's recommended that you use a ceramic or clay mortar & pestle instead of a stone one, which is too heavy & will typically lead to an over-pounded & soggy salad. :)
If you don't have a traditional, and very large (!), Thai mortar & pestle, you'll probably need to make the salad in 2 or 3 batches, depending on the size of your mortar.
Obtaining the special Thai peeler with a zig-zag blade is really no big deal. Like most of the above ingredients, you can find this tool at your local Asian market, or just buy it online. It's really inexpensive -- a minor but very practical investment -- that's only a few bucks at most, but it'll certainly come in handy in future. And, even when you're not using it to make green papaya salad, it can be repurposed for many other uses as well: Use it to make zucchini "spaghetti," or peel off the skin of any type of fruit or vegetable. I've also used mine to shred cheese & potatoes. You could probably also use it to shave chocolate, i.e., for hot cocoa or as a topping for tiramisù or some other dessert, etc. There are so many potential uses....
Since unripened, green papaya tends to be very firm & thus hard to slice open, I strongly recommend peeling off the skin first & then peeling it into long strips. It's a lot easier to shred a papaya this way, (i.e., keeping it whole as you shred it), versus cutting it in half first & then shredding it. First, green papaya's hard as rock, which can make slicing it very difficult, not to mention a bit dangerous. ;) And second, halving the papaya first generally makes it much more challenging to grip the papaya as you peel/shred it. That is, unless you place the papaya seed-side down onto a cutting board, peeling with one hand while applying pressure to the opposite side with the other, making sure to keep the stabilizing hand as far way as possible from the peeler. However, this method can still be dangerous, so unless you are an expert, extra-careful shredder, I'd recommend peeling the papaya while it's still whole. Regardless, please be careful & pay full attention as you are peeling. Please, for the love of your digits, do NOT try any mid-air peeling or slicing maneuvers. ;) This is VERY dangerous.
As you peel, you may have to reposition your hands a few times to get the maximum number of shreds from the papaya. When you start getting closer to its hollow core, you'll want to be extra careful as you peel it. The papaya only needs to be seeded if you'll be using up the whole thing for the recipe. It's best not to shred the whole thing if you're not going to use it all that day, as the papaya will generally tend to keep better for the next few days' use if you keep its seeds intact.
Advance kitchen prep: If you wish to make this dish in advance, combine all of the ingredients except for the peanuts, lime juice, fish sauce, & tomatoes. This way, it'll keep longer in the fridge, i.e., for several hours (or overnight). Then, just add these reserved ingredients just before serving & toss well.
A few words about the ingredients: If you can't find the tamarind paste (i.e., concentrated tamarind) & can only get the kind that comes in a brick (with the seeds), then you'll need to process it before adding it to the mortar. To do this, boil a kettle of water, place a chunk of the tamarind pulp (about 1-2 Tbsp.) into a small bowl, pour in about a 1/3 - 1/2 cup water, & let it dissolve for several minutes. Then break the tamarind apart with a fork (or wait until the water cools a bit, put on a pair of rubber/latex gloves, & use your hands). Strain through a sieve to extract the homemade, concentrated paste.
I normally don't put sugar into my recipes, as most of the readers of this blog are already aware, but I wanted to keep this recipe authentic, which is why I used palm sugar instead of honey. Plus, there's only a little bit of palm sugar in this recipe. Regardless, palm sugar's considered to be one of the healthier forms of sweeteners. Made from the sap of a coconut palm tree, it naturally has a very low glycemic index (a GI of 35), lower than that of cane sugar, agave, and even honey. Plus, it's especially high in potassium, magnesium and zinc, as well as vitamins B2, B3, and B6.
Key (see above for references): * = You can get these products at your local Asian market or order them online.
Variations: Other versions of this salad may sometimes also include (unripened) green mango, pineapple, white guava, mung bean sprouts, shredded cucumbers, pickled or salted crab, &/or shredded daikon radish.
This dish can easily be converted into a vegetarian or vegan dish; omit the shrimp & fish sauce, & just use some other umami substitute. Soy sauce makes an OK substitute for fish sauce, but you can also make your own vegetarian, imitation "fish sauce" by combining 1/4 c. Chinese dark soy sauce, 1 tsp. sherry wine, 1 tsp. peeled & crushed garlic (about 1/2 of a large clove), and about 1 Tbsp. miso (strained). Please note, this is just an approximation of a recipe that I just whipped up in my head on the fly, & not a tested recipe, so you'll probably want to taste the recipe first as is & then just adjust the amounts to suit your personal taste preferences.
Also, for the original recipe template, I erred on the side of caution when it came to listing amounts for the more pungent ingredients. So, if you follow the recipe as is, you will be OK. Of course, it's probably better to keep the salt, garlic, & fish sauce to a minimum, & then just tweak it a bit to balance out the flavors. That way, you can adjust them to suit your individual preferences. Easier to add than to subtract. ;)
Monday, November 29, 2010
4 Recipe #203: Pumpkin Pancakes with Strawberry Sauce

As promised, here's another pumpkin recipe. I know my pal Greg's been looking forward to this one. :-D Like me, he adores pumpkin (!), especially pumpkin pancakes.
The great thing about using "pie" pumpkins for baking & cooking is that they are a fairly neutral-tasting food -- kind of like tofu, but orange :) -- and so, can be added to practically anything. Yeah, I know, pumpkins don't taste anything like tofu, but you know what I mean. :)
These pumpkin pancakes are definitely a switch up from the average, run-of-the-mill buttermilk/buckwheat type of pancakes. And that's not just in term of taste either: They are a lot healthier. :-D (Of course you knew I was going to say that. ;) ) First of all, there's no butter and no refined sugar. And guess what? These pancakes are still moist & fluffy, & packed with flavor, & honestly don't even really taste like pumpkin. They just taste like regular pancakes, but with added health benefits. :) Pumpkin is fat-free, fiber-rich, low-calorie (cooked, fresh pumpkin has only 49 calories per cup!), & chock full of antioxidants, etc.
So, you wanna try some more pumpkin recipes? ;) If so, you're in luck: I've got a few more of them up my sleeve, which I'll probably be posting here over the next several weeks. :-D

Pumpkin Pancakes with Strawberry Sauce
Ingredients:
extra virgin coconut oil (for cooking, to coat the pan)
2-4 Tbsp. pomegranate seeds
1/2 c. (plain) pomegranate juice
1 Tbsp. honey
1 tsp. freshly squeezed lime juice (approximately the juice of 1/2 a small lime)
Batter:
1 c. fresh "pie" pumpkin (also called "sugar" or "sugar pie" pumpkin), first halved, then seeded (reserve seeds), de-pulped, & diced, with rinds removed
4 c. water (for boiling the pumpkin purée)
1 egg, beaten
1/4 c. light/lowfat, unsweetened coconut milk (from a can)
1/4 c. nonfat buttermilk (or soy milk if you're vegan)
1 tsp. pure vanilla extract
1 c. unbleached, all purpose flour (not self-rising kind)
1 tsp. baking powder
1 tsp. baking soda
1/2 tsp. salt
1/8 tsp. ground nutmeg
Directions: Prepare the strawberry syrup first: Put strawberries in a food processor (or a blender) & pulse until smooth. Pour pomegranate juice and honey into a medium-sized saucepan & cook on high heat, stirring continuously, about 5 minutes or until the honey completely dissolves. Add strawberries & continue to cook until the mixture coats the back of a wooden spoon. (Sauce cooks rather quickly, so be sure to watch it carefully so it doesn't burn.) Remove from the heat and stir in the lime juice, mixing together ingredients with a heat-proof spatula until fully combined. Set aside to cool.
Make the pumpkin purée: Either use the fresh pumpkin purée left over from pumpkin recipes you've made on previous days, or make the purée from scratch. To make the purée, cook fresh pumpkin in 4 c. boiling water until tender (but not mushy). Drain pumpkin into a colander, reserving 1/2 c. of the liquid. Let cool, then transfer both the pumpkin and the 1/2 c. liquid to a food processor (or blender) & purée until smooth & creamy. Set aside.
Prepare the batter: In an electric mixing bowl, whisk together the pumpkin purée, egg, coconut milk, buttermilk, & vanilla extract. In a separate bowl, mix together the flour, baking powder & soda, salt, nutmeg, & cardamom. Make a well in the center of the dry ingredients mixture. Then pour the wet ingredients into the dry and stir until just combined (i.e., until dry ingredients become wet). Don’t over-mix the batter; this'll make overly stiff pancakes. [I like thick batter, but if you'd like to thin it out some, add a bit more buttermilk (or milk) to the batter, a little bit at a time, slowly incorporating it into the batter as you stir it. Be careful not to make the batter too wet, because this'll make the pancakes harder to flip.] Now, set aside the batter to let it rest for a bit while you follow the next few steps.
Make the pancakes: Using a heat-proof pastry brush, lightly coat the bottom of a large (12-13"), nonstick sauté pan (or griddle) with coconut oil. Heat pan over medium-high heat until a drop of water sizzles when dropped on the surface. Ladle out batter, about a 1/4 c. at a time, tilting the pan so that the batter forms a thin layer (or spreading batter with back of a spoon), and cook on medium heat for about 30-60 seconds per side, or until small bubbles appear on the pancake's surface. Cook pancakes until golden brown. Repeat procedure with the remainder of the batter until all pancakes have been made. Try to fit as many pancakes as possible into the pan, while leaving yourself enough room to flip them, about 1/2" between pancakes. (Try not to crowd the pan, or it'll be a real challenge to flip the pancakes. ;) ) Stack pancakes on a warm plate (that's been heated in the microwave for a few seconds) to keep them warm while you are making the rest of the pancakes. Transfer pancake stacks to plates. Drizzle each stack with strawberry sauce and top with pomegranate seeds. Serve hot.
Yield: About 8-10 pancakes, 4" in diameter each.
Sunday, November 28, 2010
2 Recipe #202: Coconut-Lime Custard with Lemongrass
 >br clear="all">Tonight's recipe is a fun and healthy dessert with a mild flavor and a bit of tang.
Believe it or not, coconut, when consumed in moderation, is actually very healthy for you. You might be surprised to know that, in comparison with other plant-based sources of saturated fats, it's actually one of the few foods containing saturated fats that actually helps to suppress appetite and aid in weight loss. Coconut contains the "good" kinds of saturated fats that actually burn energy instead of storing it.
A lot of people try to lose weight by trying to avoid any and all kinds of fat, but in truth, your body actually needs healthy types of fat to help you lose (or maintain) your weight. When the body doesn't get enough fat, it will do everything it can to hold onto your existing body fat as a survival mechanism, instead of burning it off.
As of late, scientists and medical researchers have been conducting a lot of studies on the benefits of coconut, which in turn, has shifted the health and fitness community's perception of it to a large degree.
It's time for more people to start revising their thinking regarding coconut's nutritional value and health benefits, as it's certainly got a lot to offer. Did you know that, in addition to being a good source of energy, coconut is also good for your heart, stomach, intestinal tract, and kidneys, and can help build muscle mass?!
Surprise, surprise. :-D
Coconut-Lime Custard with Lemongrass
Ingredients:
4 large eggs, beaten
2 Tbsp. honey
2 tsp. lemongrass powder
1 c. unsweetened, light/lowfat coconut milk (from a can)
2 Tbsp. freshly squeezed lime juice (or 1 1/2 Tbsp. if you like your custard less tart) (the juice of about 1 large lime)
1/8 tsp. salt, or to taste
4-5 c. water (for hot water bath)
Directions: Preheat oven to 375°F. In a blender, combine eggs, honey, lemongrass powder, passion fruit juice, lime juice, and salt, and blend on high speed until frothy and smooth, about 2-3 minutes. Pour liquid mixture into 4 ramekins. Place each ramekin into a rectangular 9" x 13" Pyrex glass dish. Fill dish with about 4-5 c. water until the ramekins are submerged to the halfway mark. Cook for 40-45 minutes. Carefully remove ramekins from hot water bath. Drain water from dish. Serve immediately, while custard is still hot.
Yield: 4 servings.
Saturday, November 27, 2010
Recipe #201: Lemongrass-Galangal Tea

This is a super quick & easy tea to make. It takes about 8 minutes to boil & then it's ready to drink. The mild, subtly lemony flavor of the lemongrass goes perfectly with the bolder, slightly peppery taste of the galangal.
My favorite way to drink this tea is with just a bit of creamer. And then other times, I'll be in the mood to have it with lime or lemon juice instead. In my opinion, this tea doesn't really taste good with sweetener, but if sweet lemongrass tea's your thing, then feel free to add it.
Both lemongrass & galangal have many health benefits. Both are often taken as remedies for colds, fevers, infections (particularly respiratory infections), & various digestive & gastrointestinal problems. Not surprisingly, galangal has been known to inhibit various types of pathogenic bacteria. Lemongrass also has antibacterial (as well as antifungal) properties as well. Both help boost the immune system and may also possibly guard against cancer.
That being said, I'd nonetheless like to mention one important advisory about galangal before you decide to use it: Please be aware that women who are pregnant or are breast-feeding are strongly advised against ingesting dishes & drinks containing galangal. When consumed in copious amounts, galangal has been known to produce hallucinogenic effects in some people & can also interfere with the therapeutic effects of various medications & acid-inhibiting drugs (like antacids, etc.). So if any of these issues apply to you, you should probably consult a medical professional before cooking with galangal.
If you are still unsure whether or not you'll be affected by any of the above issues, you can always leave out the galangal & just boil the lemongrass by itself when making the tea. It'll still taste good. Or, you can just substitute regular ginger for the galangal; however, if you decide to do that, make sure to only add only one tablespoon of ginger (instead of the 2 Tbsp. listed in the below recipe). Otherwise, the ginger will totally overpower the tea.
Anyhow, now that the legal disclaimers are out of the way, here's the recipe. :)
Lemongrass-Galangal Tea
Ingredients:
5 c. water
4 large stalks of fresh lemongrass, ends trimmed, outer layers removed, quartered crosswise, & pounded with a meat mallet (to release their essence)
2 Tbsp. fresh galangal root (a.k.a. "Thai ginger"), left unpeeled & sliced into 1/4" slivers (or small chunks) (about 2" piece)
freshly squeezed lemon or lime juice, to taste (optional)
nondairy light creamer, to taste (optional)
honey, to taste (optional)
Directions: Add the lemongrass, the galangal, & 4 c. water to a medium-sized sauce pot or tea kettle, & bring to a rolling boil, about 8 minutes. Remove from heat, allow to steep for another 1-2 minutes, strain to remove whole herbs & spices, & then pour into a tea pot. (If it's easier, use heat-proof tongs first to remove the larger pieces of lemongrass & galangal before straining.) Pour into tea cups, add desired amount of lime (or lemon) juice, creamer, &/or honey, and serve hot.
Yield: Makes about 4-6 servings.
Friday, November 26, 2010
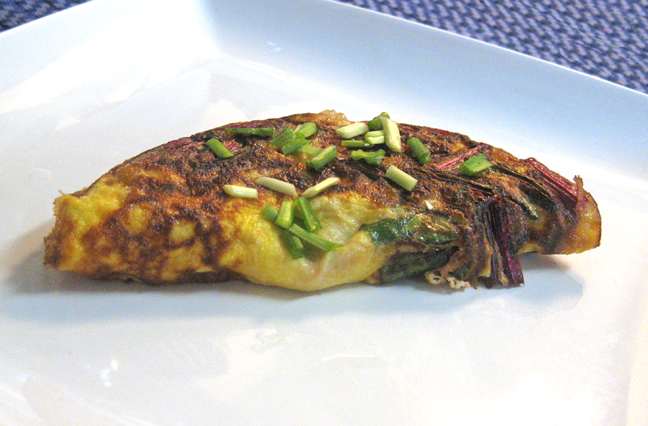
0 Recipe #200: Beet Greens & Chive Omelette With Feta Cheese
Ah, recipe #200 is finally here. And as you might've already guessed, I'll be doing something fun here to celebrate its arrival. Will let you know what that idea is as soon as I do. :)
As you can see, I've been quite busy lately, pumping out recipes like some kind of machine. It's only a matter of time until someone starts calling me the Chefinator." ;)
While I've been cooking up a storm over the past few weeks, I haven't had a chance to transcribe the recipes from the barely legible note paper scribbles into actual blog posts, that is, until just this week. And so, over the past few days, I've been posting like mad, making up for lost time over the long holiday weekend. I'm almost caught up now. Hence, the recipe deluge. :)
So why resort to using note paper when there's a readily-accessible wireless netbook? The main reason: practicality. With the recent barrage of recipe ideas flowing out of my head so fast that I can barely keep up with them in the kitchen, it's much safer these days to take the oh-so-expendable note paper into the kitchen than risk a dollop of sauce landing on the laptop, thus rendering it useless. ;) With my luck, it would probably go right in between the keys and fizzle the motherboard. :)
If you're wondering why all these new recipes that appear to be from the last three weeks have suddenly popped up onto this blog, it's because I've back-dated them all so that they'd more accurately reflect their actual creation dates (for posterity's sake). After all, it just didn't seem right to post them all with today's date when I actually made them over several days. And furthermore, it would seem like I'd been slacking when I've really been working my tail off. :)
With all of the pre-holiday bustle, it's been much easier to cook the recipes first, then edit the text and photos as time allows. Yeah, I know that means the posts are delayed and then back-dated, but it's better than nothing, right?!
Alright, enough blather. Onto the recipe. :)

Beet Greens & Chive Omelette With Feta Cheese
1/8 c. (2 Tbsp.) water
2 eggs
1 Tbsp. low-fat buttermilk
1 Tbsp. chives (1/2 in omelette, other 1/2 sprinkle on top)
1/4 tsp. unsalted butter, to season pan
2 Tbsp. feta, or to taste
cracked black pepper, to taste
Directions: Beat together eggs, buttermilk, and 1/2 Tbsp. chives in a small bowl, and then set aside. In a medium-sized, nonstick sauté/omelette pan, sauté beet greens on medium heat until tender and water has been completely reduced, about 5 minutes. (No one likes wet omelettes!) Be careful not to brown or burn the beet greens, especially the leaves, which will cook faster due to their thinness and larger surface area. Immediately remove from heat and transfer to a bowl. Let cool for several minutes. When ready, transfer veggies to egg mixture and thoroughly combine. Set aside.
Melt butter in the same pan on high heat. Then reduce heat to low and pour in vegetable-egg mixture. As soon as the omelette starts to set, sprinkle feta cheese on top and season with pepper, to taste. After a few seconds, lift up omelette on one side to check if it's ready to be folded over. When ready, fold omelette over and continue to cook until desired color (i.e., light golden brown, etc.) has been reached. Then flip over and cook a few seconds more on the other side. (Cooking time may vary depending on how you like your omelettes.) Transfer to plate(s), sprinkle with remaining 1/2 Tbsp. chives, and serve hot or warm.
Yield: Makes 1-2 servings.
Chef's Notes: Make sure you do not fold the omelette prematurely, as this will make it harder to flip the omelette later, and thus, also harder to cook it evenly. Also, depending upon your stovetop range, you might need to alter the cooking temperature in order to get the best result(s). I have a gas range and cook with Caphalon cookware, both of which conduct heat very well, so the food tends to cook very quickly. Hence, this is why I cook my eggs over low heat. However, this may or may not work for you. Adjust accordingly.
Another useful tip: You might've noticed that when you beat eggs together in a bowl and then lift up the bowl, you'll usually find a "ring of egg" left behind on the counter top. To avoid this, simply place the bowl inside of another bowl. This works even better than a paper towel, which will typically stick to both the bowl and the countertop after soaking up the egg. ;)
Please note that this omelette does not need salt, because it's already plenty salty enough with the feta. I once even tried adding only a very tiny amount and even that little bit still made the omelette way too salty. So, add salt at your own peril. ;)

Thursday, November 25, 2010
0 Recipe #199: Cranberry Sauce Spiked with Cointreau

Nothing quite says Thanksgiving like cranberry sauce. Now add a drop of Cointreau and you've got something special. :-D
As usual, I've got to add my own little twist to an old standard; otherwise, it just wouldn't be one of my recipes. ;) As of late, I've been doing so much cooking in my test-kitchen for the upcoming cookbook, I've just got to mix it up to keep me going. :)
And so, not surprisingly, this version is a bit different from the usual "cranberries & sugar" type of recipe. First of all, there's no refined sugar, so it's much healthier for you. :) And second, all of the different orange flavors -- the juice, the zest, & the Cointreau -- go really nicely with the cranberries. In addition to the honey, they help sweeten the mouth-puckering tartness of the cranberries. :)
Happy Thanksgiving, everybody!
-C
Cranberry Sauce Spiked with Cointreau
Ingredients:
1 c. orange juice
1/4 c. honey
2 c. fresh cranberries (or frozen, if unavailable)
1 Tbsp. orange zest (the zest of 1 large navel orange)
1/4 tsp. ground cinnamon
1/8 tsp. ground clove
1/8 tsp. ground allspice
1/16 tsp. (pinch) ground nutmeg
Directions: Boil orange juice and honey until honey dissolves. Then add cranberries, zest, all of the spices, the water, & the Cointreau, stirring occasionally. Boil cranberries until they "pop" & then turn heat down to medium-low. Simmer until liquid has been reduced to only 1/4 of its original amount, about 15-16 minutes. During the last 2-3 minutes of cooking, turn down heat to low & stir continuously so that the cranberry sauce doesn't stick to the bottom &/or burn. Remove from heat & let cool. Add walnuts & thoroughly combine. Transfer into a serving dish & serve with turkey, chicken, beef, or other main course. Enjoy!
Yield: Makes 2-4 servings.
Variations: Other possible additions you could try include currants, black or red raspberries, boysenberries, apricots, pineapple, mango, pomegranate seeds &/or juice, apple, or a combination of these fruits.
Tuesday, November 23, 2010
0 Holiday Eating & Baking: Neither Have To Be Scary ;)

The funny thing is that when I've baked pies in the past, they've usually been for someone else, , i.e., usually as a gift for the hostess & guests of a holiday dinner party. However, that was then, this is now. These days, I hardly ever give baked goods as gifts anymore. First, I'd rather not give people unhealthy presents -- one may as well say, "Here, have some diabetes and premature aging!" ;) (After all, what kind of friend would I be to give that kind of present to someone?!) And second, who has time to make sweets when one is rushing around to prepare for the holidays? Maybe your grandma? ;) Getting all of the holiday shopping done is only the starting point of the preparation for most people.... I don't know about you, but I'm trying to simplify the process of getting ready for the holidays, not make my life a living hell. LOL.
So, as a dinner or house guest, what do I give instead? Of course, I don't like to arrive empty-handed, so I'll usually bring the hostess & their family either a bottle of wine, or, if they're not big drinkers, a gift basket (containing food &/or nonfood items).
If I was forced to bake something, ideally, it'd be best to deposit the baked goodies and then not stick around for the eating part. :) That is, unless the baked goods are actually healthy choices. :) Some people probably will think I'm insane for saying that, but I honestly couldn't give a fig. Well, at least a fig is healthy. LOL. Sure, I like to eat sweets from time to time, but they're not a huge part of my life. My world just doesn't revolve around refined sugar. I just wasn't raised that way, so it never really felt like I was missing out on anything. Growing up, we rarely ate "traditional" dessert after dinner, and instead, would either opt for fruit &/or sometimes a cup of herbal tea, or nothing at all. Shocking, I know. :)
This is also probably why I'm pretty good at saying "no" to sweets at parties & other types of gatherings. Plus, this resolve is bolstered even more particularly when I've been working out a lot & really just don't want to blow it. :) Of course, I'm not professing to be a saint all the time, but more times than not, I'm able to stay on the "healthy eating" path, even in the face of "temptation."

All I can say is that if you set your intentions and have pre-planned eating strategy before you "go into battle" (LOL!), you are much more likely to be successful in keeping your resolve and sticking to your health-related goals. Also, please understand that I'm NOT saying that you should be extreme & not eat ANY sweets over the holidays -- that would probably be unrealistic for most people -- but rather, that it'd be a wise idea to set portion guidelines for yourself before approaching known vulnerabilities/temptations. One cookie doesn't have to lead to six. :) Eat consciously and focus on your larger goals & then it most likely won't come to that.
If I do bake these days, it's mostly tarts versus pies, as it's much easier to make no-sugar, lowfat versions of tarts that actually taste good. :) While it's relatively easy to substitute other ingredients for refined sugar, pie crusts made without any butter tend to be, well, just plain awful. :)
In general, it's really hard to make tasty "traditional" baked goods without sugar & butter. I'm not saying it's impossible, but this is also why I tend not to bake pies, cookies, or cakes very often. It's honestly a LOT easier to cook healthy meals than it is to create original recipes for tasty baked goods that are also low in sugar & fat. Some baked goods are easier to revamp into healthier versions of themselves than others. Some examples of easily modifiable baked goods include muffins, breads (whether sweet or savory), & tarts. But cakes, cookies, & pies? Er, not so much. And a lot of that has to do with the chemistry of baking. Chemical reactions require specific ingredients and ingredient ratios. Otherwise, the results will be a bit scary. ;)
On this topic, I am once again reminded of what happened when I attempted to make a healthy version of orange scones as part of the "Make It Healthier" challenge for @britishbulldog & @andyo22. It was hard enough creating a tasty, no-sugar, low-fat cookie recipe, which I did eventually manage to accomplish (after several tries), but scones? OMG. Stop right there. I'm still trying to figure that one out. ;) And @britishbulldog & @andyo22 are probably wondering why I still haven't posted that recipe yet. LOL.
Anyhow, enough about the hilarity of past kitchen mishaps.... Below are some tips for making great-tasting, and yes, also much healthier (!), apple pie:
Apple selection & prep:
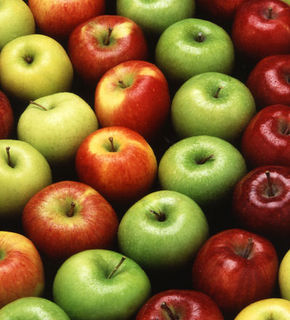
--Check apples for firmness. Firm apples are good, but don't use overly hard apples. They'll take forever to bake. ;)
--IMPORTANT: DON'T ever use Red Delicious, Empire, or McIntosh apples for apple pies. Unbelievably, some people swear that they taste good in pies, but those people clearly don't have any taste buds, nor do they have a clue which apples should be used for baking. LOL. Of course, neither type is suitable for baking. Got questions on which apples are best for baking? Consult this chart.
--After you cut the apples, add lemon juice to the apples right away to prevent oxidation.
The filling:
--I don't add a lots of sugar to my pies because the apples tend to be pretty sweet on their own. In fact, I usually don't add any refined sugar and will instead opt for honey if the pie needs to be made sweeter. However, whatever sweetener you decide to use (if any), I do recommend that you first taste the apples & then adjust the tartness/sweetness ratio to suit your own taste preferences. Using your taste buds usually works better than just blindly following a cookie-cutter recipe to the letter. ;)
--Mix the apples, pinch of salt, spices, & lemon juice, etc. together first, and then drain the juices using a colander. Reserve the liquid & combine with a thickening agent like flour, corn starch, or arrowroot, cooking it all together in a sauce pot. Then pour the liquid mixture over the apples after you've packed them into the pie shell.
The pie crust:
--While fresh is best, there's no shame in using a pre-made pie crust to save time. The holidays are busy enough. There are times when it's best to make things easier on yourself. :) And besides, who will really know unless you tell them? ;) Either that, or recruit members of your family to make the homemade pie crust while you make the rest of the Thanksgiving dinner. ;) Maybe the crust will be ready by the time you finish cooking the turkey & making the pie filling. LOL.
--Tips for a crisp crust: Lightly sprinkle a few breadcrumbs across the pie shell before adding the filling, to absorb any extra moisture. They'll bake right in & no one will even be able to taste that they're in there.
--Paint the crush with some egg (whites or yolks) & give it enough time to dry before adding the filling. Some people also use milk or a mixture of the two (i.e., an "egg wash), although I've only ever tried egg by itself; so I can't compare the results. Egg's always worked fine for me.
Prebaking the crust:
--To pre-bake the crust or not to prebake. Hmmm. This is a tough call. On the one hand, if you make the pie crust at the same time you bake the filling, there's a chance the crust will be soggy & undercooked. However, if you do pre-bake the crust, it can be only too easy to burn the crust if you don't watch it carefully. ;) Personally, I'd rather take my chances & not have a soggy pie crust. ;)
--An important step is to freeze the pie shell for at least 30 minutes (until adequately chilled) before pre-baking it.
--To help the pie crust keep its structure & prevent the bottom crust from puffing up, be sure to line the pie shell with parchment paper or a large coffee filter & fill it with "rice" or "beans" to weight down the crust. Of course, after you prebake the crust, remember to remove them before adding the filling. LOL. Be sure to push the beans or rice up against the sides of the parchment/coffee filter to keep the sides of the crust from collapsing in the heat of the oven.
--Also, DON'T use aluminium foil or pie weights; the former doesn't work as well because it doesn't allow the crust to breathe. Plus, it can get stuck in the crust, which can be a pain in the @#$%&*! to get out. ;) The latter (pie weights) are usually too heavy, and tend to produce a stiff, cardboard-like crust. Yuck. :)
--After you prebake the crust, prick the bottom with the tines of a fork to allow the steam to escape. Allow crust to cool slightly before adding filling.
--More prebaking tips can be found here.
Baking the pie:
--Place aluminum-coated baking tray underneath pie-plate while pie is cooking to prevent juices from overflowing onto oven.
--Before baking the pie, make sure you cut large vent holes in the top crust with a knife so the moisture can escape. Otherwise, you'll have a soggy crust & underbaked apples. ;)
--To cut baking time in half, try this trick: Place the pie in a microwaveable pie plate & then microwave it on high for 12-14 minutes, or until filling starts to bubble through the slits in the crust. Then transfer to a conventional oven & continue to bake until crust is flaky & golden brown.
--Apples will shrink during baking, so it's really important to pile on the apples & pack them in tightly before you seal the top crust. Layer the apples so there isn't any space in between. Apples should fill the entire shell & press up against the outer edges of the pie shell. Fill in any remaining gaps before sealing.
--How to tell if the pie is ready: Take a sharp paring knife & make a small incision to test. The knife should slide through without any resistance, but the pie should still be firm.
If you'd like some more tips, check out:
How to Make the Best Apple Pie You've Ever Eaten
Ten Top Tips for Baking An Apple Pie
Hope you find the above tips to be helpful! Good luck with your holiday baking expeditions & hope you all have a great Thanksgiving!
Happy Holidays,
-C
Monday, November 22, 2010
1 Recipe #198: Pumpkin Omelettes

Here's what I did with the fresh, puréed pumpkin that was leftover after making the pumpkin ravioli. Yeah, it took a while for me to post the recipe. :) Been rather busy lately....
I know it might sound strange to put pumpkin in omelettes, but it's such a neutral flavor that it goes with almost anything. :) Plus, it makes the omelettes really light & fluffy.
There's so much more to pumpkin than pumpkin pie, as it can be used for either savory or sweet dishes. The possibilities are endless. And of course, it's very healthy for you too!
Pumpkin Omelettes
Ingredients:
2 eggs
1 Tbsp. creamer
2 Tbsp. fresh pumpkin, pre-cooked and puréed*
1/2 Tbsp. chives (about 1 large chive)
1/4 tsp. unsalted butter (or extra virgin coconut oil)
Directions: Beat together eggs, creamer, pumpkin purée, & chives in a small bowl, & then set aside. Melt butter (or heat coconut oil) in a large (12-13") nonstick sauté pan on high heat. Then reduce heat to low and pour in egg mixture. As soon as the omelette starts to set, season with salt & black pepper, to taste. After a few seconds, lift up omelette on one side to check if it's ready to be folded over. When ready, fold omelette over & continue to cook until desired color (i.e., light golden brown, etc.) has been reached. Then flip over & cook a few seconds more on the other side. (Cooking time may vary depending on how you like your omelettes.) Transfer to plate(s) and serve hot or warm.
Yield: Makes 1-2 servings.
Chef's Notes: Make sure you do not fold the omelette prematurely, as this will make it harder to flip the omelette later, & thus, also harder to cook it evenly. Also, depending upon your stovetop range, you might need to alter the cooking temperature in order to get the best result(s). I have a gas range & cook with Caphalon cookware, both of which conduct heat very well, so the food tends to cook very quickly. Hence, this is why I cook my eggs over low heat. However, this may or may not work for you. Adjust accordingly.
*To prepare pumpkin, add it to a pot of boiling water and cook (on high heat) for about 15-20 minutes, or until tender (but not mushy). Drain into a colander, allow to cool for about 10 minutes, and then purée in a food processor until smooth.
Another useful tip: You might've noticed that when you beat eggs together in a bowl and then lift up the bowl, you'll usually find a "ring of egg" left behind on the counter top. To avoid this, simply place the bowl inside of another bowl. This works even better than a paper towel, which will typically stick to both the bowl & the countertop after soaking up the egg. ;) And it's less messy than using a dish towel, which will only have to be tossed into the washing machine later. Plus, washing a bowl with soap & water is a lot more green -- it saves both water & energy in contrast to washing a whole load of dishes or clothes. :)
Saturday, November 20, 2010
0 Recipe #197: Tom Yum Yum, Yum! :) -- Tom Yum Nam Khon (Spicy Hot & Sour Soup with Shrimp & Coconut Milk)
 |
| The subtle, creamy flavor of the coconut milk makes this soup taste unbelievably good! |
For those of you who might not be that familiar with Thai cuisine &/or its soups, tom yum (ต้มยำ), which is pronounced [tôm jam] in Thai, is the generic name for a number of spicy, hot & sour soups found in both Thai and Laotian cuisine.
There are many different versions of this soup, but all generally contain the same basic broth, which is typically comprised of soup stock, lemongrass, kaffir lime leaves, galangal (a.k.a. "Thai ginger"), lime juice, fish sauce, and crushed Thai chili peppers. Sometimes nam prik pao (น้ำพริกเผา) -- a Thai chili paste containing soy bean oil -- is also added, which gives the soup a bright orangish-red colour and obviously jacks up the chili flavor (& the heat!) in this soup. As a final flourish, the soup is then generously topped with cilantro &/or Thai basil.
Although there are a zillion different versions of this soup, here's a brief listing of some of the more common varieties: When tom yum is made with prawns or shrimp that've been cooked in a seafood or chicken broth -- i.e., one that does not contain coconut milk -- it's then called tom yum goong or tom yum koong (ต้มยำกุ้ง). The kind that's made with chicken is called tom kha gai (ต้มข่าไก่), which literally translates into "chicken galangal soup." (This version has coconut milk in it, but the galangal & the chicken are the predominant flavors.) Tom yum pla contains fish, while a similar but lesser-known variety (outside of Thailand), called tom khlong, is made with smoked fish cutlets & originates in northern Thailand. When mixed seafood is the primary ingredient, the soup is either named tom yum thale or tom yum po taek. And lastly, there's tom yum nam khon (ต้มยำน้ำข้น), a relatively more modern variety of tom yum, which is made with prawns & coconut milk, & is today's featured recipe.
My particular version stays fairly close to the original template, with only one small modification: I added baby bok choy, which isn't necessarily traditional, but who cares because it tastes good. :) Plus, it's my recipe blog & I can do what I want. :-P
Honestly, baby bok choy isn't that radical of an addition anyhow, as it actually is an authentic ingredient used in Thai cuisine. So, it's not like I've gone completely off the reservation. ;) Plus, even from within the different types of tom yum category "subsets," the ingredients still do tend to vary somewhat by region, specific family traditions, &/or individual chefs' preferences. For starters, I've seen some versions with evaporated milk, while others contain coconut milk or absolutely nothing creamy at all. I've also seen another version with tofu, and yet another version with (rice) noodles, although the latter addition is generally less common. I didn't add tofu or noodles to this particular recipe because, despite being nontraditional to this particular type of soup, there's so much going on with this soup already & it's filling enough as is. Also, I didn't want the soup to become a total starch-fest. However, if you're carbo-loading for an upcoming road race, feel free to add noodles & serve it as one of your pre-race meals. :)
If it's your first time making tom yum (&/or Thai dishes in general), I strongly recommend that you stick to the recipe template during your first go-round. Then, after you've become comfortable working with the ingredients & balancing the various soup flavors, feel free to experiment.
In this way, mastering a new dish or cuisine is very much like mastering creative writing. First, you learn the rules -- the "syntax" of cooking so to speak -- and then you become well-versed in them, so that you can break them later with complete & utter confidence in what you are doing. ;) That way, you can become the next "e.e. cummings" of cooking. :-D
Tom Yum Nam Khon (Spicy Hot & Sour Soup with Shrimp & Coconut Milk)
1 13.5 oz. can of light/lowfat, unsweetened coconut milk
1/2 c. yellow onion, peeled & diced (about 1/2 small or 1/4 large onion)
2 Tbsp. garlic, peeled & roughly chopped (about 4 large cloves)
2 Tbsp. fresh galangal root (a.k.a. "Thai ginger"), peeled & roughly chopped (about a 2" piece)
1 1/2 c. fresh, oyster mushrooms or whole straw mushrooms, rinsed, ends trimmed, & thickly sliced
2 c. baby bok choy, chopped crosswise (about 2 small boy choy heads)
18-20 fresh, raw (or if unavailable, pre-cooked) medium-sized shrimp (about 0.6 lbs.), cleaned/washed, peeled, & deveined
6 Tbsp. freshly squeezed lime juice (the juice of 2 large limes)
1 c. vine-ripened tomatoes, cut into wedges & then chopped into thirds (add in raw at end)
4 Tbsp. scallions, sliced crosswise into 1/4" rounds (about 3 large scallions)
1 c. fresh Thai basil leaves, stemmed & halved
1/2 c. fresh cilantro, well-washed & roughly chopped
Directions: Bring chicken broth, water, & coconut milk to a rapid, rolling boil in a large, 8 qt. nonstick stock pot over high heat, about 8 minutes. While liquid is boiling, add onion, garlic, galangal, Thai chili peppers, nam prik pao (if using), tamarind paste, & salt to a food processor & pulse until galangal & garlic have become finely minced & well-combined with the other ingredients. Add this mixture to the soup, once it's come to a boil. Next, add the lemongrass, cilantro root, kaffir lime leaves, & fish sauce. Boil for 5 minutes. Then add mushrooms & baby bok choy, & boil for another 1-2 minutes, or until just tender. (The cooked bok choy should retain some of its firmness & still have a slight crunch to it.) Add the raw shrimp & cook until they turn pink, i.e., only about 1-2 minutes or so under a rolling boil. Turn off stove range & remove pot from heat. Add the lime juice & sesame seed oil (if using) & stir well to combine. Taste soup adjust the seasonings as necessary, to suit your personal preferences. Discard lemongrass & lime leaves before serving. Ladle out soup into bowls.
(If you'll be using pre-cooked shrimp instead, this is the point at which you'll want to add them, i.e., directly to the individual bowls of soup. Since pre-cooked shrimp are already cooked, there's no sense in cooking them further; the object is just to warm them in the soup. Otherwise, they'll become tough & chewy, which doesn't take very long to happen. Shrimp will cook even when they're just sitting in warm soup.)
Garnish each bowl with tomatoes, scallions, Thai basil, cilantro, & additional (sliced) chilies (if desired). Serve hot, accompanied by a plate of lime wedges for those diners who wish to season the soup with additional lime juice.
Yield: Makes 4-6 servings as an entrée, or 6-8 servings as an appetizer, depending upon the size of your appetite. :)
Chef's Notes: Most of the above ingredients, especially galangal, lemongrass, & kaffir lime leaves, etc., can typically be found in most Asian markets. Or, if you don't live close to an Asian market, you can buy them online, either separately or as a Thai spice combo pack. My online store stocks many, if not most, of these specialty products. Check the "favorite gourmet groceries" and "favorite herbs & spices" sections.
Substitutions: If you can't get a hold of some galangal, regular ginger root can be used as a substitute, but it really doesn't impart the same flavor to the soup. Also, please be sure to use Thai basil and not regular Italian sweet basil; Thai basil has a peppery taste, & works much better for tom yum. Also, if you don't happen to have any chicken broth on hand, you can easily make chicken stock by boiling pieces of cleaned & washed (raw) chicken in water, leaving the meat on the bone.
As with most soup seasonings, the trick to using fish sauce properly is knowing exactly how and when to incorporate it into the soup during the cooking process. In fact, the step that makes the biggest difference is the very first one: Just like the process of making phở, the fish sauce should be added to the broth itself as it boils, so it literally gets cooked into the broth, versus being added to the finished bowls of soup as an afterthought, in its uncooked & largely undiluted state, which would just overpower the soup. At least this is what the purists tell me. ;)
As a result, this soup isn't "fishy"-tasting at all. The mere proof of this is that even Erik will eat it, and he absolutely HATES fishy-tasting foods. :)
For the record, I'm not making any of this up. For one, the fish sauce tips were dispensed by traditional, native Southeast Asian chefs who know a thing or two about authenticity. :) And second, anyone who knows Erik fairly well can tell you about his "fish-ues." :) Probably enough to fill an entire book. Don't even get me started. Hahaha. OK, I'm only joking about the latter of the two. Er, sorta. ;) I wasn't going to get into the topic at first, but you know me -- it was just too hard to resist a good pun. ;)
Wednesday, November 17, 2010
0 Recipe #196: Cranberry-Apricot Banana Bread
 |
| Got left-over bananas that're on their way out? Don't throw 'em away. Make banana bread instead. :) |
Ah, dessert breads with fresh cranberries. A sure sign that fall's here and winter's just around the corner. :)
Of course, if you'd like to make dishes with fresh cranberries any other time of year, good luck with that. ;) For some reason, they are really hard to find out of season, unlike a lot of other fruits which seem to be stocked year-round, regardless of whether they're actually in season or not. They also aren't always easy to find in the frozen food aisle either. Maybe it's just the supermarkets in this area; I have no idea. Regardless, with a little advance planning, you can easily avert this issue the next time you're in the mood to cook or bake with cranberries in the middle of July: Just buy a few extra bags while they're still in season, & then freeze them for future use.
Almost all of the other ingredients in this recipe -- both fresh & dry -- are basic staple foods & can of course be found year-round. As for the canned coconut milk & extra virgin coconut oil, these ingredients can often be found in regular chain-style supermarkets, depending upon location & product availability.
The nice thing about using natural/organic coconut products for cooking & baking is that they are light, nutritious, & neutral-tasting. Not only does coconut have a very mild flavor & texture, but it's also a very dense, fiber-rich ingredient, & thus, also a very filling & economical one as well. And so, likewise, you'll notice that this recipe calls for very little coconut milk, & even less coconut oil. (The latter is used only to lightly coat the inner surfaces of a glass baking dish, to keep the bread from sticking to it.) A little goes a very long way, which is also a good news for one's waistline as well. :) Think of it as built-in portion-control.
Since I've already extensively covered the nutritional value & health benefits of coconut in previous posts, I won't repeat myself here. Suffice to say that it's much healthier to consume coconut in its various forms than animal fats (like butter, etc.).
Speaking of which, this recipe calls for extra virgin coconut oil, which is unrefined & expeller-pressed, & thus, the healthiest form of this oil.
And lastly, there's a really cool culinary reason for why I specifically added coconut milk to this recipe: Due to its high-moisture & essential oil content, coconut milk can double as a replacement for both the milk and the butter typically added to most traditional dessert bread recipes. This is not only a more efficient usage of ingredients (in terms of culinary chemistry), but also cuts down on the overall amount of dairy used in this recipe, which many be of particular concern if you're lactose-intolerant or else are just trying to limit/monitor your dairy intake for general health reasons. (After multiple months of post-respiratory illness complications, I've lately been making a concerted effort to cut back on my dairy intake, which has been helping a great deal to keep my throat & respiratory passages clear. Ahhhh, so much better!)
In fact, due to the minimal dairy ingredients listed for this recipe, it'd be easy enough to make it completely non-dairy if you wish: Just substitute 1 Tbsp. coconut milk for the 1 Tbsp. yoghurt. It's as easy as that.
I could go on about the nutritional values & health properties of the other ingredients in this dish -- the cranberries, bananas, walnuts, & oats, etc. -- but I won't, because for one, that'd make this blog post even longer (!), and two, all you have to do is just search this blog or peruse the archives. ;) This blog already abounds with an extensive array of facts & figures on those topics. :-D
In closing, I will just state for the record that this is one of the best banana breads that I have ever created. Seriously. It turned out phenomenally. Light and moist, & full of flavor. When it was baking in the oven, Erik commented on how wonderful it smelled & told me that he definitely wanted to have some. Please note that he's never said this about any of the previous banana breads I've baked. ;) And you know what? The senses don't lie; most of the ones I've made in the past were moist but very, very dense. However, this bread turned out really well. I've finally figured out the secrets to good banana bread, which I'll share with you here:
(1) Follow the recipe steps exactly (i.e., making sure to use the correct proportions of baking soda to baking powder, etc.).
(2) Properly aerate the ingredients (whipping the baking soda into the bananas & sifting the flour).
(3) Do not overmix the batter; and lastly....
(4) Work quickly & efficiently, particularly after transferring the wet ingredients to the dry. Once the active ingredients have mixed together, it's imperative that you immediately pour them into the loaf pan & start to bake the bread. Otherwise, if you wait too long the mixture may start to sink or fall flat.
If you follow the above steps, you will more than likely produce a light & fluffy banana bread that's absolute heaven to the taste buds. The warm bread just melts in your mouth. Ahhhhh. When banana bread turns out well, it's the best! Enjoy!
Happy Autumn,
-C
Cranberry-Apricot Banana Bread
Ingredients:
extra virgin coconut oil (for buttering Pyrex glass loaf pan)
Wet Ingredients:
1 c. very ripe bananas (about 3 medium-sized bananas)
2 large eggs, at room temperature
1 Tbsp. honey
1 Tbsp. light/lowfat, unsweetened coconut milk (from a can)
1 Tbsp. nonfat, plain Greek yoghurt
2 Tbsp. freshly squeezed lime juice
Dry Ingredients:
1 c. unbleached, all-purpose flour
1 c. oats, finely milled/ground in a food processor (i.e., oat flour)
1 tsp. baking powder
1/2 tsp. baking soda
1/2 tsp. salt
1/2 c. Granny Smith apple, peeled, cored, & sliced into wedges & then diced into 1/2" cubes (about 1/2 apple)
Directions: Preheat oven to 350°F. In a small bowl, mash the bananas with a fork. Mix in baking soda, so that it starts a chemical reaction & makes the banana fluffy. (You should start to see bubbles upon contact.) Set aside. In an electric mixing bowl, whisk together eggs, honey, coconut milk, yoghurt, & lime juice on high speed until well-combined; mixture should be fluffy & frothy. Turn down mixer to medium speed, add mashed bananas & whisk together until just combined. Don't overmix batter or dough will become gluey, making a dense, hard bread. (There should still be banana lumps in the mixture; be careful not to purée bananas or bread will not become as light & fluffy as it should during the baking process.) Turn off mixer & set aside.
Next, sift together all remaining dry ingredients into a separate, large bowl. This is a very important step. Do NOT skip it; it will help to further aerate the ingredients. Transfer wet ingredients from mixing bowl to this bowl & gently fold the wet ingredients into the dry (i.e., this is called the muffin method) until just combined. Fold in nuts & remaining fruit (apple, cranberries, & apricots, if using). Bubbles should appear in the mixture, which is an indication that the baking soda & baking powder are reacting with the wet ingredients. Immediately pour the batter into a buttered 9" x 5" x 3" Pyrex glass loaf pan & bake for 1 hour, or until top turns golden brown. Test with a fork for doneness; if fork pulls out easily without any batter on it, then it's ready. Cool for about 10 minutes before removing from pan. Serve, preferably warm, & enjoy!
Yield: Serves 6-8.
Sunday, November 14, 2010
0 Recipe #195: Hearts of Romaine with Tri-Colored Roasted Bell Peppers, Eggplant Croutons, & Lemon-Sumac Dressing
 |
| I know it's hard to see all of the listed ingredients in there, but I promise you, they're all there. Just buried underneath all of the lettuce. ;) |
I recently made this recipe for my parents when I visited them in late October. They loved it, & we all had seconds. :) Then, I made it again tonight for Erik, with equally favorable results. It's a really fun salad to make & to eat. Plus, it's a nice change of pace from the typical, same old lettuce-&-tomato salads.
The cool & creative thing about this salad is that it has baked eggplant croutons. In other words, the eggplant's been breaded in seasoned Panko, & then baked until crispy & golden brown. No oil is used to make them, so they're actually very healthy for you, unlike a lot of "real" croutons, which can contain a surprising amount of fat. (Queue Psycho theme music now. ;) )
After they bake in the oven, the eggplant croutons get nice & brown on the outside (Crunch, crunch!) but stay soft & chewy on the inside. They have a great texture & a wonderful, surprisingly mellow flavor. Honestly, even eggplant haters might like these croutons, because they don't actually taste much like eggplant. :) They really do taste (and look!) a lot like croutons, save their soft center.
Case in point: I completely fooled Erik into eating them for tonight's dinner, even though he's stated for the record (multiple times!) that he hates eggplant. I asked him how he liked the salad, which he said he enjoyed, & then slyly asked specifically about the croutons, to which he replied, "I like them!" Oh well, you might want to reconsider your opinion of eggplant. ;) Shhhh, don't tell him though, because I want him to keep eating them. ;) (Let's hope he doesn't see this post.)
Am I evil? Well, I'm just trying to get him to eat his vegetables, even the ones he says he doesn't like. I'm determined to change his mind about some of the ones he purportedly won't eat. And I'm not going to give up any time soon. So you can just pack it in, Erik. Resistance is futile. :) You will eventually give in to my vegetable voodoo. LOL.
What can I say? I enjoy a good challenge. :-D
After all, a person might not like some preparations of certain vegetables but then might find out that they actually do like other preparations of the very same vegetable. (Shock, shock.) Or, perhaps the main reason they became so dead set against a particular vegetable over the years was due to a traumatic food experience (often from their childhood) that scarred them for life -- i.e., subjection to horrible cafeteria meals at school, a bad dining-out experience, or perhaps their mother couldn't cook to save her life. ;) Either way, it's important to keep an open mind, and give things a second chance. You never know. A person's tastes change over the years. Plus, there is a distinct possibility that a person might alter their opinion of a particularly despised or dreaded food given the right set of circumstances. It's been known to happen before.
Score: Corey - 1, Erik -1. He wins too, he just doesn't know it yet. :)
Hearts of Romaine with Tri-Colored Roasted Bell Peppers, Eggplant Croutons, & Lemon-Sumac Dressing
Salad Ingredients:
3/4 c. + 2 5/8 tsp. (about 6.4 fl. oz.) lemon-sumac dressing (see recipe)
1 large red bell pepper
1 large yellow bell pepper
1 large orange bell pepper
10-11 oz. hearts of romaine, roughly torn into bite-sized pieces
1/3 c. nonfat feta, crumbled
1/3 c. sun-dried tomatoes, (i.e., the kind that's not packed in oil), julienned & tightly packed
1/3 c. scallions, slice crosswise into 1/4" rounds (about 2 large scallions)
1 c. avocado, peeled, pitted, and diced into 3/4" cubes & soaked in a bowl of lemon juice (to prevent oxidation) (about 1/2 large Florida or 1 medium-sized Haas avocado)
1/2 c. Italian flat leaf parsley, roughly chopped & tightly packed
1/2 c. lightly toasted pecans, crushed
Eggplant Croutons:
1/2 c. panko (Japanese bread crumbs) (regular plain bread crumbs can also be used)
1/2 tsp. salt
1/4 tsp. ground black pepper
1 tsp. dried basil leaves
1 tsp. dried oregano leaves
1 tsp. dried parsley leaves
1/2 tsp. dried marjoram leaves
3 Thai eggplant (about 1 c. eggplant)
3 Indian eggplant (about 1 c. eggplant)
2 eggs, beaten
Directions: Prepare lemon-sumac dressing first, which can be made in advance. Refrigerate for at least 1 hour before serving salad to allow flavors to properly meld together.
While salad dressing is marinating in the fridge, roast the peppers on the top rack of an oven that's been preheated to the highest temperature setting (i.e., 500-600°F) for 40 minutes, or until lightly charred/blackened (but not grey/burnt). Every 15-20 minutes, carefully open the oven, pull out rack, & rotate peppers a quarter-turn using heat-proof tongs, & then return to oven. You'll end up doing this procedure a total of 4 times, so that all four sides of the peppers become evenly roasted.
While peppers are roasting, toss all of the raw salad ingredients (romaine, feta, sun-dried tomatoes, scallions, parsley, & toasted pecans) together -- minus the avocado -- in a large salad bowl. Set aside.
Next, make the eggplant croutons: In a medium-sized bowl, mix together panko, salt, black pepper, basil, oregano, dried parsley, & marjoram. Dip each eggplant cube, one at a time, into a small bowl of the egg mixture & then shake off the excess. Then dip into a bowl of bread crumbs & transfer to an aluminum foil-covered tray. Repeat this procedure until all of the eggplant cubes have been coated in egg & breaded. Be sure to evenly space the eggplant cubes across the tray, so that none of them are touching each other or the sides/edges of the tray.
After you're done doing all of the above steps, the roasted peppers should be fairly close to being finished.
When the roasted peppers are done, carefully pull the tray out of the oven. Using heat-proof tongs, transfer the tray to a heat-proof surface and let stand for 10 minutes.
After the peppers have finished roasting, bake eggplant cubes on the top rack of an oven that's been preheated to 400°F for 40 minutes, flipping the eggplant croutons over onto the opposite side after the first 20 minutes of baking. Watch the oven carefully so eggplant cubes don't burn. Let cool, transfer to a heat-proof bowl, & set aside.
While eggplant cubes are baking in the oven, pick up the peppers, one at a time, grasping them with the heat-proof tongs, and hold them over the sink, one at a time. Remove the stems, & then drain the liquid into the sink. Then place peppers back onto the tray & peel off the skin. (The skin should peel off fairly easily.) Slice open each pepper & scrape out the seeds with a paring knife. (If some of the seeds are still sticking to the peppers, wash them off under running water; that usually does the trick.) Transfer peppers to a nonporous, heat-proof surface (preferably a silicone cutting board) & julienne into 1/2" wide, 2-3" long strips. (I actually used my hands to tear each pepper into strips, which I thought was a lot easier, but if you'd rather not get your hands messy, do the former.) Transfer peppers to the salad bowl & toss with the other ingredients.
When eggplant cubes are done, let them cool for a few minutes, & then transfer them to a heat-proof bowl. Set aside.
Just before serving, pour the salad dressing onto the salad & toss once more. Thoroughly combine. Then add avocado cubes & eggplant croutons gently toss again. (Avocado is delicate & has a tendency to become mushy if tossed too vigorously.) Serve & enjoy!
Yield: Serves 6-8.
Chef's Notes: If you're lucky enough to have "double-decker" ovens, you can, of course, simultaneously roast the peppers & bake the eggplant cubes, which should save you a good 30 minutes or so.