
Saturday, April 16, 2011
0 Recipe #263: Oven-Baked Kale Chips, Six Different Ways


Wanna get your kids to eat their veggies... willingly? ;) Then, make these.

Oven-Baked Kale Chips, Six Different Ways
Thursday, April 14, 2011
Recipe #262: Mesquite Dry Spice Rub
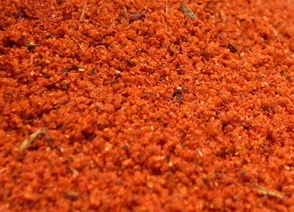 I'll admit that I'm not a huge fan of smoky tasting (i.e., hickory-smoked or chipotle flavored) foods or preparations, with one major exception: mesquite seasoning. :) Mesquite barbequed chicken can be really good, and, although I rarely have them, I also enjoy mesquite BBQ flavored potato chips. ;)
The good news is that I've discovered a new way to enjoy mesquite BBQ flavored chips without the pangs of remorse that follow ;) -- i.e., by baking my own mesquite-flavored kale chips, which undoubtedly are lot lower in calories and fat than store bought potato chips. In fact, I just baked a batch of these kale chips today. :) (And yes, there'll be a recipe to follow. :) ) If you can't tell, I've created this spice mix recipe expressly created for this purpose, although I'm posting it as a separate recipe here, in case people would like to use it for other dishes as well.
Please note that if you're going to make this recipe into a BBQ sauce/marinade, you'll want to add a few other ingredients first before using it, namely some lemon juice &/or vinegar, soy sauce, Worcestershire sauce, a few drops of olive oil, and some tomato paste. Plus, this way, you'll also be able to substitute honey for the palm sugar or jaggery (a combination of unrefined "evaporated" cane and palm sugar) in the below recipe.
Most people know that I try to avoid using refined sugar as a recipe ingredient here on this blog (and also in my daily cooking & eating) whenever possible. Even though jaggery and palm sugar have a lot less refined sugar content than regular sugar, I only used it as an ingredient in the below spice rub, because it's purpose was primarily for dry applications, like mesquite BBQ kale chips and other similar snacks. Honey won't work as an alternative in this instance, since the chips have to be as dry as possible when baked; the chips need to bake, not steam. ;)
As anyone who's ever tried this seasoning before surely knows, mesquite is supposed to be smoky, salty, spicy, and just a little bit sweet.
I didn't want to resort to using dry, powdered artificial sugar substitutes or "natural" ones like stevia, both of which have possible health safety issues (including potential cancer risks and a whole host of other problems). [The FDA has gone back and forth on their position on stevia, initially banning it and then later permitting it as a food additive, even though there are only 12 countries that currently allow it past their borders. (Gee, do such limited numbers set off any warning bells in your head?! ;) ). The "Big Food" lobby began putting on the pressure on the powers that be in our nation's fair, shinning capitol, and the FDA caved to the political pressure. However, that's a whole other discussion for another time. Don't even get me started on that topic -- i.e., the whole Montsanto debacle, etc. -- or we'll be here all day. ;) ] The bottom line is this: I don't know about you, but I'd rather not take these kinds of chances and play "Russian Roulette" with my health. ;) I'll stick to all-natural, whole foods that aren't such a big scary question mark, thank you very much. :)
Technically, this recipe isn't really "mesquite" flavored, per se, as it wasn't prepared using mesquite wood, which isn't exactly an easy thing to find locally, although you could always order it online. ;) However, it does approximate the mesquite BBQ flavor, and could potentially be made on mesquite wood-fired grill, if you're lucky enough to have access to these sorts of materials and equipment.

Mesquite Dry Spice Rub
Ingredients:
Yield: Makes 2 Tbsp. + 1 tsp. (This is probably enough for a small chicken or a 3.5 qt. batch of oven-baked kale chips.)
Chef's Notes: *Palm sugar or jaggery can be found in an international market carrying Asian/Indian products.
I didn't add salt to the above recipe, although if you're going to be using this spice rub as part of the aforementioned mesquite sauce/marinade, the soy and Worcestershire sauces will probably provide enough salt to suffice.
Wednesday, April 13, 2011
0 Recipe #261: Black Olive Tapenade

Tapenade is a Provençal olive condiment that's typically spread onto rustic bread slices and served with a variety of warmed soft goat cheeses. In its most authentic and traditional form, tapenade contains olives, capers, garlic, Dijon mustard, lemon juice, anchovies, and various fresh (or dried) herbs, and may also contain cornichons, (i.e., miniature dill pickles). It's soooo incredibly easy to make: Basically, you just toss all the ingredients into a food processor and pulse. Et le voilà. :)
Black Olive Tapenade
2 Tbsp. cornichons (i.e., mini pickles), roughly chopped
1 tsp. fresh lemon zest
1 tsp. Dijon mustard
Directions: In a food processor, pulse all of the ingredients together (in several quick, short bursts) until mixture transforms into a thick, slightly chunky paste. Transfer the mixture to a container and chill in the fridge for at least 30 minutes before serving.
Yield: About 1 1 /3 c.
Chef's Notes: With the olives, capers, anchovies, cornichons, and Dijon mustard, tapenade clearly doesn't require any additional salt. In fact, since it's so salty, this is why it's usually served with bread and soft goat cheeses. ;) It's rather intense by itself, and so, it needs something else to buffer/offset its concentrated flavor.
If you're looking for a post-recovery run/workout snack that'll replenish your sodium levels, tapenade will definitely serve this purpose. ;) You'll probably end up downing a few bottles of water afterwards as well, which'll not only sate your thirst from the salt, but also rehydrate you after your workouts. ;)
Serving Suggestions: Serve with slices of rustic bread and assorted warmed soft goat cheeses, about 1 oz. per plate. If desired, garnish with a handful of fresh basil leaves, torn into small pieces, &/or a few lightly toasted pignoli (i.e., pine) nuts.
You can either serve the tapenade on a single slice of bread (open-faced), or make a sandwich with two slices, spreading some tapenade on one slice and some goat cheese on the other before closing the sandwich halves together. If you'd rather skip the bread products, you can also serve the tapenade on slices of tomatoes or grilled zucchini.
Serve as party hors d'œuvres: Serve on toasted mini baguette rounds, spreading each portion first with soft goat cheese (chèvre), followed by a dollop of tapenade, and top each portion with a small sliver of roasted red pepper.
Other uses: Also, tapenade makes a great ingredient for other dishes: Use it as part of a marinade for grilled fish or chicken, or try it in an omelette.
Variations: Traditionally, a tablespoonful of brandy or cognac is sometimes also added, but I didn't have any on hand at the time to try, and so, left it out. Feel free to try this variation if you like.
If you'd like to break with tradition, you're also welcome to try incorporating some of the following popular additions into your tapenade: Sun-dried tomatoes, fresh basil leaves, marinated artichokes, peperoncini (i.e., marinated, sweet banana peppers), &/or roasted red peppers. Or, instead of using all cured black olives, try making tapenade with cured green olives, or a combination of various cured green and black cured olives, if you like.
You can also substitute the herbs and spices in this recipe (as shown above) with the classic French spice blend, herbes de Provence. Either whip up a batch of it yourself, or buy it commercially. Most people here in the States are familiar with this mélange of herbs in its dried form, although in France, it can also be made with fresh herbs and spices as well. If you'll be doing this substitution, please be aware that in most cases, 1 tsp. dried spices/herbs = 1 Tbsp. fresh spices/herbs. :)
To make this dish vegan/vegetarian, simply leave out the anchovies. Vegans can use a non-dairy cheese substitute like soy cheese to replace the soft goat cheese.
Tuesday, April 12, 2011
0 Recipe #260: Feta-Potato-Leek Casserole with Fresh Greens

This was tonight's dinner. If you like baked potatoes with broccoli and cheese, then you'll probably enjoy this recipe. The concept is very similar. :)

Feta-Potato-Leek Casserole with Fresh Greens
8 c. lightly salted water (for boiling the potatoes)
1/2 c. scallions, sliced crosswise into 1/4"-thick rounds (about 4 large scallions)
2 c. fresh, uncooked broccoli florets and stalks, leaves pruned (from the stalks) and divided into bite-sized pieces (1 large broccoli "branch")
1/2 c. Parmigiano-Reggiano cheese, shredded
1 Tbsp. paprika
While potatoes are boiling, prepare the remaining ingredients: In one bowl, mix together the scallions and all of the fresh herbs, and in another separate bowl, the crumbled feta and shredded mozzarella. Set both bowls aside.
In a large (12-13”) sauté pan, heat 1 Tbsp. olive oil until glistening. Add leeks, shallots, and garlic, and sauté for 5 minutes on low heat, until softened. Deglaze with chicken (or vegetable) stock, stirring a bit to loosen and break up the fond (i.e., the brown bits) on the bottom and sides of the pan. Then, immediately add spinach and kale, cover with lid, and steam for 2-3 minutes, or until liquid's volume has been reduced by half. Remove from heat and set aside to cool for 5-10 minutes.
Potatoes should be close to being done by now: Drain potatoes into a heat-proof colander, and allow them to cool for at least 10 minutes. Place about 1/2 of the potato slices (i.e., 3 c.) in a single layer across the bottom of a 9" x 13" glass casserole dish that's been lightly brushed with about 1 Tbsp. olive oil. Transfer the entire contents of the sauté pan (including the remaining liquid) to the casserole dish, placing them across in a single layer. (Do NOT drain first before transferring to the casserole dish, as the liquid will keep the ingredients from burning and help the flavors meld together.) Season with black pepper. Next, add the entire amount of (uncooked) broccoli florets and stalks, spreading the mixture across the dish in a single layer, followed by a layer of (half of the) scallions and fresh herbs mixture. Evenly sprinkle 2 c. of the feta-mozzarella cheese mixture in a light layer across the top, followed by another single layer of the remaining potatoes, a layer of the remaining scallions and fresh herbs mixture, and then finally, the remaining (2 c.) feta-mozzarella cheese mixture. Carefully mold all ingredients into the casserole dish, rearranging any ingredients on the surface to fill in any holes, and then press down lightly so that the ingredients are evenly distributed across the dish. Top with with shredded Parmigiano-Reggiano, and then generously sprinkle with paprika. Bake, covered with aluminium foil, in a preheated 375ºF oven for about an hour, then remove foil, and bake for an addition 10-15 minutes, or until golden brown.
Yield: Makes about 12 square portions, about 3 square inches per person.
Chef's Notes: The feta cheese in this dish provides enough salt, so no additional salt is needed.
Variations: Substitute 2 c. cauliflower, or a combination of 1 c. cauliflower + 1 c. broccoli for the 2 c. broccoli. As another idea, you could also add a 1/2 c. pitted, sliced Kalamata olives.

Monday, April 11, 2011
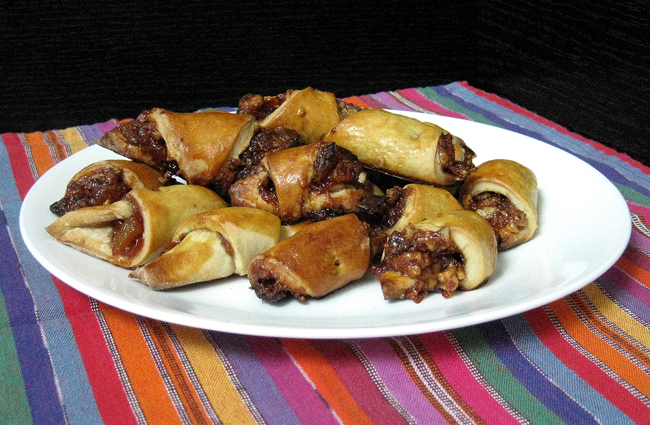
0 Recipe #259: Apricot Rugelach
 Rugelach are traditional Jewish rolled cookies that originated in Central Europe. They are often eaten on Rosh Hashanah (i.e., the Jewish New Year), to usher in a 'sweet new year,' although they aren't really considered to be seasonal: People eat them almost any of year. :)
The word "rugelach" literally means "little twists" in Yiddish. The cookie dough is rolled around a sweet filling that can range from dried fruits like raisins or dried apricots, etc., to fruit preserves or chocolate, depending upon individual preferences. Cinnamon and nuts are typically common denominators for the filling. Depending on how they are rolled and shaped, they can have a whorl pattern that looks a little bit like pinwheel biscuits or jelly rolls from the side, or they can resemble croissants. (Please see this photo to view and compare both shapes.)
Making rugelach is quite easy and fun. It does take a bit of time to roll out and refrigerate (&/or freeze) the dough in multiple stages, but it's well worth the time investment. Also, freshly made, homemade rugelach beats store-bought rugelach any day of the week. Often, the ones they sell in delis or in the supermarket are taste like sawdust. Rugelach shouldn't be dry and crumbly; they should be moist and soft, and just a tad bit flaky. Not that I'm opinionated on this topic or anything. ;)
Originally, in Europe, rugelach dough was first made with yeast. However, American Jews later changed up the recipe by dropping the yeast and adding cream cheese. To my mind, the latter version is way more delicious. :) It's also typically a lot more fattening this way. But of course. ;)
However, rugelach doesn't have to be made with a ton of butter &/or cream cheese. The recipe I created below calls for low-fat sour cream and has a lot less butter and cream cheese than most traditional rugelach recipes. Plus, it doesn't contain any refined sugar -- these rugelach are naturally sweet!
Please note: For baking chemistry reasons, cookie dough does require a certain minimum amount of fat, in order for the cookies to have the proper taste and consistency. And believe me, I know this quite well from experience. And by experience, I mean, I went through a lot of trial and error in trying to achieve the perfect, all-natural, fat-free cookie that actually tastes good. ;) If only you were there to witness some of these attempts. Ay-yi-yi. ;) I've done a lot of experimenting in this area and am now convinced that it's not humanly possible to create a delicious-tasting, all-natural, completely fat-free cookie by natural means. Low-fat cookies, yes. No-fat cookies? Yeah, right. Remember, I said it's got to taste good too. ;)
I originally tried creating a rugelach recipe using low-fat cream cheese, but the final product ended up tasting like a flavorless brick. ;) That is, if bricks were puffy. ;) Of course, the process of achieving a flavorful cookie has to do with maintaining the proper balance, in terms of baking chemistry. The good news is that, through a lot of experimentation, I've managed to find the proper balance between flavor and fat content. In other words, I've created this recipe using the lowest amount of fat possible without sacrificing on taste. Ta-da! :)
Please note that this recipe is comparatively lower in fat than most standard rugelach recipes, but again, it still isn't exactly a low-calorie, "diet" recipe. As most of you already know, I don't do "diet" recipes. Just hearing the word alone makes me want to go on a rampage and rail against that kind of mentally and physically unhealthy approach to food. ;) There'll be no coiled-up deprivation ready to burst into an explosion of over-eating and weight gain here, not if I have anything to say about it! Moderation rules the day as the overriding guiding philosophy here on this blog, and to my mind, it's also the principle behind all things sane and good. :)
As I've probably stated here a zillion times before, it's perfectly OK to have a treat now and then, but to be truly healthy from the inside out, exercise has got to be a key part of this equation. If you exercise, you won't be freaking out after you eat the occasional cookie. ;) Again, everything in moderation.
Moreover, I believe that taking "chemical shortcuts" (just for the sake of losing a few pounds) is just as bad (if not worse) for a person's health as eating too much chocolate cake. Both actions are unhealthy, not to mention reckless and short-sighted. In the former case, low-fat, diet this-or-that isn't good for you if it contains lots of artificial, laboratory-created ingredients, several of which scientists and medical researchers have proven to be deleterious to one's health. This is why you'll never find "Franken-foods" on this blog and that's a promise!
Chances are, if you are having a hard time pronouncing the names of the ingredients when you read the label, (provided they aren't in a foreign language you aren't familiar with -- Haha!), that's probably a sign that you should just put it down and walk away.
In other words, I'd much rather use a little bit of butter than a whole lot of margarine, which has all sorts of manufactured chemicals in it. Plus, why eat chemical-laden, highly processed (and highly unnatural!) foods when you have so many fresh, healthy and delicious options available to you?
So, now you can go and enjoy baking this all-natural apricot rugelach recipe, knowing that, after eating them, you won't wake up the next day with an extra nose, eyeball, or flipper (!) in the middle of your forehead. ;)

Apricot Rugelach
Filling Ingredients:
1/4 c. pecans
1/4 c. walnuts
1/2 Tbsp. ground cinnamon
1/2 c. all-natural, sugar-free apricot preserves (a.k.a., "spreadable fruit," etc.)
1/4 c. dried apricots, finely diced
Dough Ingredients:
1/2 c. regular cream cheese, softened (let it reach room temperature)
1/4 c. lowfat sour cream
1/4 c. honey
2 Tbsp. unsalted butter, cubed and softened (let it reach room temperature)
1/2 tsp. pure vanilla extract
1 1/2 c. unbleached, all-purpose flour
1/8 tsp. salt
Egg Wash Ingredients:
1 egg, beaten
1 Tbsp. milk (for brushing cookies)
Directions: Make the filling: Dry roast pecans and walnuts in a nonstick sauté pan on low heat for 5 minutes. Watch nuts carefully as they burn easily. Let the nuts cool for 10 minutes, then pour into a food processor and pulse only once or twice in short, quick pulses until just combined. Don't completely pulverize the nuts; they should still be in small, bite-sized pieces when you've finished processing the mixture. Next add remaining filling ingredients and pulse in short bursts until just combined. Turn off processor and transfer contents to a small bowl. Fold in cinnamon, apricot preserves, and dried apricots by hand and set aside.
Next, make the dough: Cream together cream cheese, sour cream, honey, butter, and vanilla extract in an electric mixer with a paddle attachment on low-speed, until fluffy and smooth. Keeping the mixer on low speed, sift in the flour and salt (to aerate and remove any lumps), and mix together until just combined. IMPORTANT: Be very careful not to overmix dough, or else your rugelach will be heavy and doughy. (When dough is ready, it should easily peel off the sides of the bowl.) Scrape the mixture off the paddle and sides of bowl. Transfer dough to a piece of plastic wrap that's been laid out onto a clean surface and roll into a ball. Then fold up corners of the plastic wrap, and wrap around the dough ball. Chill in the freezer for a minimum of 1 hour, or until firm. (This is a lot faster than the conventional method of chilling the dough in the refrigerator, which takes a minimum of 2 hours. If you're making the dough in advance, you can also chill the dough overnight if you wish.)
Prepare the dough: When ready, remove dough from freezer and place it onto a floured surface. With a lightly floured rolling pin, and roll out dough to a 1" thickness, forming the dough into a rectangular shape, roughly 7" x 5". Use a dough scraper (also called a "pastry scraper" or a "bench scraper") to straighten out the sides of the rectangle. Chill in the freezer for another 30 minutes. Next, perform the three-fold technique: Remove dough from freezer and place back onto the floured surface. Make sure the longer side of the rectangle is parallel to you, and fold the furthest side towards you to the middle of the rectangle. Next, fold the nearest side on top of the layer you just folded. (Fold the dough sheet together as you would with a sheet of 8 1/2" x 11" letter paper before placing it into an envelope. ;) This makes the dough flaky and ensures that the ingredients are well-distributed throughout the dough.) Wrap in plastic wrap and chill it again in the freezer for 30 more minutes. Remove from freezer and divide into 3 equal portions, using a dough scraper (or pizza cutter). Be sure to cut down the shorter side of the rectangle shape.
Bake the rugelach: Place each rugelach, points tucked under, onto an ungreased, parchment-lined baking sheet, evenly spacing them about 1" apart from one another. Chill them for another 20-30 minutes in the fridge before baking. When ready, remove from fridge. Whisk together the egg and milk in a small bowl, to form an egg wash. Using a pastry brush, coat the top of each cookie with the egg wash. Then place rugelach onto the middle (and bottom) rack(s) of an oven preheated to 375°F and bake until golden brown, about 25-30 minutes. Be sure to rotate the cookie sheet(s) between upper and lower racks halfway through baking time. Immediately remove rugelach and transfer to wire racks to cool, about 30 minutes. (This step is important as it prevents the rugelach from getting soggy on the bottom, or sticking to the baking sheet.) Either serve immediately and enjoy, or refrigerate in a tightly covered container. Rugelach will keep for a few days in the fridge. If you don't plan to serve them within a few days time, then freeze them for future use. Rugelach freeze very well, and so, will keep for several months in the freezer.
Yield: 24 cookies.
Variations: You can also try adding other fruit like dried cranberries, fresh diced strawberries, etc. Another favorite of mine is raspberry preserves, which you can substitute for the apricot preserves and dried apricots.
Chef's Notes: Traditionally, after the rugelach is baked and cooled on wire racks, it is then sprinkled with granulated or powdered (confectioner's) sugar. Of course, since this blog is all about healthy gourmet foods and living the lifestyle that goes with it (i.e., regular exercise, good nutrition and health, etc.), I've obviously omitted this step. Really, rugelach is already so freakin' sweet by itself that adding refined sugar to an already sweet recipe is a bit of overkill. Plus, there's no need to send people into a sugar coma. ;)

Sunday, April 10, 2011
0 Here's What's Cooking, Er, I Mean, Baking.... :)

I particular enjoy making stuffed breads, and so, am planning to post a few more. Of course, this doesn't mean that I'll be making and posting them all tomorrow. ;) All in due time. After all, this penguin's gotta do other stuff besides just baking bread (and cooking!) all day long. ;)
Got lots of exciting recipe ideas now taking shape. In fact, the ideas are just bursting out of my head, so I'm just going with it. :)
As many of you already know, all of the recipes you see here are original recipes that I create from the top of my head. While others might sometimes inspire my creations, (particularly if these individuals make direct recipe requests :) ), I rely on my own brain to actually dream up the recipe details, which are typically created in my own little brainstorming bubble. Obviously, the overall concepts for certain classic dishes (like colcannon or spaghetti puttanesca) didn't start with me, but I wrote all of the recipes myself, and have added my own unique healthy gourmet twists to them, either in terms of the ingredients added &/or their preparation. However, many of the recipes I've posted here are, indeed, completely unique and original, and, as far as I know, I was the first one to create the concepts behind these dishes . :) And of course, when it comes to titling original dishes, I try to do the same. I might've even coined a new completely new word or two in the process. ;)
In other words, the bottom line is this: I don't ever copy from the works of others.
Not sure if some of the below recipe ideas have already been done before by others, because I haven't checked any outside resources yet, but the ideas for them did at least start in my own brain without any outside assistance. :)
So, here are some of these ideas:
(1) "Insalata Caprese" bread: Stuffed with fresh buffalo mozzarella, fresh basil leaves or perhaps pesto, & sun-dried tomatoes.
(2) "Caponata" ciabatta: Stuffed with balsamic oven-roasted red onions, garlic, eggplant, artichoke, roasted red pepper, sun-dried tomatoes, capers, fontina or perhaps haloumi cheese, & fresh herbs like thyme, parsley, & oregano.
(3) Gorgonzola-pistachio bread: Probably will add a bit of cracked black pepper to this bread as well, but am going to keep it simple, because Gorgonzola is a particularly bold flavor, and doesn't need any other equally dominant flavors conflicting with it. The bread and nuts should be enough to hopefully counterbalance some of its power. :)
(4) Pesto-olive bread: Black or green olives, or perhaps a combination of both? Not sure yet. (All of these recipe ideas are still works in progress, more or less.)
(5) Pain au chocolat blanc with dried California apricots and Mission figs: I think the tangy flavor of the California apricots, which are much softer and tarter than the Turkish kind, will go quite nicely with the sweeter flavors of the white chocolate and the figs. Plus, white chocolate has a bit of salt in it, so that'll bring out all of these flavors even more. :) OK, I realize that this one doesn't really fall into the "healthy gourmet" category, so I'm not sure where I'd post that one yet. Perhaps it'll be posted on the Cook. Eat. Drink. Blog. Run. blog instead? ;)
(6) Black olive tapenade bread stuffed with goat cheese: Tastes good on bruschetta, so why not stuff these ingredients into a bread? :)
Some of these vegetable-based breads are like a sandwich in a sandwich bread. :) Plus, if you grill them, you'll have instant panini. ;)
OK, that's it for now. Will keep you posted, quite literally (LOL!), as more developments emerge.
-C
Wednesday, April 6, 2011
0 Recipe #258: Rosemary-Kalamata Olive Bread: Hooray for Artesanal Breads!

Kalamata olive bread (or eliopsomo, ελιόψωμο, in Greek) is probably one of my all-time favorite kinds of artesanal bread. I love the rich, juicy flavor of the olives coupled with the vibrant, fresh herbs, as well as the contrast between the thick, crunchy outer crust and soft, warm center.
While olive breads are popular all over the Mediterranean, they’ve also become quite the thing here in the US as well, especially over the past several years.
Two of my favorite places for Kalamata olive bread in DC are the Firehook Bakery and Marvelous Market. Eatsy’s in Rockville also had phenomenal olive bread, but sadly they are no longer in business. :( Also, believe it or not, Safeway makes surprisingly good olive bread.
Of course, this recipe is for those of you who’d like to try your hand at breadmaking. :) Breadmaking is truly an art, and I’ll be honest, it takes some practice to master the techniques. Also, there’s a lot of room for error, so don’t be too disappointed if your bread doesn’t turn out perfectly on the first try. If at first you don’t succeed, etc. :-D Keep trying, and you’ll get the hang of it.
If it makes you feel any better, know this: It took me several tries as well before I got it right. Ask my mother about one of my first breadmaking experiences: When I was a teenager, I once attempted to make two different kinds of braided bread -- a pulla, (a Finnish braided, wreath-shaped, cardamom-flavored bread), as well as a challah, (a Jewish braided bread both made and glazed with eggs) -- both for the very first time, and in a single day. (Yeah, I know. Totally over-ambitious, and also, probably not a stellar move either, considering that I'd never made bread before in my life, that is, up until that point. ;) ) And well, let’s just say that they looked a lot more impressive than they tasted. ;) They probably could've been used as projectile weapons. :) You could've chucked them across the room and they still would've remained in one piece, completely undamaged. LOL. I think I might've ended up shellacking the pulla, and using it as a decorative household ornament. ;)
However, I kept at it and eventually got better. What can I say: I like a challenge. ;) Breadmaking is one area in which research and persistent efforts are definitely rewarded. :)
If nothing else, your whole house will be permeated with the smell of freshly baked bread. And who doesn’t like that?! Ahhhh, heaven. :-D
Rosemary-Kalamata Olive Bread
Ingredients:
1/4 c. lukewarm (i.e., 100-110°F) water (for proofing the yeast)
3 Tbsp. extra virgin olive oil (for adding to the mixing bowl as a dough ingredient)
1/2 Tbsp. (non-iodized) kosher salt (if unavailable, regular salt will do)
1 Tbsp. extra virgin olive oil (to oil dough while rising the first time around)
1-2 Tbsp. cornmeal (for dusting the baking tray)
1 extra large egg, beaten
2 Tbsp. water, at room temperature (for the beaten egg mixture, to coat the bread before baking)
Directions: In a glass custard dish (or other small bow1), dissolve sugar in 1/4 c. lukewarm (i.e., 100-110°F) water. To proof, stir in yeast and let stand for about 10 minutes in a warm place, until mixture is creamy and foamy and doubled in size. (NOTE: Before using, check the expiration date on the package of yeast to ensure yeast is fresh. Do NOT use boiling water, or you'll kill the yeast. If mixture doesn't bubble, yeast is dead, and you'll have to start over using new, fresh yeast.)
In a medium-sized bowl, combine the herbs & olives, toss, and set aside.

In an electric mixer fitted with a flat beater attachment, combine 1 c. flour, proofed yeast, 3 Tbsp. olive oil, and water, and mix on low speed. Then, add remaining flour, a cup at a time until flour is fully incorporated. After approximately one minute, add olives and herbs, followed by salt, and mix until both are evenly distributed throughout.* Mix until dough is smooth and elastic and too stiff to stir, adding up to a 1/4 c. flour or a few tablespoons of water/oil if necessary, to keep from being either too dry or too sticky, respectively. (Don't overdo it, or flavor balance will be off.) You'll know the dough is ready when it begin to pull away from sides of bowl.
Remove dough from mixer, and turn out onto a floured surface, and form into a round loaf shape. Sprinkle salt on top and knead dough 10 times, by picking up one corner of the dough at a time and folding corner into center. Push center into table with heel of hand. Knead dough for a total of 10 to 15 minutes, sprinkling the board with additional flour, if necessary, to avoid sticking. Knead dough until salt is fully incorporated throughout the dough. Roll dough back into a ball. Wash out electric mixer’s mixing bowl to reuse, then oil the bowl with 1 Tbsp. olive oil, and place the dough in it; turn dough to coat with oil. Cover bowl tightly with plastic wrap (or a warm, damp kitchen cloth) in a warm, draft-free area, and allow to rise until doubled in size, about an hour or so. Once dough has risen, transfer to a lightly floured surface. Then, punch down dough to release trapped gases, and separate dough into two equally-sized pieces, cutting them apart with a large bread knife, and gently shape (do not knead!) into round loaves again. (The dough will not be smooth this time.)
Place loaf onto lightly greased baking sheet dusted with cornmeal. Let rise again in a warm oven set to 150°F for 2 minutes, then turn off oven and allow to proof for another 2 hours, or until light, puffy, and nearly doubled in volume.
While the bread is rising for the second time, put a pan of water in the bottom of the oven, which helps to create a thick, shiny, golden brown crust. (Some people generously spray inside of oven with water with about 8 sprays or directly spray the bread itself before placing it into the oven, but the former method is much more effective.)
Remove loaf from oven (to avoid deflating, do NOT knead or punch down dough this time!), turn oven back on, and preheat to 500°F. Diagonally score/slash the top of each loaf with a sharp knife. (This allows the bread to expand without ripping apart.) Whisk together the egg and 2 Tbsp. water in a small bowl. Lightly brush the top surface of each loaf with the egg wash. Position rack in center of oven, immediately place loaves into oven, and bake in a 500°F preheated oven on a pizza stone or in a clay baking cloche for 15 minutes, then reduce heat to 375°F and cook for another 30 minutes, until the crusts are a deep golden brown and the loaf sounds hollow when tapped. The middle of the loaves should reach about 190-200°F. Remove the bread from the oven, transfer to a wire cooling rack, and cool for about 30 minutes, or until bread has completely cooled. (If the bread was baked in loaf pans, remove the bread from the pans before cooling.) And finally, don't forget to remove the pan of water from the oven. :)
Best served warm! Slice off some bread to taste. Serve, & enjoy!
Yield: Makes 2 (3/4 lb.) round loaves.
Chef’s Notes: For this recipe, be sure to use rich, juicy olives marinated in brine &/or herbs, rather than canned or bottled ones.
After you knead the dough the first time around, you can also place it in a round proofing basket to rise. Most proofing baskets are made out of wicker or cane, so do not oil the basket. ;)
*If salt is added directly to the yeast, it'll kill it, and then, of course, your bread won't rise properly. So, this is why it's better to wait to add the salt until all of the other ingredients have been mixed together first.
If you make bread this particular way, you'll get a much better outcome. The dough will rise higher than if you added it during the mixing phase, and of course that translates into much lighter loaves of bread. Even though olive bread is a sturdy, rustic bread -- it's not exactly meant to be as weightless as a croissant (!), neither do you want to resemble a hockey puck. ;) In terms of weight class, it should be somewhere between featherweight and welterweight, but definitely not heavyweight. ;) It should be crusty on the outside and a bit aerated on the inside. If it's too dense, then the dough clearly didn't rise enough. If it's still a bit doughy, then the bread needs to cook a bit longer. Of course, the former situation can't be fixed (unless you make a new batch), while the latter one can. :)
Variations: Shape the dough into 16 small rolls or brioches. Slash the tops as indicated above & reduce cooking time to 25 minutes, cooking the loaves in a 375°F preheated oven.
Greek or Kalamata olives may be used or a combination of both. Or try adding green, cracked olives to the mix. Whatever type of olives you use, again, make sure they are brine-cured olives, and not olives from a can or glass jar. :)
To make this recipe vegan, simply omit the egg wash. Instead, brush the top of the loaves with water right before you place them into the oven to be baked.

Monday, April 4, 2011
6 Recipe #257: Spaghetti alla Puttanesca

Do you like spicy, zesty pasta dishes? If so, spaghetti alla puttanesca is for you. :)
When referring to the sauce itself, Italians refer to it as puttanesca al sugo in Italian. This classic, flavorful, Southern Italian sauce is traditionally served with spaghetti, but of course you can serve with various other pasta shapes -- like penne, linguine, or even cavatappi. It also goes extremely well with fish, particularly tilapia, sole, or any other mild white fish that could use a bit of zing to perk it up a bit. ;) If you're going to serve the sauce with fish, I'd recommend grilling or pan-searing the fish in this particular instance.
Speaking of which, my tilapia Veracruzana recipe has a very similar sauce, except it's a Mexican recipe and, unlike this recipe, doesn't contain any garlic, onions, red pepper chili flakes, lemon juice, or anchovies. Again, like the Caesar salad recipe, there aren't enough anchovies in this recipe to make the sauce fishy-tasting; plus, soaking the anchovies in lemon juice will "cold cook" them, and therefore, neutralize their flavor. Plus, they're also cooked in a pan until they've dissolved into the other ingredients. Honestly, you can barely taste the anchovies in the sauce -- it's not a flavor that pops out as a distinct entity. However, they'll still add a little something (i.e., something savory ;) ) to the finished product when combined with the other ingredients.
The traditional Italian version of spaghetti alla puttanesca is typically prepared with anchovies, except if you're making the Neopolitan version. In contrast, while the American version of this recipe doesn't usually contain anchovies, it does have onions in it. The below recipe is more or less an amalgamation of both the Italian and American styles. Plus, I make it my own by adding some red wine, shallots (instead of onions), and roasted red peppers to the sauce, and also by making the sauce a bit chunkier than the standard version, all of which give it a lot more body and dimension. ;) The red wine, in particular, really adds something special to the sauce; and, you'll also find that, if you peruse this blog's recipe archive, I'm partial to adding it to many different tomato-based dishes. :)
One good thing is that, unlike a lot of other preparations of this dish, you won't have to simmer the sauce for an eternity. ;) The sauce itself takes only about 20 minutes to cook from start to finish. This also has another hidden bonus: The sauce will taste more vibrant this way, since you're not pummeling the flavors into submission by cooking the sauce for longer than 20 minutes. (The longer you cook herbs and vegetables, the less potent they become. And, in some cases, like basil, they'll actually turn bitter if cooked for too long.) There are also health benefits to "quick-cooking" the sauce: More nutrients will be preserved this way than if you were to cook the sauce for, let's say, 40-60+ minutes. :)
This recipe is especially for my pal, Jen, who's a huge fan of this dish. :) A while back, I mentioned to her that I'd been planning to create and post a spaghetti alla puttanesca recipe, and would eventually get around to doing this at some point. See, I'm a penguin -- er, I mean a person -- of my word. :)

Spaghetti alla Puttanesca
Ingredients:
1/2 c. shallots, peeled & finely diced (about 1/4 large onion)
1 Tbsp. garlic, peeled & finely minced (about 2 large cloves)
2 small anchovy fillets (from a can), soaked in 2 Tbsp. freshly squeezed lemon juice for 10 minutes, then drained & mashed (makes about 1 tsp. mashed) (if unavailable, 1 tsp. anchovy paste will also work as well)
1/8 tsp. red pepper chili flakes, or to taste
1/4 c. Malbec or other non-oaky, dark, full-bodied red wine (I used a 2007 Altos Las Hormigas Malbec.)
1 c. fresh, medium-sized vine ripened tomatoes, diced (including the juice) (about 2 medium-sized vine ripened tomatoes)
1/2 c. (4 oz.) sun-dried tomatoes (i.e., the kind that's not packed in oil), julienned
2 Tbsp. tomato paste
1/2 Tbsp. capers, soaked in 2 Tbsp. water for 10 minutes and then drained (to remove briny flavor) (about 20 large capers)
1/4 c. Kalamata olives, pitted & coarsely chopped (about 10 large Kalamata olives)
1/8 tsp. ground black pepper, or to taste
1/2 Tbsp. fresh oregano leaves, finely minced and densely packed
1/2 Tbsp. fresh thyme leaves, densely packed
1 tsp. fresh marjoram leaves, finely minced and densely packed
1 Tbsp. fresh Italian flat-leaf parsley, coarsely chopped and densely packed
Directions: Roast the peppers: Roast the pepper (whole) on the top rack of a 500°F preheated oven for about 40 minutes, or until lightly charred/blackened (but not grey/burnt). Every 10 minutes or so, carefully open the oven, pull out rack, & rotate peppers a quarter-turn using heat-proof tongs, & then return to oven. You'll end up doing this procedure a total of 4 times, so that all four sides of the peppers become evenly roasted.
While the peppers are roasting, prepare your other ingredients: Now is the perfect time to do all of the kitchen prep work as listed above: Chop the vegetables (shallots, garlic, vine-ripened tomatoes, olives, and herbs), soak the anchovies and capers in separate custard dishes, etc. Then, get all of your ingredients ready to transfer into the sauce: Place the chopped shallots, vine-ripened tomatoes, and parsley into three separate bowls, respectively. Then, combine the garlic, soaked and drained anchovies, and red pepper flakes together in a single bowl, and the tomato paste, sun-dried tomatoes, capers, and olives all together in another. Finally, combine the oregano, thyme, and marjoram together in yet another bowl.
Prepare the roasted peppers: When the roasted pepper is done, carefully pull the tray out of the oven. Using heat-proof tongs, transfer the tray to a heat-proof surface and let stand for 10 minutes. When peppers have completely cooled, pick them up using the heat-proof tongs, and hold them over the sink, one at a time. Remove the stems, & then drain the liquid into the sink. Then place peppers back onto the tray & peel off the skin. (The skin should peel off fairly easily.) Slice open each pepper & scrape out the seeds with a paring knife. (If some of the seeds are still sticking to the peppers, wash them off under running water; that usually does the trick.) Transfer peppers to a nonporous, heat-proof surface (preferably a silicone cutting board) & finely dice. Place roasted peppers into the same bowl as the diced tomatoes and set aside.
Make the sauce: Heat olive oil on high heat in a large (12-13") nonstick sauté pan until glistening. Then, reduce heat to low, add shallots, and sauté until soft, translucent, and lightly caramelized, about 4 minutes. Add garlic, anchovies, and red chili pepper flakes (if using), and cook for another minute, or until garlic is fragrant and golden, and anchovies have melted. Deglaze with Malbec (or other non-oaky, dark, full-bodied red wine) and reduce liquid to a quarter of its original volume, about 3 more minutes. Then,, add the diced, vine-ripened tomatoes (including juices) and the roasted red peppers, and cook for another 5 minutes. (If, at any time during the cooking process, you find that the sauce is cooking down too fast, reduce the heat and add more water, as necessary.) Then stir in the tomato paste, sun-dried tomatoes, capers, and olives, and cook until the sauce is thickened, about 5 more minutes, stirring occasionally. Season with black pepper. Stir in the oregano, thyme, and marjoram, and cook for another 2-3 minutes. Remove from heat and stir in the parsley and black pepper. Set aside to cool for 5-10 minutes.
While the sauce is cooling, make the pasta: Bring a large pot of (6 c.) lightly salted water season with a few drops of olive oil to a rolling boil, about 8 minutes. Add spaghetti and cook according to package instructions, until al dente, (about 10-11 minutes for Barilla Plus spaghetti). Drain pasta into a colander, rinse with cold water, and drain once more, shaking off any excess water. Divide pasta into equal portions and transfer to plates or bowls. Pour sauce over each serving of pasta. Garnish with parsley and Parmigiano-Reggiano cheese, and serve immediately. (Or, alternatively, you add the whole amount of pasta back to the pot, toss with the sauce, and then transfer to plates/bowls.)
Yield: 2 servings.
Chef's Notes: The ingredients of this recipe are naturally salty-tasting enough as is, so no additional salt is needed.
Variations: If you'd like, garnish the pasta with a few handfuls of fresh basil leaves, torn into small pieces. To make this recipe vegetarian, simply omit the anchovies; and then to make it vegan, of course omit the cheese as well, or use a dairy-cheese substitute like soy cheese, etc.